









Introduction
Buying a gold detector in the UAE is not simply about finding the lowest price. Different machines are designed for very different search conditions, target types, depths, and technologies, so the final cost can vary significantly from one detector to another.
A compact professional detector for natural gold may cost far less than a multi-system device designed for deep underground targets, long-range search, or advanced ground scanning. This is why the gold detector machine price in UAE can range from around one thousand dollars to more than ten thousand dollars for high-end professional systems.
In this guide, we will compare gold detector prices in the UAE and Dubai, explain what affects the final cost, review the main detector technologies, and look at real examples from professional brands such as GER Detect and XP Metal Detectors.
We will also compare models by budget, technology, search application, warranty, and overall value, helping buyers understand which type of gold detector and metal Detectors best suits their actual field requirements.
Table of Contents
What Is the Average Gold Detector Machine Price in UAE?
The average gold detector machine price in UAE depends heavily on the type of technology and the level of performance the buyer needs. Professional gold detectors generally start from around $1,200 to $2,000, while more advanced multi-system and deep-detection devices can cost $3,000 to $8,000 or more.
For example, compact professional detectors designed for natural gold and general prospecting are usually more affordable than systems built for deep underground targets, long-range searching, or advanced ground scanning.
High-end detectors can exceed $10,000 when they combine several search technologies in one device or are designed for specialized professional applications.
Typical Gold Detector Price Range in UAE
| Detector Category | Typical Price Range |
|---|---|
| Entry-level professional gold detectors | $1,200 – $2,000 |
| Mid-range gold detection systems | $2,000 – $4,000 |
| Advanced multi-system detectors | $4,000 – $8,000 |
| High-end professional systems | $8,000 – $13,000+ |
The final gold detector price in UAE can vary depending on the manufacturer, number of search systems, included accessories, warranty, and technical support.
Why Do Gold Detector Prices Vary?
The price of a gold detector is influenced by more than the brand name alone. The biggest differences usually come from the technology inside the device, the number of search systems, the type of targets it is designed to detect, and the level of depth and accuracy it can provide.
A detector designed mainly for surface prospecting and small natural gold targets will usually cost less than a professional system built for deep underground objects, long-range locating, or advanced 3D ground scanning.
Other factors such as accessories, software, warranty, training, and after-sales support can also affect the final gold detector price in Dubai and the UAE.
Main Factors That Affect Gold Detector Price
| Factor | How It Affects the Price |
|---|---|
| Detection technology | More advanced technologies generally increase the device cost |
| Search depth | Systems designed for deeper targets are usually more expensive |
| Number of search systems | Multi-system detectors normally cost more than single-system models |
| Target specialization | Devices built for natural gold, deep targets, or underground scanning may use different technologies |
| Ground balancing | Advanced ground compensation can improve performance in mineralized soil |
| Display and imaging | 3D visualization and advanced interfaces usually increase the price |
| Accessories | Additional coils, probes, antennas, tablets, and carrying cases can affect the final package price |
| Warranty and support | Official warranty, training, and technical support can add value to the purchase |
Other factors such as accessories, software, warranty, training, and after-sales support can also affect the final gold detector price in Dubai and the UAE. Buyers who want to understand the technology in more detail can also read our guide on how gold and metal detectors work
Gold Detector Prices by Technology
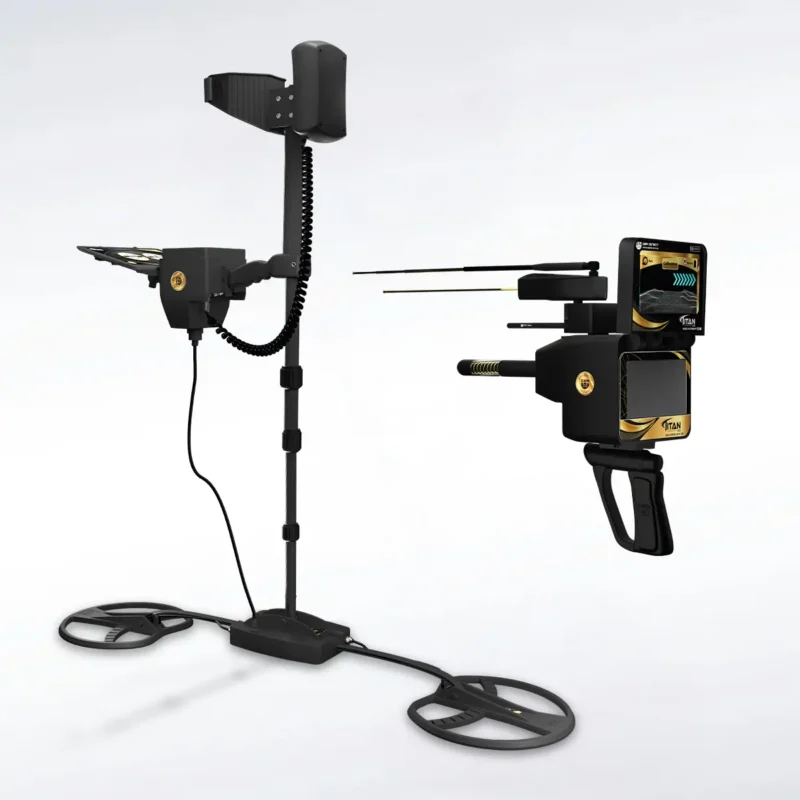
The technology used inside a detector is one of the biggest factors that determines its final price. Different gold detection systems are designed for different search conditions, target sizes, soil types, and depths, which is why two devices can have very different prices even when both are marketed as professional gold detectors.
VLF detectors are often used for natural gold, coins, and small metal targets, while pulse induction systems are generally chosen for difficult ground and deeper detection. Long-range systems focus on locating targets across wider areas, while 3D ground scanners are designed to analyze underground structures and provide visual data.
Gold Detector Price by Technology
| Technology | Typical Use | Typical Price Range |
|---|---|---|
| VLF | Natural gold, coins, small targets | $1,000 – $2,500 |
| Pulse Induction | Deeper targets and mineralized ground | $1,800 – $5,000 |
| Long-Range Detection | Wide-area target locating | $2,000 – $8,000 |
| 3D Ground Scanning | Underground imaging and structure analysis | $3,000 – $10,000+ |
| Multi-System Detectors | Multiple search methods in one device | $3,500 – $13,000+ |
The right technology should be chosen according to the search objective rather than price alone. A lower-cost detector can be the better choice for natural gold prospecting, while a more advanced system may be more suitable for deep targets or underground scanning.
Gold Detector Price Comparison in UAE
Looking at real products makes it easier to understand how the gold detector machine price in UAE changes from one model to another. The final price depends on the device technology, number of systems, intended search depth, and the type of targets it is designed to locate.
Below are examples of professional models currently offered by Detectors Shop.
Gold Detector Price Comparison
| Model | Brand | Main Use | Price |
|---|---|---|---|
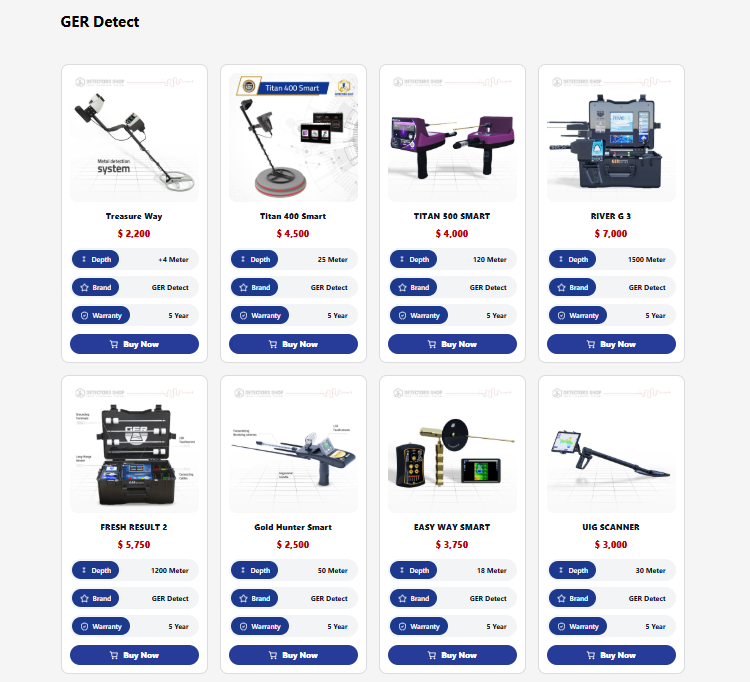
| Gold Hunter Smart | GER Detect | Gold, metals, long-range search | $2,500 |
| Titan 500 Smart | GER Detect | Gold, treasures, deep targets | $4,000 |
| Deep Seeker | GER Detect | Deep underground targets | $5,500 |
| Titan GER 1000 | GER Detect | Long-range and deep detection | $8,000 |
| Titan X13 | GER Detect | Advanced multi-system detection | $13,000 |
| XP DEUS II | XP Metal Detectors | Natural gold, coins, metals | $1,800 |
| XP DEUS Gold | XP Metal Detectors | Natural gold prospecting | $1,800 |
Buyers looking for a mid-range professional option can consider the Gold Hunter Smart, while users who need more advanced search capabilities may compare it with the Titan 500 Smart and other multi-system detectors.
These examples show why the gold detector price UAE market covers a wide range, from compact professional detectors to advanced systems designed for deeper and more specialized search applications.
Best Gold Detectors by Budget
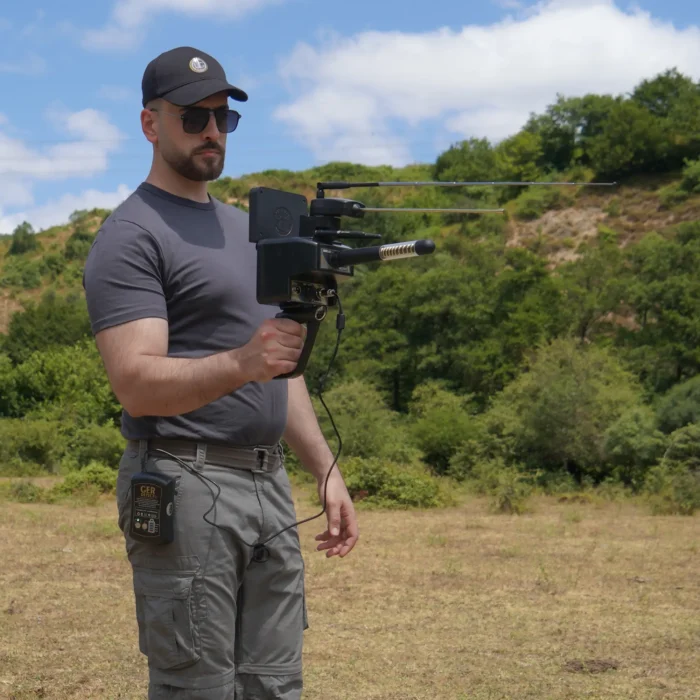
Choosing the right detector becomes easier when buyers first decide how much they want to spend and what type of search they actually need. The best option is not always the most expensive device; it is the one that matches the target type, soil conditions, required depth, and level of experience.
Under $2,000
This budget is suitable for users looking for professional detectors for natural gold, coins, and general metal detection without moving into advanced multi-system technology.
Good options in this range include:
- XP DEUS II — around $1,800
- XP DEUS Gold — around $1,800
These models are suitable for users who want lightweight, professional detectors focused on field search and natural gold prospecting.
From $2,000 to $5,000
This is one of the most popular price ranges for buyers looking for more advanced gold detectors in UAE.
Examples include:
- Gold Hunter Smart — $2,500
- Titan 500 Smart — $4,000
- Titan 400 Smart — $4,500
- Easy Way Smart — $3,750
This range gives buyers access to more specialized search systems, wider search applications, and more advanced detection capabilities.
Above $5,000
High-end professional systems are designed for users who need deeper search, advanced technologies, multiple systems, or specialized underground detection.
Examples include:
- Deep Seeker — $5,500
- River G 3 — $7,000
- Titan GER 1000 — $8,000
- Titan X13 — $13,000
These devices are generally intended for experienced users and professional search applications where more advanced technology is required.
Buyers interested in deeper detection can explore the Deep Seeker, while users focused on lightweight field prospecting can compare models such as the XP DEUS II according to their target type, terrain, and preferred search technology.
Gold Detector Price vs Performance
A higher price does not automatically mean a detector is the best choice for every user. Performance depends on how well the detector matches the search objective, soil conditions, target size, required depth, and the technology being used.
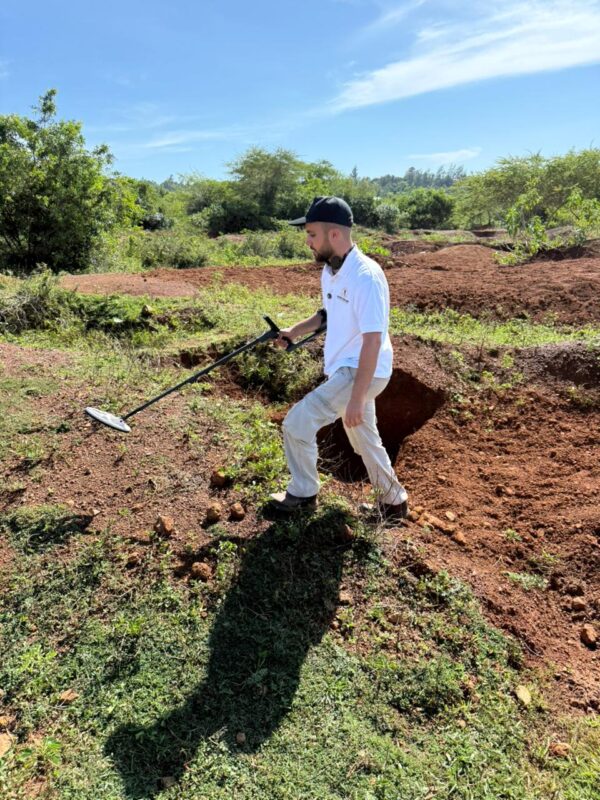
For example, a lightweight detector designed for natural gold prospecting may perform better for small shallow targets than a much more expensive deep-search system. On the other hand, users searching for deeper underground targets may need advanced technologies that naturally increase the overall gold detector cost.
The best way to compare gold detector price and performance is to look at what each machine is actually designed to do rather than focusing only on the number of systems or the highest advertised depth.
Price vs Performance Comparison
| Price Level | Best For | Typical Advantage |
|---|---|---|
| $1,000 – $2,000 | Natural gold, coins, general detection | Lightweight, simple operation, lower cost |
| $2,000 – $5,000 | Professional prospecting and wider applications | More search options and specialized systems |
| $5,000 – $8,000 | Deep targets and advanced detection | Greater specialization and deeper-search technologies |
| $8,000+ | Professional multi-system applications | Multiple technologies and advanced search capabilities |
A buyer searching mainly for natural gold should therefore not choose a high-end device only because it is more expensive. Likewise, a professional user who needs deep-search capability should not expect an entry-level detector to provide the same type of performance.
Buyers who want a closer look at the relationship between features, systems, and real-world use can read our complete Gold Hunter Smart review
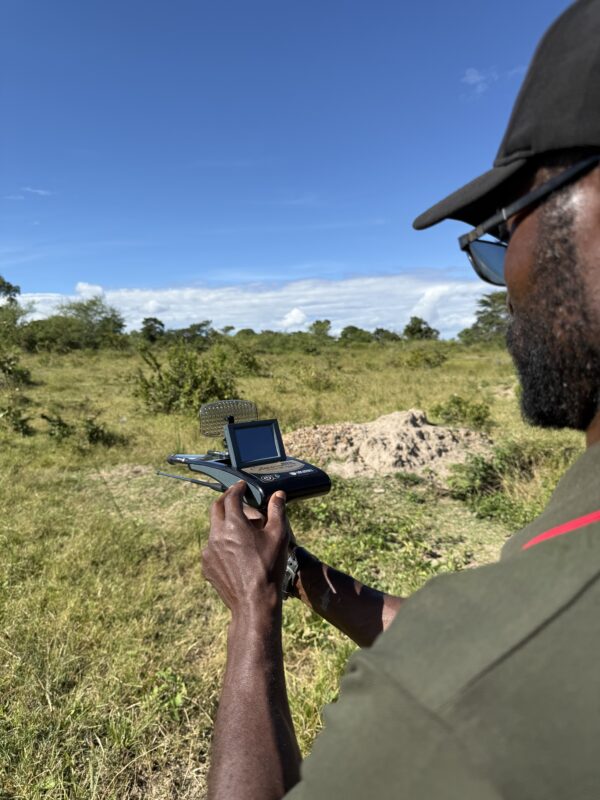
Featured GER Detect and XP Metal Detectors
The UAE market includes a wide range of professional gold detectors, but two brands that stand out in the Detectors Shop lineup are GER Detect and XP Metal Detectors. Each brand focuses on different technologies and search applications, which gives buyers more flexibility when comparing performance and price.
GER Detect offers multi-system devices designed for long-range search, deep targets, underground structures, and specialized gold detection. Models such as Gold Hunter Smart, Titan 500 Smart, Deep Seeker, and Titan X13 cover several price levels and search requirements.
XP Metal Detectors focuses strongly on lightweight, wireless, and highly responsive field detectors for natural gold, coins, relics, and general metal detection. Models such as XP DEUS II and XP DEUS Gold are popular with users who prefer portable systems with advanced target response and field performance.
Example Price Comparison by Brand
| Model | Brand | Price |
|---|---|---|
| Gold Hunter Smart | GER Detect | $2,500 |
| Titan 500 Smart | GER Detect | $4,000 |
| Deep Seeker | GER Detect | $5,500 |
| Titan X13 | GER Detect | $13,000 |
| XP DEUS II | XP Metal Detectors | $1,800 |
| XP DEUS Gold | XP Metal Detectors | $1,800 |
Buyers looking for a more advanced multi-system option can explore the Titan 500 Smart, while users focused on lightweight field prospecting may prefer XP models.
Why Buy from an Authorized Gold Detector Dealer in Dubai?
When comparing gold detector price in Dubai, the purchase price should not be the only factor. Buying from an authorized dealer can provide important advantages such as genuine products, official warranty coverage, product training, technical support, and access to compatible accessories and spare parts.
Professional detectors can be complex, especially when they include multiple search systems or advanced ground settings. Proper setup and training can help users understand the device correctly and avoid many common mistakes during field use.
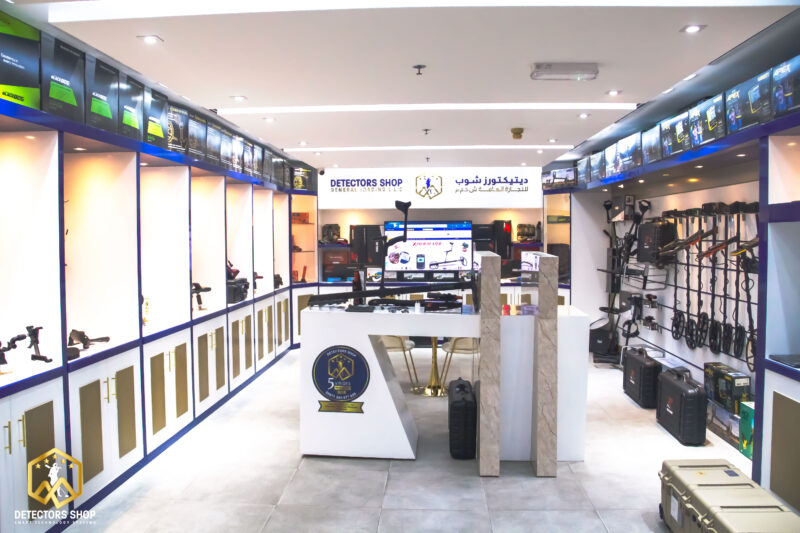
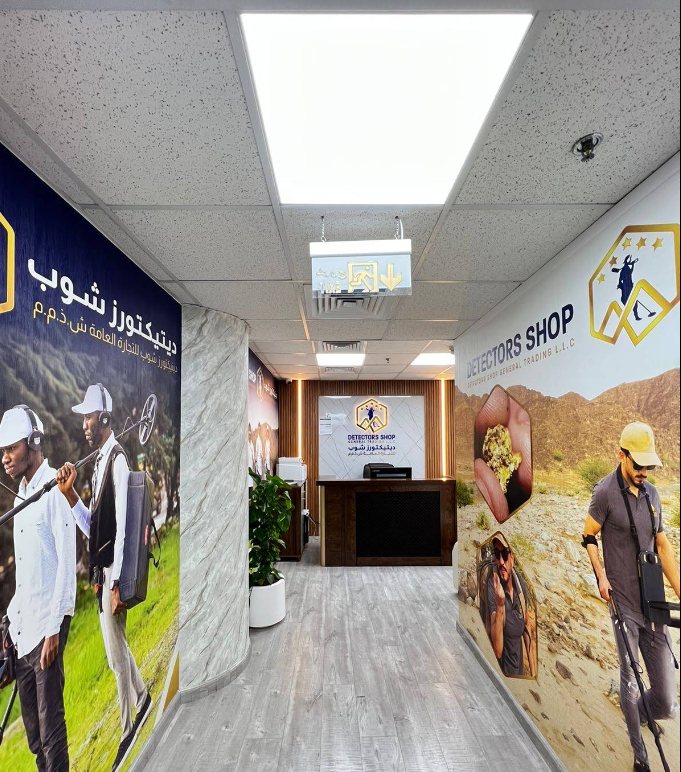
Detectors Shop supplies professional detection equipment in Dubai and supports customers with product guidance, training, warranty assistance, and after-sales service. Buyers can also visit the showroom to compare different detector technologies before choosing the system that best matches their requirements.
What You Should Receive from an Authorized Dealer
| Service | Why It Matters |
|---|---|
| Genuine equipment | Helps ensure the detector is original and supplied through an official channel |
| Official warranty | Provides support if the device develops a covered fault |
| Product training | Helps users understand search systems, settings, and field operation |
| Technical support | Useful for setup, troubleshooting, and software or configuration questions |
| Accessories and spare parts | Makes long-term ownership easier |
| Product comparison | Allows buyers to compare technologies before purchasing |
Buyers can explore professional metal detectors and gold detection systems available through Detectors Shop in Dubai and compare models according to budget, technology, and search application.
Where to Buy Gold Detector Machines in Dubai & UAE
Buyers looking for a gold detector machine in UAE should choose a supplier that provides clear product information, genuine devices, warranty coverage, training, and technical support after the purchase.
Dubai is one of the main regional markets for professional detection equipment, giving buyers access to different technologies in one place, including natural gold detectors, long-range systems, deep-search devices, and advanced ground scanners.
Detectors Shop provides professional gold and metal detection systems in Dubai, with options from GER Detect and XP Metal Detectors. Customers can compare models, prices, search systems, and applications before choosing the most suitable device.
What to Check Before Buying
| Check | Why It Matters |
|---|---|
| Device authenticity | Ensures you receive an original product |
| Warranty | Protects the purchase against covered faults |
| Training | Helps users operate the detector correctly |
| Technical support | Useful after purchase |
| Search technology | Ensures the detector matches the intended target |
| Price transparency | Makes it easier to compare different models |
| Availability of accessories | Important for long-term use |
Looking for the right detector for your budget? Explore our range of professional metal detectors and compare available models, prices, and technologies.
How much does a gold detector machine cost in UAE?
The gold detector machine price in UAE can range from around $1,000 to more than $13,000, depending on the technology, search depth, number of systems, brand, and intended use.
What is the average gold detector price in Dubai?
The average gold detector price in Dubai varies by category. Professional models often fall between $1,800 and $5,000, while advanced multi-system and deep-search detectors can cost considerably more.
Why are some gold detectors so expensive?
Higher-priced detectors may include multiple search systems, long-range technologies, advanced ground scanning, deeper-search capabilities, specialized accessories, and more complex electronics.
What is the Gold Hunter Smart price in UAE?
The current price of Gold Hunter Smart is around $2,500.
What is the Titan 500 Smart price?
The current price of Titan 500 Smart is around $4,000, placing it in the mid-to-high professional price range.
Which gold detector is best for beginners?
Beginners should usually focus on a detector that is easy to operate and appropriate for their target type rather than choosing the most expensive model. Lightweight field detectors can be a practical starting point for natural gold and general metal detection.
What is the best gold detector for deep targets?
Deep-target searches generally require technologies designed specifically for greater depth, such as pulse induction, deep-search systems, multi-system detectors, or advanced ground scanning equipment.
Where can I buy a gold detector machine UAE ?
Buyers can purchase professional gold detectors from specialized detector suppliers in Dubai that provide genuine products, warranty, training, and technical support.
Does the gold detector machine price in UAE include warranty and training?
This depends on the seller and product package. Buyers should confirm what is included before purchasing, including warranty coverage, training, accessories, software, and after-sales support.
Conclusion
The gold detector machine price in UAE can vary significantly depending on the technology, search application, number of systems, brand, accessories, and level of technical support included with the device.
For natural gold prospecting and general field detection, professional detectors can start from around $1,000–$2,000. More advanced systems designed for long-range search, deeper targets, ground scanning, or multiple detection technologies can range from several thousand dollars to more than $10,000.
The most important factor is not choosing the most expensive detector, but selecting a machine that matches the intended target, terrain, search depth, and user experience. Comparing specifications, technology, warranty, training, and after-sales support can help buyers make a better purchasing decision.
Detectors Shop provides a range of professional gold and metal detection systems in Dubai from brands including GER Detect and XP Metal Detectors, with different options available for beginners, experienced prospectors, and professional users.
Final CTA
Compare technologies, prices, and available models before choosing your detector. Explore our professional metal detectors and find the right system for your search requirements and budget.
Buying a metal detector in Dubai can be confusing because prices vary widely depending on the technology, search depth, target type, brand, and intended use. Some detectors are designed for coins and small objects, while others are built for natural gold, deep underground targets, long-range search, or professional ground scanning.
For this reason, metal detector price should not be judged by cost alone. A lower-priced device may be suitable for basic searches, while professional systems can cost significantly more because they use advanced detection technologies and are designed for more demanding field conditions.
In this guide, we will explain the main factors that affect metal detector prices in Dubai and the UAE, compare typical price ranges, and help you understand what to look for before choosing the right detector for your needs.
Table of Contents
What Is the Average Metal Detector Price in Dubai?
Metal detector prices in Dubai can range from around $1,000 for compact professional detectors to more than $10,000 for advanced multi-system and deep-detection equipment. The final price depends heavily on the detector technology, search depth, number of search systems, target type, and manufacturer.
For example, a detector designed for coins, jewelry, and shallow targets normally costs less than a professional system designed for natural gold, deep underground targets, ground scanning, or long-range detection.
Buyers should therefore compare more than just the advertised metal detector price. The technology, warranty, manufacturer support, training, and suitability for the intended search environment are equally important when choosing professional equipment.
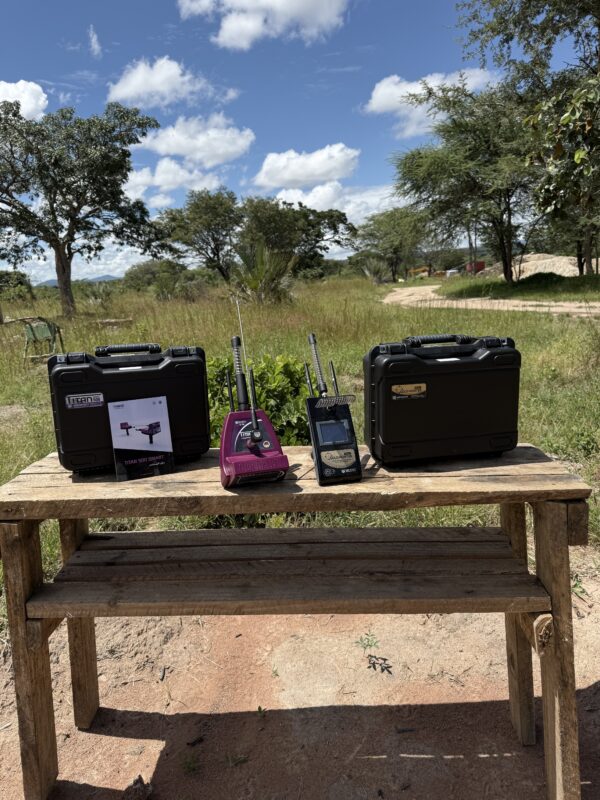
Why Do Metal Detector Prices Vary?
Metal detector prices can vary significantly because different devices are built for very different types of searches. A detector designed for coins, jewelry, and shallow targets does not require the same technology as a professional system designed for natural gold, deep underground targets, or 3D ground scanning.
One of the biggest factors is the detection technology itself. VLF detectors are generally more affordable, while pulse induction, long-range, imaging, and multi-system detectors can cost considerably more because they use more advanced electronics and specialized search systems.
Search depth also affects the final price. A detector designed for targets within one or two meters will usually cost less than a system built for deeper underground detection. The number of search systems, digital analysis features, included accessories, warranty period, and manufacturer support can also influence the metal detector price.
For professional buyers in Dubai and the UAE, it is also important to consider what is included with the device. Training, technical support, warranty service, software, coils, sensors, and other accessories can make a major difference when comparing two detectors with similar prices.
| Factor | How It Affects the Price |
|---|---|
| Detection technology | Advanced systems usually cost more |
| Search depth | Greater depth normally increases the price |
| Number of search systems | Multi-system detectors are usually more expensive |
| Imaging & scanning features | 2D/3D analysis can increase the cost |
| Brand & manufacturing quality | Established manufacturers often cost more |
| Warranty & technical support | Longer support adds value |
| Accessories included | Coils, sensors and additional equipment affect total cost |
Metal Detector Prices by Technology
The technology inside a detector has a major impact on its price. Some systems are built for simple surface searches, while others are designed for natural gold, deeper targets, long-range detection, or underground imaging.
VLF metal detectors are usually among the more affordable options. They are commonly used for coins, jewelry, relics, and smaller targets at relatively shallow depths. Depending on the brand and included accessories, prices can start from a few hundred dollars and rise as features become more advanced.
Pulse Induction (PI) detectors are generally more expensive because they are designed to perform well in mineralized soil and can be more effective for certain gold and deep-target applications. Professional PI systems can cost several thousand dollars.
Long-range detection systems are positioned in a higher price category because they often include multiple search modes and are intended for wider search areas and specialized targets.
Ground scanners and imaging systems can be even more expensive, especially when they include 2D or 3D visualization, target analysis, advanced sensors, and deeper underground scanning capabilities.
Multi-system detectors are often among the highest-priced options because they combine several search technologies in one device. These systems are designed for users who need flexibility across different search conditions and target types.
Suggested Price Range by Technology
| Technology | Typical Price Range |
|---|---|
| VLF Metal Detectors | $500 – $2,000 |
| Pulse Induction Detectors | $1,500 – $5,000+ |
| Long-Range Detection Systems | $2,000 – $8,000+ |
| Ground Scanners / Imaging Systems | $2,500 – $10,000+ |
| Multi-System Professional Detectors | $3,000 – $13,000+ |
Prices vary by manufacturer, included accessories, search depth, warranty, and the number of detection systems available in each device.
Gold Detector Prices in Dubai & UAE
Gold detector prices in Dubai and the UAE vary depending on the type of technology, search depth, number of systems, and the manufacturer. Entry-level gold detectors can start at around $1,000–$2,000, while advanced professional systems designed for deeper targets, long-range search, and ground scanning can cost $5,000 to more than $10,000.
For buyers, the most important point is not simply to choose the cheapest option. A lower-priced detector may be suitable for basic gold prospecting, while professional users may need a device with multiple search systems, greater depth, advanced sensors, or imaging technology.
At Detectors Shop, gold detection equipment is available across different price levels from brands such as GER Detect and XP Metal Detectors. This makes it possible to compare devices based on budget, search application, and required technology.
Examples of Gold Detector Prices
| Detector | Price | Main Application |
|---|---|---|
| XP ORX | $ 1,250 | Gold prospecting and metal detection |
| Deus Gold | $ 1,800 | Gold and metal detection |
| XP DEUS 2 | $ 1,800 | Multi-purpose metal detection |
| Gold Hunter Smart | $ 2,500 | Gold and underground target detection |
| XTREM HUNTER | $ 2,900 | Deep target detection |
| Titan 500 Smart | $4,000 | Multi-system professional detection |
| Deep Seeker | $5,500 | Deep underground detection |
| Titan GER 1000 | $8,000 | Advanced deep detection |
| Titan X13 | $13,000 | Professional multi-system detection |
These prices are provided as current reference prices and may vary depending on availability, package contents, accessories, and promotional offers.
Professional Metal Detector Price Comparison
For many buyers, budget is one of the easiest ways to narrow down the right detector. Professional metal detectors in Dubai are available across a wide price range, from compact detectors under $2,000 to advanced multi-system systems costing more than $10,000.
The table below gives a practical comparison based on current product prices.
Under $2,000
| Detector | Price | Best For |
|---|---|---|
| XP ICON | $ 550 | General metal detecting |
| XP ICON X | $ 585 | Lightweight professional detection |
| XP ORX | $ 1,250 | Gold prospecting and metal detection |
| DEUS II WS6 | $ 1,450 | Wireless professional metal detection |
| Deus Gold | $ 1,800 | Gold and metal detection |
| XP DEUS 2 | $ 1,800 | Multi-purpose professional detection |
This price range is suitable for users who want professional technology without moving into advanced deep-scanning or multi-system equipment.
$2,000 to $5,000
| Detector | Price | Best For |
|---|---|---|
| Treasure Way | $ 2,200 | Metal and underground target detection |
| UIG Gold Digger | Original price was: $ 2,799.$ 2,200Current price is: $ 2,200. | Gold and metal detection |
| River-F Smart | Original price was: $ 3,000.$ 2,250Current price is: $ 2,250. | Groundwater detection |
| Diamond Hunter Smart | $ 2,250 | Diamond and underground target search |
| UIG Watch Detector | $ 2,299 | 3D imaging and underground detection |
| Gold Hunter Smart | $ 2,500 | Gold and underground target detection |
| XTREM HUNTER | $ 2,900 | Deep target detection |
| UIG Scanner | $ 3,000 | Ground scanning |
| Easy Way Smart | $ 3,750 | Long-range detection |
| Titan 500 Smart | $ 4,000 | Multi-system professional detection |
| Titan 400 Smart | $ 4,500 | Deep and multi-system detection |
This is one of the most popular price ranges for buyers looking for more advanced features, greater depth, or multiple search systems.
Above $5,000
| Detector | Price | Best For |
|---|---|---|
| Deep Seeker | $ 5,500 | Deep underground detection |
| Fresh Result 2 | $ 5,750 | Advanced underground search |
| River G 3 | $ 7,000 | Groundwater detection |
| Titan GER 1000 | Original price was: $ 12,500.$ 8,000Current price is: $ 8,000. | Advanced deep detection |
| Titan X13 | $ 13,000 | High-end multi-system detection |
These systems are generally aimed at professional users who need advanced search technology, greater depth, or specialized detection capabilities.
A higher price does not automatically mean a detector is better for every user. The right choice depends on the target type, search depth, soil conditions, and the technology required for the intended application.
Best Metal Detectors by Budget
Choosing the right detector by budget can make the buying process much easier. The goal is not simply to choose the cheapest device, but to find the detector that offers the right technology for the intended type of search.
Best Option Under $1,500
XP ORX — 1250$
The XP ORX is a strong option for users who want a lightweight professional detector for gold prospecting and general metal detection. It offers a good balance between price, performance, and portability without moving into the higher price range of deep-scanning systems.
Best Option Around $2,500
Gold Hunter Smart — $2,500
The Gold Hunter Smart is a suitable choice for users looking for a more advanced system with multiple search capabilities for gold and underground targets. Its price places it in the mid-range professional category, making it a practical option for buyers who want more than a standard metal detector.
Best Option Around $4,000
Titan 500 Smart — $4,000
The Titan 500 Smart is designed for users who need a professional multi-system detector with more advanced search capabilities. It is positioned above standard prospecting detectors and is better suited to users looking for broader search functions and deeper target applications.
Best High-End Option
Titan X13 — $13,000
The Titan X13 sits at the premium end of the market. It is intended for professional users who require advanced multi-system detection technology and are prepared to invest in a high-end system for specialized field applications.
Best XP Option for Professional Users
XP DEUS 2 — $1,800
The XP DEUS 2 is one of the strongest options in the professional XP range. It is suitable for users who want a versatile, modern detector from a well-established French manufacturer while staying below the price of many advanced deep-detection systems.
Metal Detector Price vs Performance
A higher metal detector price can reflect better technology, greater search depth, more advanced target analysis, or additional search systems. However, the most expensive detector is not automatically the best choice for every buyer.
For example, a user searching mainly for coins, jewelry, or small natural gold targets may get excellent results from a professional VLF detector such as the XP ORX or XP DEUS 2. In this case, paying several thousand dollars for a deep ground scanner may not provide any practical advantage.
On the other hand, professional users searching for deeper underground targets may need more specialized technology. Systems such as the Titan 500 Smart, Deep Seeker, Titan GER 1000, or Titan X13 are priced higher because they are designed for more advanced applications and may combine several search methods within one device.
The best way to compare price and performance is to focus on four points: the type of target, expected depth, search environment, and the technology required for the job. A detector that matches the intended application usually provides better value than simply choosing the most expensive model available.
Quick Price vs Performance Guide
| Buyer Need | Recommended Price Level |
|---|---|
| General metal detecting | $500 – $1,800 |
| Gold prospecting | $1,200 – $3,000 |
| Multi-system detection | $2,500 – $5,000 |
| Deep underground detection | $4,000 – $8,000+ |
| Advanced professional systems | $8,000 – $13,000+ |
Buyers should compare the detector’s actual capabilities, warranty, technical support, and suitability for the intended search before focusing only on price.
Why Buy from an Authorized Metal Detector Dealer in Dubai?
Buying from an authorized dealer can make a major difference, especially when the equipment is expensive or technically advanced. Professional detectors often require correct setup, software updates, calibration, training, and access to reliable after-sales support.
Detectors Shop operates from Dubai and works as an official distributor and authorized partner for GER Detect and XP Metal Detectors, the French manufacturer known for professional metal detection technology.
Buying through an authorized source helps customers verify that the detector is original, covered by the appropriate warranty, and supported with technical guidance when needed.
It also reduces the risk of purchasing outdated, modified, or unsupported equipment from unknown sellers. For professional buyers, access to training, spare parts, accessories, and direct manufacturer support can be just as important as the detector itself.
For customers comparing metal detector prices in Dubai, the total value should therefore include more than the device price alone. Warranty coverage, technical support, product authenticity, training, and after-sales service should all be considered before making a purchase.
Where to Buy Metal Detectors in Dubai
Dubai is one of the main regional markets for professional detection equipment, with buyers coming from across the UAE, the Middle East, Africa, and other international markets.
When choosing where to buy, it is important to work with a specialized supplier that can explain the differences between technologies rather than simply selling a device based on price.
Detectors Shop provides a wide range of professional metal detectors, gold detectors, ground scanners, and underground detection systems from established manufacturers including GER Detect and XP Metal Detectors.
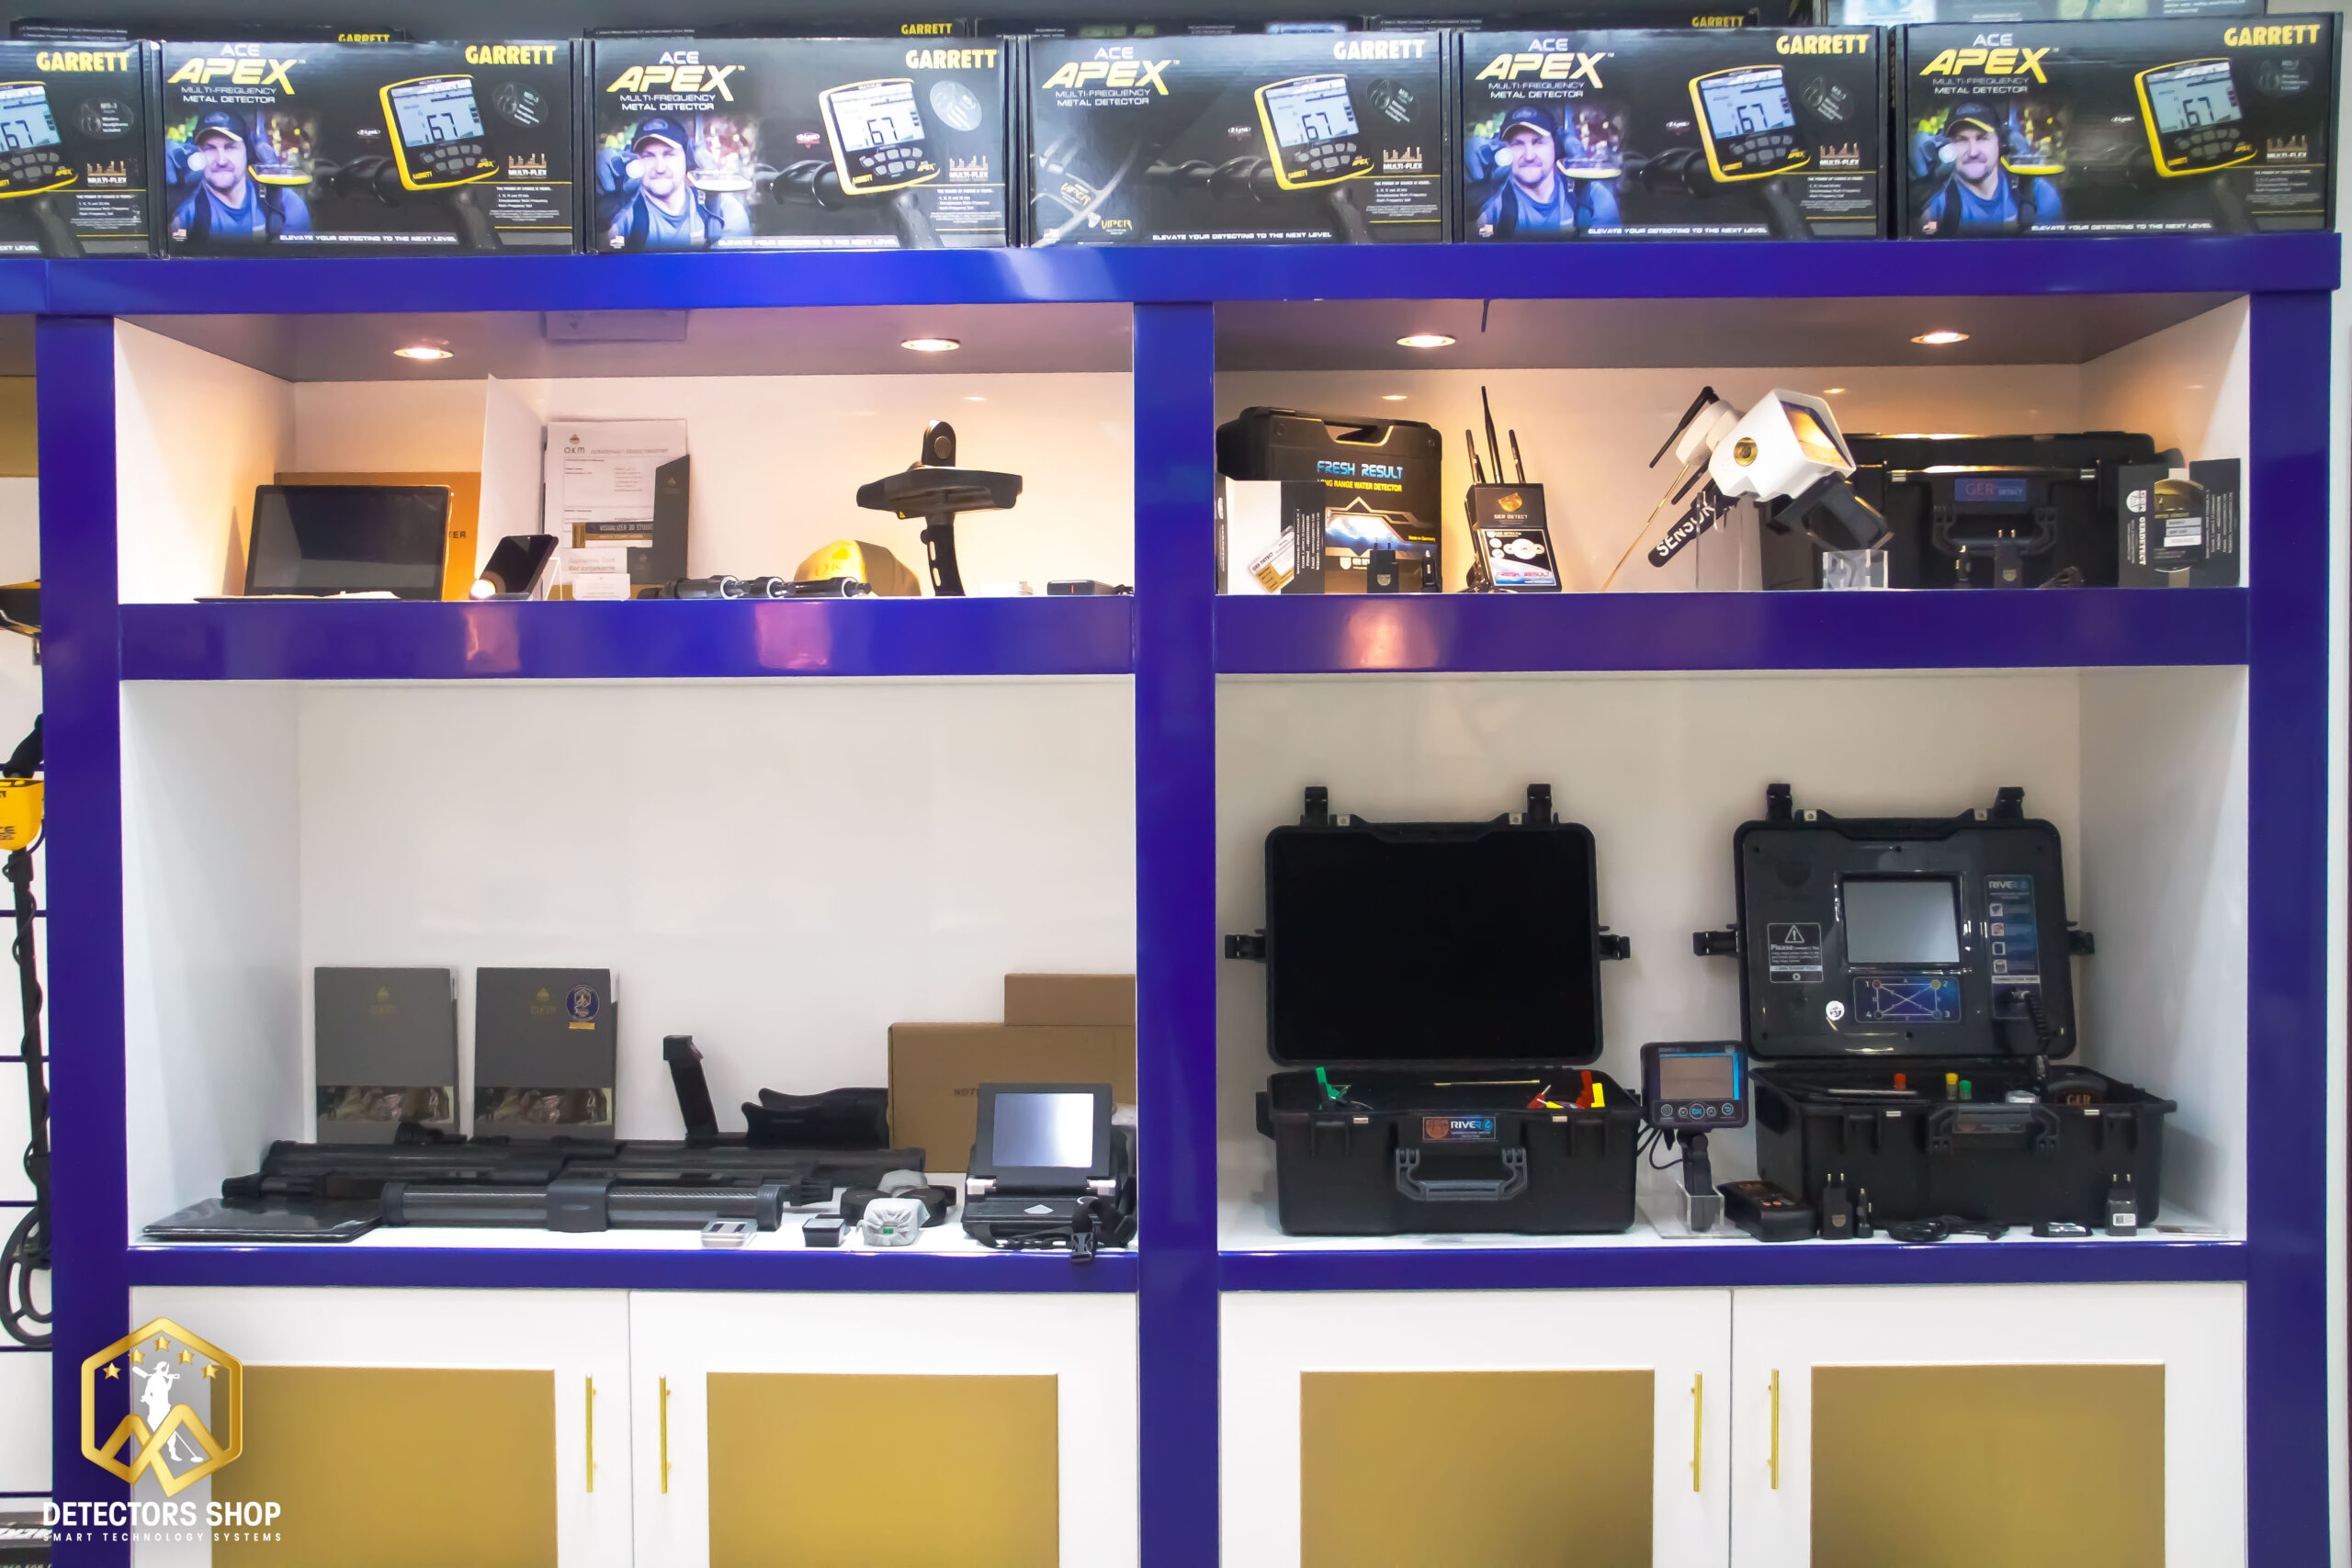
Customers can compare devices based on their intended application, search depth, technology, budget, and target type. The Dubai showroom also gives buyers the opportunity to receive product guidance, training, warranty support, and after-sales assistance.
For buyers comparing metal detector prices in Dubai, purchasing from a specialized and authorized supplier can also help ensure that the device is genuine and suitable for the required search conditions.
Frequently Asked Questions About Metal Detector Prices
How much does a metal detector cost in Dubai?
Metal detector prices in Dubai can start from around $500 for entry-level professional models and can exceed $10,000 for advanced multi-system, deep-detection, and ground-scanning equipment.
What is the average gold detector price in the UAE?
Gold detector prices in the UAE vary depending on the technology and intended use. Professional gold detectors commonly range from around $1,200 to $5,000, while advanced deep-detection systems can cost significantly more.
Why are some metal detectors more expensive than others?
Price differences usually come from the detection technology, search depth, number of systems, imaging capabilities, accessories, warranty, and manufacturer support.
What is the price of Gold Hunter Smart?
The Gold Hunter Smart is currently priced at around $2,500 at Detectors Shop. Pricing may vary depending on availability, package contents, and promotions.
Which metal detector is best for beginners?
For beginners, it is usually better to choose a professional detector that is easy to operate and matches the intended target type. Models such as the XP ORX can be suitable for users who want a lightweight detector for gold prospecting and general metal detection.
How much does a deep metal detector cost?
Professional deep-detection systems typically start from around $3,000–$4,000, while advanced systems such as the Titan GER 1000 or Titan X13 can cost $8,000 to $13,000 or more.
Where can I buy a metal detector in Dubai?
Professional metal detectors can be purchased through specialized dealers in Dubai such as Detectors Shop, where customers can compare different technologies, prices, warranty options, and available support.
Does the metal detector price include warranty and training?
This depends on the supplier and device. Buyers should always confirm whether the listed price includes warranty coverage, technical support, training, accessories, and after-sales service before purchasing.
Conclusion: Choosing the Right Metal Detector at the Right Price
The right detector is not always the most expensive one. A good purchase starts with understanding the target type, expected depth, search environment, and the technology actually needed for the job.
For buyers comparing metal detector prices in Dubai and the UAE, the market offers everything from compact professional detectors to advanced multi-system and deep-detection equipment. The best value comes from choosing a device that matches the intended application while also considering warranty, training, technical support, and long-term reliability.
Detectors Shop provides professional detection equipment from established manufacturers including GER Detect and XP Metal Detectors, with options for different budgets and search requirements.
If you are comparing prices or choosing between different systems, explore our range of professional metal detectors or contact our Dubai team for guidance before making your final choice.
Need Help Choosing the Right Detector?
Compare prices, technologies, and search systems with our Dubai team before you buy.
Gold Monster 2000 Review: The Complete Guide

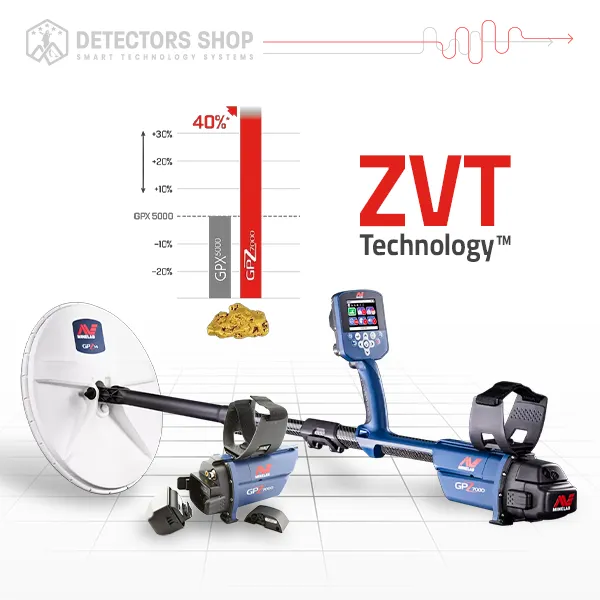
Introduction
The Gold Monster 2000 is Minelab’s advanced gold detector designed for prospectors who want high sensitivity to very small gold while maintaining stable performance in difficult and mineralized ground.
It uses Multi-Au™ simultaneous multi-frequency technology, operating across multiple frequencies from 12 to 75 kHz. According to Minelab, this allows the detector to remain highly sensitive to a wide range of gold nugget sizes, including extremely small pieces weighing below 0.01 g.
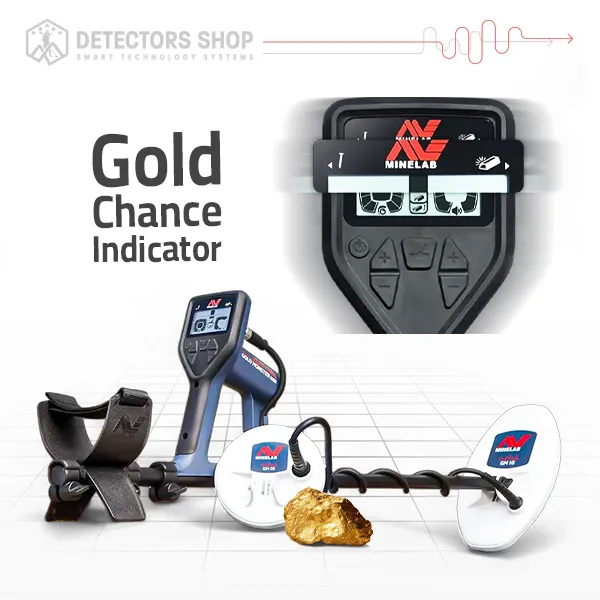
The detector also combines several important tools, including Echo Wave™ Audio, the Gold Chance Indicator, Target ID from 00 to 99, automatic and manual sensitivity, and multiple Ground Type settings for different soil conditions.
In this complete Gold Monster 2000 review and guide, we will explain how the detector works, its technologies, settings, ground balance system, Target ID, discrimination features, battery, coils, specifications, troubleshooting, and the best way to use it in the field.
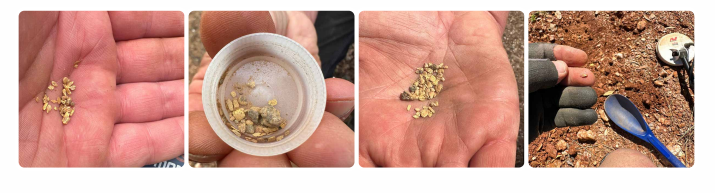
Table of Contents
What Is the Gold Monster 2000?
The Gold Monster 2000 is a simultaneous multi-frequency gold detector developed by Minelab for detecting small and ultra-fine gold in a wide range of soil conditions.
Unlike the older Gold Monster 1000, which uses a single 45 kHz operating frequency, the Gold Monster 2000 uses multiple frequencies between 12 and 75 kHz. This broader frequency range is designed to improve sensitivity across different nugget sizes while maintaining better stability in mineralized ground.
Minelab positions the detector as a bridge between traditional single-frequency VLF gold detectors and higher-performance gold detectors. Its main strength is the ability to detect very small, shallow gold while using advanced ground handling and discrimination features to help users work more efficiently in difficult soil.
The detector can be used by beginners, artisanal miners, and experienced prospectors. Minelab also describes it as a useful companion to detectors such as the GPX 6000 and GPZ 7000, especially for target pinpointing, patch finding, and recovering smaller gold that may be missed during excavation.
Multi-Au™ Technology Explained
One of the most important technologies inside the Gold Monster 2000 is Multi-Au™, Minelab’s simultaneous multi-frequency system developed specifically for gold detection.
According to Minelab, Multi-Au™ builds on its Multi-IQ™ technology and combines multi-frequency VLF operation with signal-processing techniques inspired by Pulse Induction (PI) technology. This combination is designed to improve ground balance performance while preserving high sensitivity to very small gold targets.
The detector operates across multiple frequencies between 12 and 75 kHz, rather than using only one fixed frequency. This allows the Gold Monster 2000 to respond to a wider range of nugget sizes, from larger pieces down to extremely fine gold.
Another advantage of Multi-Au™ is its ability to handle mineralized soil more effectively than a conventional single-frequency VLF detector. Minelab states that this gives the Gold Monster 2000 improved ground balance and better target discrimination in difficult soil conditions.
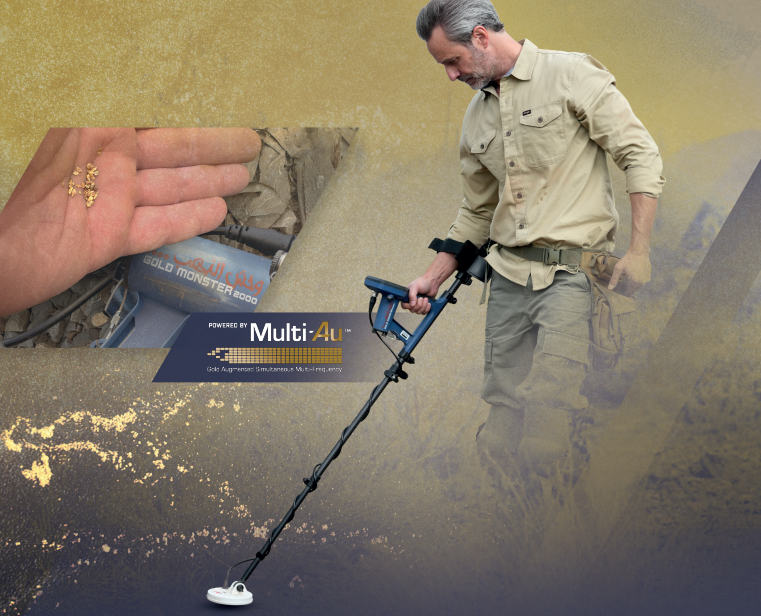
Echo Wave™ Audio
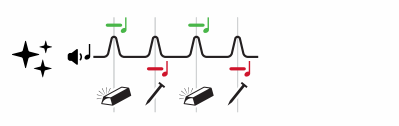
The Gold Monster 2000 uses Echo Wave™ Audio to provide target information without removing the normal detection response.
The system combines the detector’s regular Detection Audio with additional discrimination tones. A high tone indicates a target that is more likely to be non-ferrous and potentially gold, while a low tone indicates a target that is more likely to be ferrous, such as iron or a hot rock.
At the same time, the normal Detection Audio remains active, so the user can still hear changes in pitch and volume based on the strength of the target signal. This is important because faint or deep targets can still be heard even when the discrimination information is uncertain.
Minelab designed Echo Wave™ Audio to help prospectors distinguish possible gold from unwanted targets while maintaining sensitivity to very small gold.
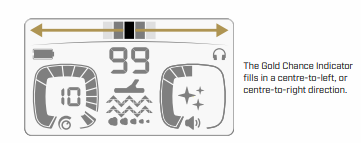
Gold Chance Indicator
The Gold Chance Indicator is one of the most useful discrimination tools on the Gold Monster 2000. It does not confirm that a target is gold; instead, it estimates whether the detected target is more likely to be non-ferrous or ferrous.
When the indicator fills toward the right, the target is more likely to be non-ferrous and could potentially be gold. When it fills toward the left, the target is more likely to be ferrous, such as iron or a hot rock. The more bars shown on either side, the stronger the detector’s confidence in that estimate.
The accuracy of the Gold Chance Indicator depends on both the target signal and the surrounding ground conditions. In mineralized soil, weak or deep targets may produce fewer bars or unstable indications because ground noise can mix with the target signal.
Minelab also notes that sweeping over the target several times can improve the estimate. As the coil gathers more information, the Gold Chance reading can become more reliable.
Target ID 00–99
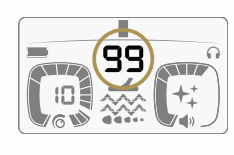
The Gold Monster 2000 assigns a Target ID number from 00 to 99 whenever it detects a target. This number is based mainly on the target’s conductive properties and can help the user understand the likely size and type of the object before digging.
Minelab gives several typical Target ID ranges. 00–15 can include small gold nuggets, foil, lead shot, and small iron fragments. 10–40 can include medium gold nuggets, small coins, hot rocks, and iron trash. 40–99 can include larger gold nuggets, larger coins, and bigger iron targets.
However, the Target ID does not tell you whether a target is ferrous or non-ferrous. That information comes from the Gold Chance Indicator. Target ID should therefore be used together with Gold Chance, Echo Wave™ Audio, the normal detection response, and your knowledge of the site.
It is also important to remember that gold can appear at almost any Target ID depending on its size and shape. Small nuggets are more common at lower IDs, while larger nuggets can appear at higher numbers.
Sensitivity Settings: Manual, Auto 1 & Auto 2
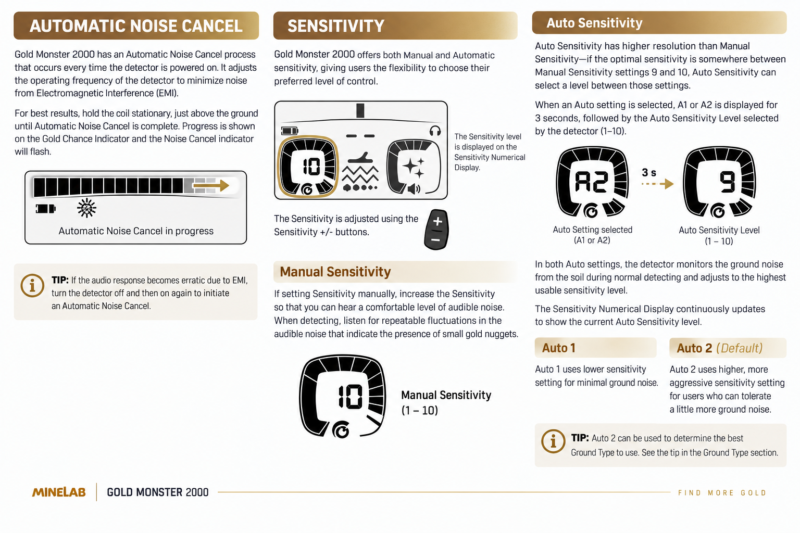
The Gold Monster 2000 provides both Manual Sensitivity and Automatic Sensitivity, giving users the choice between direct control and automatic adjustment based on ground conditions.
In Manual Sensitivity, the level can be adjusted from 1 to 10. Minelab recommends increasing sensitivity until there is a comfortable level of audible background noise, then listening for repeatable changes that may indicate a very small gold target.
The detector also offers two automatic modes: Auto 1 and Auto 2. In both modes, the detector continuously monitors ground noise and automatically selects the highest usable sensitivity level.
Auto 1 uses a lower sensitivity level to provide quieter and more stable operation. Auto 2, which is the default setting, uses a more aggressive sensitivity level and is designed for users who can tolerate slightly more ground noise in exchange for higher sensitivity.
A useful advantage of Auto Sensitivity is that it has finer resolution than the manual settings. For example, if the ideal sensitivity falls somewhere between Manual 9 and 10, the automatic system can select an intermediate level.
Ground Type: Difficult, Normal & Benign
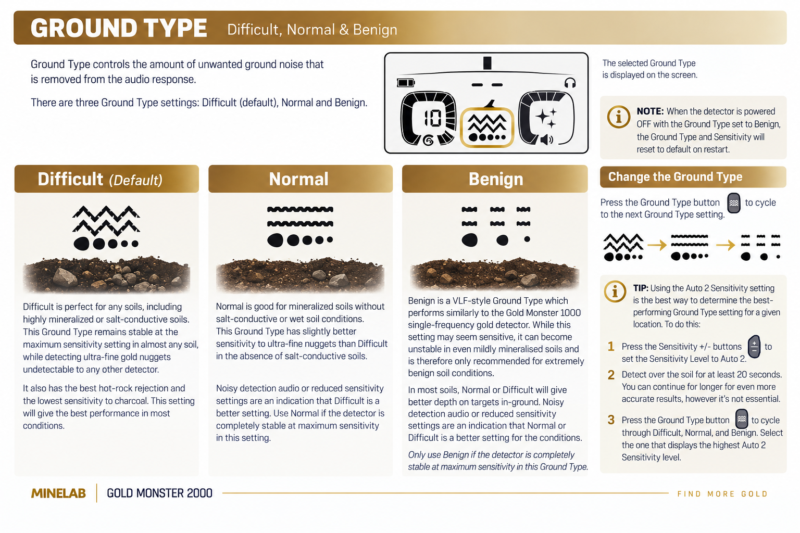
The Gold Monster 2000 includes three Ground Type settings designed to control how much unwanted ground noise is removed from the audio response: Difficult, Normal, and Benign.
Difficult
Difficult is the default setting and is designed for a wide range of soils, including highly mineralized and salt-conductive ground. Minelab states that it remains stable at very high sensitivity and also provides the best rejection of hot rocks and lower sensitivity to charcoal.
Normal
Normal is intended for mineralized ground without significant salt conductivity or wet-soil effects. In suitable conditions, it can provide slightly better sensitivity to ultra-fine gold than Difficult. If the detector becomes noisy or requires lower sensitivity, Minelab recommends switching back to Difficult.
Benign
Benign behaves more like a traditional VLF ground mode and is only recommended for extremely mild soil conditions. It may appear highly sensitive, but it can become unstable even in lightly mineralized ground. In most real-world soils, Normal or Difficult will usually provide better in-ground performance.
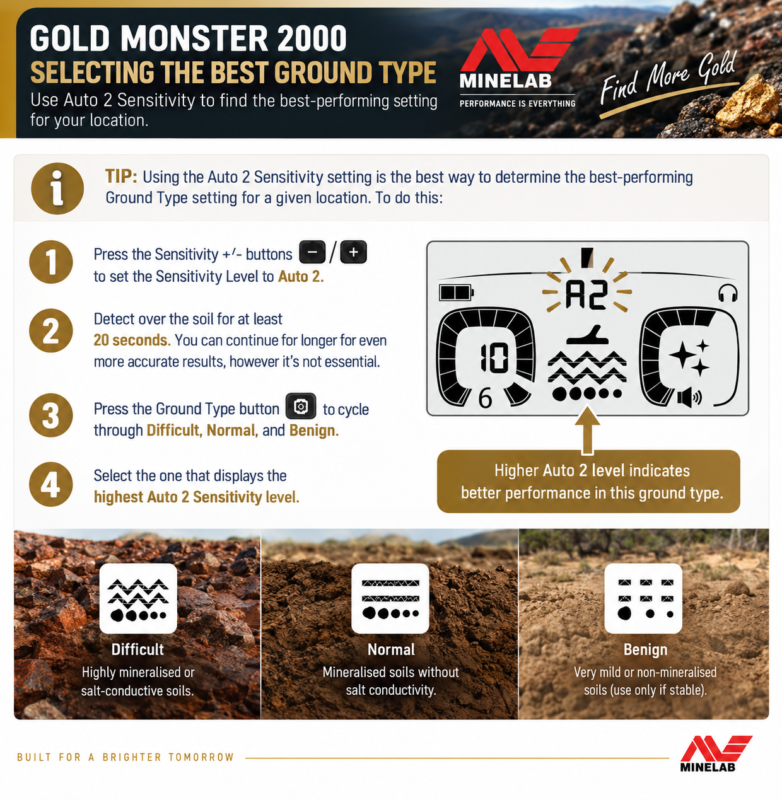
A useful method is to use Auto 2 Sensitivity and cycle through all three Ground Types. After detecting over the soil for at least 20 seconds, choose the setting that allows the highest stable Auto 2 sensitivity level.
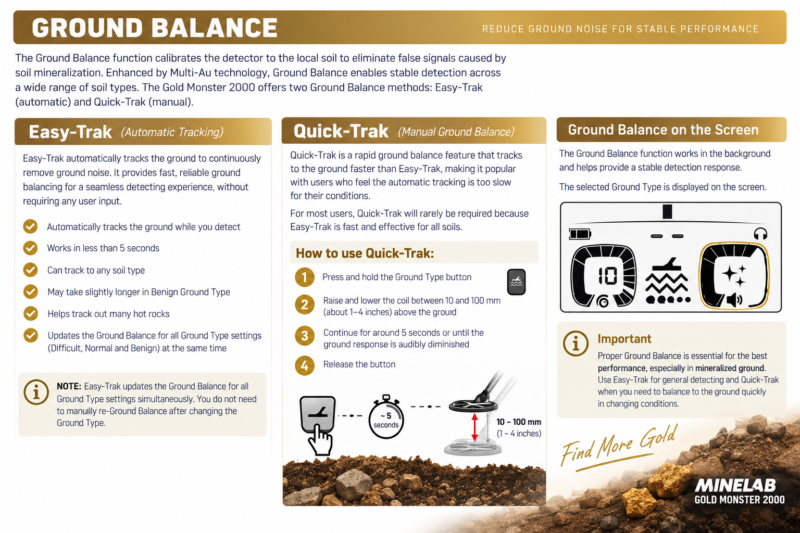
Ground Balance: Easy-Trak & Quick-Trak
The Gold Monster 2000 uses Ground Balance to reduce false signals caused by soil mineralization and changing ground conditions. Minelab provides two methods: Easy-Trak for automatic tracking and Quick-Trak for faster manual ground balancing.
Easy-Trak
Easy-Trak automatically tracks the ground while you detect and continuously adjusts the Ground Balance to reduce unwanted ground noise. Minelab describes it as the recommended method because it works automatically and normally requires no user input.
It can usually adapt to the soil in less than 5 seconds, and it also helps track out many hot rocks. Another useful point is that Easy-Trak updates the Ground Balance for all Ground Type settings at the same time, so you do not need to rebalance manually every time you switch between Difficult, Normal, and Benign.
Quick-Trak
Quick-Trak is a faster Ground Balance method for situations where you want the detector to adapt more quickly to the soil.
To use it, press and hold the Ground Type button while raising and lowering the coil about 10 to 100 mm above the ground. Continue for around 5 seconds, or until the ground response becomes quieter, then release the button.
Automatic Noise Cancel
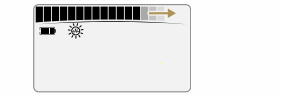
The Gold Monster 2000 automatically performs a Noise Cancel every time the detector is powered on. This process adjusts the detector’s operating frequencies to reduce unwanted noise caused by electromagnetic interference (EMI).
For the best result, Minelab recommends holding the coil stationary and just above the ground while the Automatic Noise Cancel process is running. During this time, the progress is shown on the Gold Chance Indicator and the Noise Cancel icon flashes on the display.
If the detector starts producing erratic or excessive audio because of EMI, the recommended solution is simple: switch the detector off and back on again so it can perform a fresh Automatic Noise Cancel.
Common EMI sources can include power lines, electric fences, electric motors, transformers, radio transmitters, mobile phones, and even distant lightning activity.
Gold Monster 2000 Audio & Threshold Tone
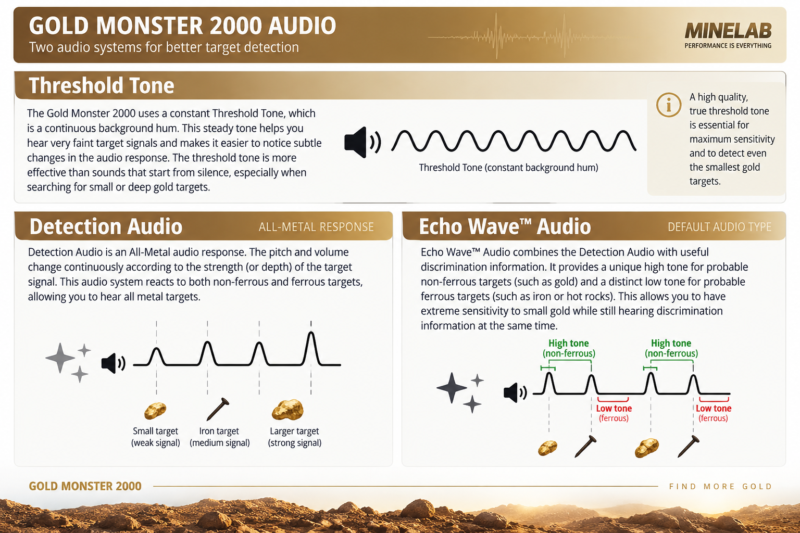
The Gold Monster 2000 uses two main audio systems: Detection Audio and Echo Wave™ Audio. Both operate with a continuous Threshold Tone, which helps the user hear very faint target responses more clearly.
The Threshold Tone is a constant background hum. According to Minelab, subtle changes in this continuous tone can make very small or weak targets easier to notice than sounds that begin from complete silence.
Detection Audio
Detection Audio is an All-Metal response, meaning it reacts to both ferrous and non-ferrous targets. The pitch and volume change continuously according to the strength of the target signal, which can help the user judge whether a target is weak, strong, shallow, or deeper.
Echo Wave™ Audio
Echo Wave™ Audio adds discrimination tones on top of the normal Detection Audio. A high tone suggests a probable non-ferrous target, while a low tone suggests a probable ferrous target such as iron or a hot rock.
How to Use the Discrimination Features Correctly
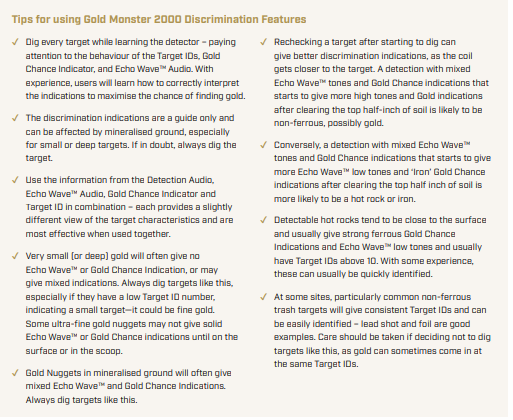
The Gold Monster 2000 is designed to give the user more information about a detected target rather than simply hiding or rejecting targets. This is important in gold prospecting because small nuggets can produce weak or mixed responses, especially in mineralized ground.
Minelab recommends using the Target ID, Gold Chance Indicator, Echo Wave™ Audio, and the normal Detection Audio together. Each one gives a slightly different view of the target, and they are most useful when interpreted as a group rather than individually.
When you are still learning the detector, the best approach is to dig every target and compare what the detector showed before recovery with what was actually in the ground. This helps you understand how different targets behave on your own sites.
Very small or deep gold may give no clear Echo Wave™ tone, no strong Gold Chance indication, or even mixed responses. Minelab specifically recommends digging uncertain targets, especially when the Target ID is low, because the target could still be fine gold.
Rechecking a target after removing some soil can also improve the discrimination information. As the coil gets closer to the target, the Echo Wave tones and Gold Chance indication may become more reliable.
Detecting Basics & Proper Sweep Technique
Battery, Charging & Runtime
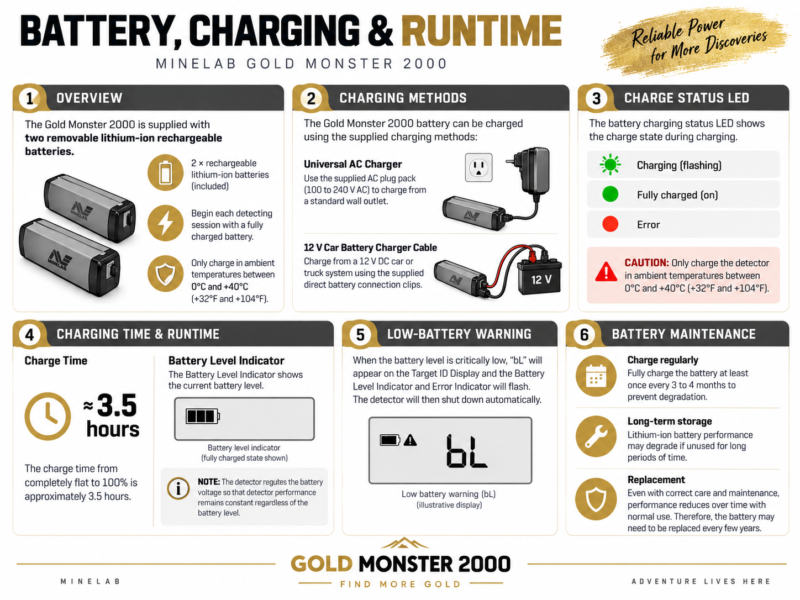
The Gold Monster 2000 is supplied with two removable rechargeable lithium-ion batteries, giving users a practical way to continue detecting by carrying a fully charged spare battery in the field.
A full charge from completely empty takes approximately 3.5 hours. The battery can be charged using the supplied universal AC charger or from a typical 12 V vehicle battery using the included car battery charger cable.
The detector provides approximately 8 hours of battery runtime, depending on operating conditions and usage. The system also regulates battery voltage so detector performance remains consistent as the battery level drops.
When the battery becomes critically low, “bL” appears on the Target ID display and the detector automatically shuts down shortly afterward to protect the system.
For long-term battery care, Minelab recommends fully charging the battery at least once every 3 to 4 months if it is not being used regularly.For the Gold Monster 2000 to perform consistently, the search coil should be kept level and close to the ground while sweeping from side to side. Avoid lifting the coil at the end of each swing, because this reduces ground coverage and can weaken target responses.
Each sweep should slightly overlap the previous sweep so that no narrow strips of ground are missed. The Getting Started Guide specifically illustrates level sweeping and overlapping passes as part of the basic detecting technique.
Keep metal objects away from the search coil while detecting. Picks, phones, boots with metal components, or other nearby metal can interfere with the detector and produce false responses.
After recovering a target, refill the hole before continuing. This is also included in Minelab’s basic field-use guidance.
Coils, Waterproofing & Detector Design
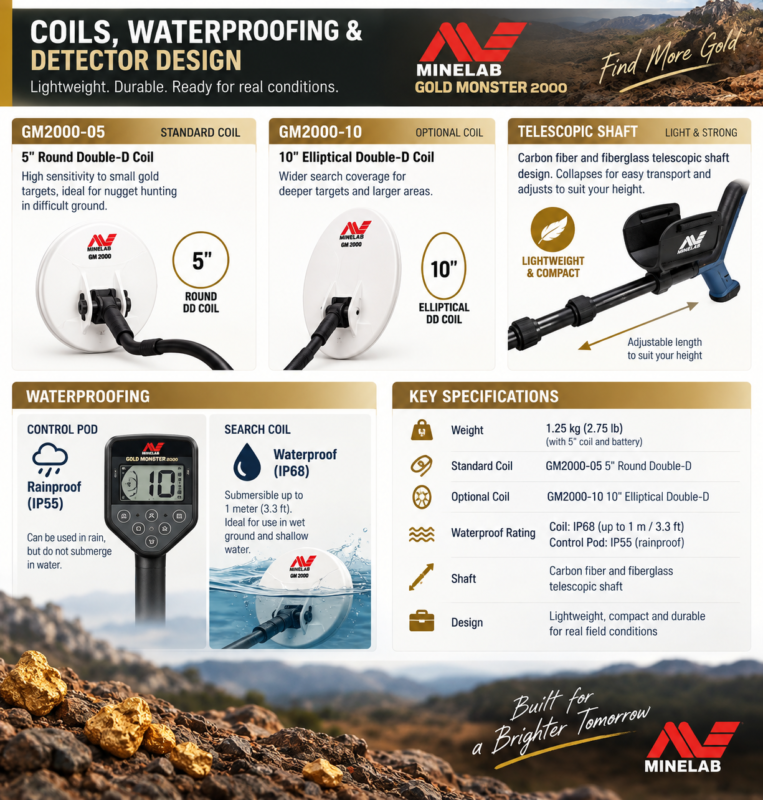
The Gold Monster 2000 comes standard with the GM2000-05 5-inch Round Double-D coil, which is designed for high sensitivity to small gold targets. Minelab also lists an optional GM2000-10 10-inch Elliptical Double-D coil for users who want a different search profile.
The detector uses a compact telescopic shaft made from carbon fiber and fiberglass, allowing it to collapse down for easier transport while remaining lightweight in the field. With the 5-inch coil and battery installed, the detector weighs approximately 1.25 kg (2.75 lb).
Waterproofing
The control pod is rainproof and rated IP55, but it is not designed to be submerged. The search coil is waterproof and rated IP68 up to 1 meter (3.3 ft).
This means the detector can be used in wet ground and the coil can be placed in shallow water, but the control unit must remain above the water surface. Minelab specifically warns against submerging the Control
Gold Monster 2000 Specifications
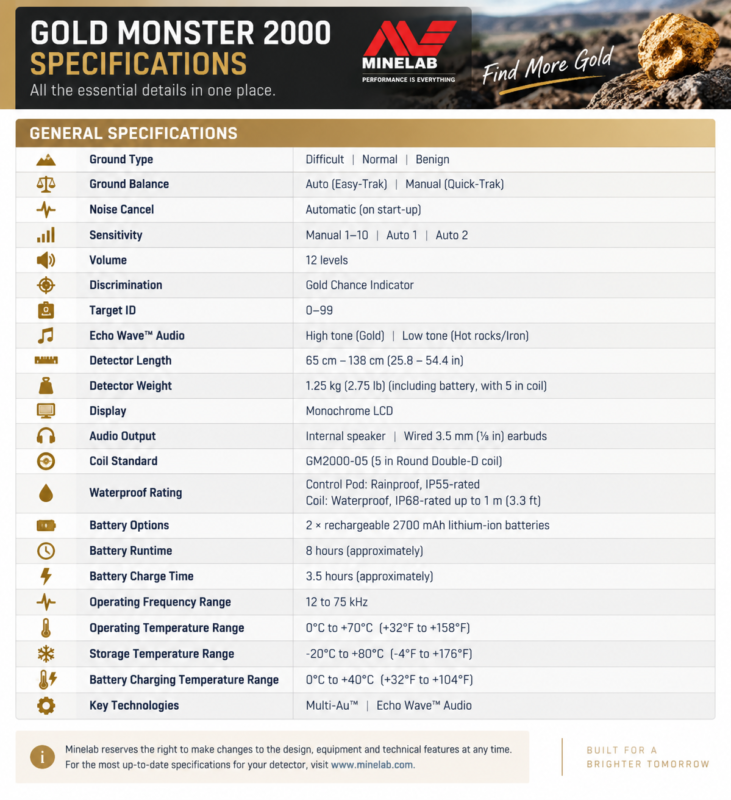
The Gold Monster 2000 combines a lightweight design with multi-frequency gold detection, automatic ground tracking, discrimination tools, and a compact 5-inch Double-D search coil. The table below summarizes the main specifications published by Minelab.
| Specification | Details |
|---|---|
| Ground Type | Difficult / Normal / Benign |
| Ground Balance | Auto (Easy-Trak) / Manual (Quick-Trak) |
| Noise Cancel | Automatic on start-up |
| Sensitivity | Manual 1–10 / Auto 1 / Auto 2 |
| Volume | 12 levels |
| Discrimination | Gold Chance Indicator |
| Target ID | 0–99 |
| Echo Wave™ Audio | High tone: probable non-ferrous / Low tone: probable ferrous |
| Operating Frequency Range | 12–75 kHz |
| Standard Coil | GM2000-05 5″ Round Double-D |
| Detector Weight | 1.25 kg with battery and 5″ coil |
| Detector Length | 65–138 cm |
| Battery | 2 × rechargeable 2700 mAh lithium-ion |
| Approx. Runtime | 8 hours |
| Approx. Charge Time | 3.5 hours |
| Control Pod | Rainproof, IP55 |
| Search Coil | Waterproof, IP68 up to 1 m |
| Audio Output | Internal speaker / 3.5 mm wired earbuds |
| Display | Monochrome LCD |
| Key Technologies | Multi-Au™ / Echo Wave™ Audio |
What’s Included in the Box
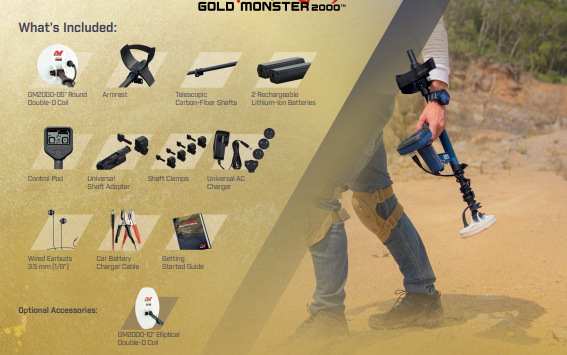
The Gold Monster 2000 package includes the main detector components and the accessories needed to begin detecting without requiring extra equipment.
According to Minelab, the standard package includes the GM2000-05 5-inch Round Double-D coil, telescopic carbon-fiber shafts, armrest, control pod, shaft clamps, a universal shaft adapter, two rechargeable lithium-ion batteries, a universal AC charger, a car battery charger cable, wired 3.5 mm earbuds, and the Getting Started Guide.
The optional accessory listed by Minelab is the GM2000-10 10-inch Elliptical Double-D coil, which gives users another coil option for different detecting conditions and search coverage.
Gold Monster 2000 Troubleshooting & Common Errors
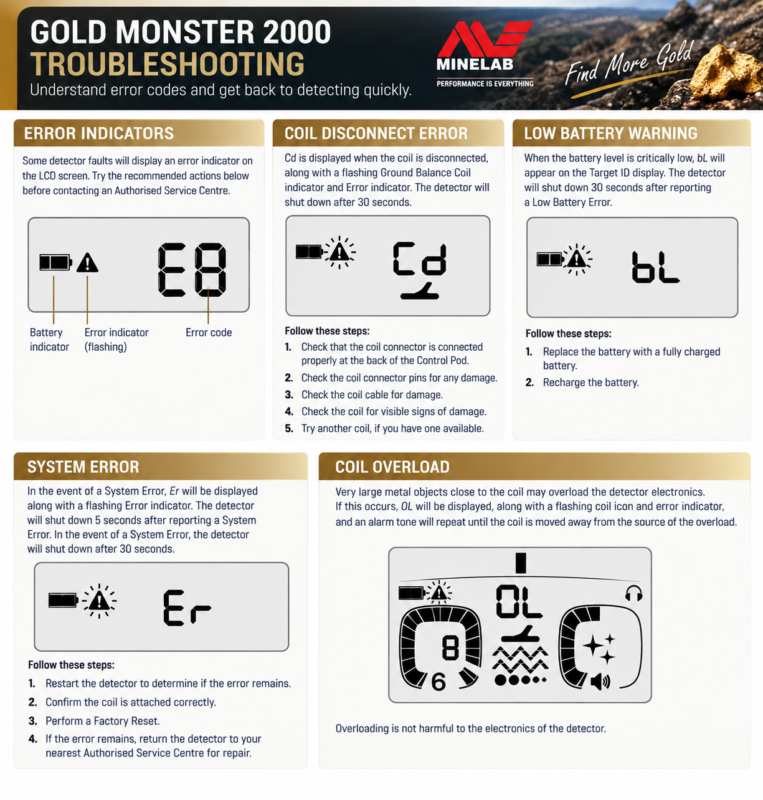
The Gold Monster 2000 can display several error codes that help identify common problems before contacting an authorised service centre.
Coil Disconnect Error — Cd
If the coil is disconnected, the display shows Cd, along with a flashing coil indicator and Error icon. Minelab recommends checking the coil connection, connector pins, coil cable, and the coil itself for damage.
Low Battery Warning — bL
When the battery reaches a critically low level, bL appears on the Target ID display. The detector then shuts down shortly afterward. The solution is to replace the battery with a charged one or recharge the existing battery.
System Error — Er
A system fault is indicated by Er. Minelab recommends restarting the detector, checking that the coil is connected correctly, and performing a Factory Reset. If the error remains, the detector should be checked by an authorised service centre.
Coil Overload — OL
Very large metal objects close to the coil can overload the detector electronics and cause OL to appear. Simply move the coil away from the large metal object. Minelab notes that this overload condition does not damage the detector electronics.
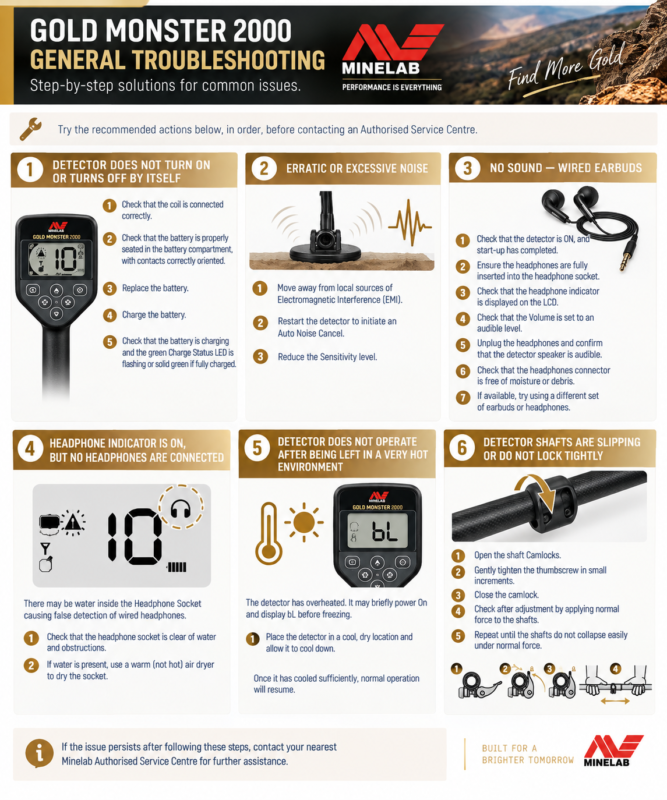
General Troubleshooting: Noise, Headphones, Heat & Shaft Problems
The Gold Monster 2000 manual includes several practical troubleshooting steps for common field problems. Minelab recommends trying these checks in order before contacting an authorised service centre.
Erratic or Excessive Noise
If the detector becomes unstable or produces too much noise, first move away from nearby sources of electromagnetic interference (EMI). Then restart the detector so it performs a new Automatic Noise Cancel. If the noise continues, reduce the Sensitivity level.
No Sound Through Wired Earbuds
If there is no sound from the wired earbuds, check that the detector is fully powered on, the headphones are inserted correctly, the headphone icon appears on the LCD, and the volume is set high enough to hear. Minelab also recommends checking the connector for moisture or debris and trying another pair of headphones if available.
Headphone Icon Appears Without Headphones Connected
If the headphone symbol appears even though no headphones are connected, water may be inside the headphone socket. The manual recommends checking the socket and, if moisture is present, drying it using warm, not hot, air.
Detector Overheated
If the detector has been left in an extremely hot environment, such as inside a parked vehicle, it may temporarily stop operating correctly. Move it to a cool, dry location and allow it to cool before turning it on again.
Shaft Slipping
If the telescopic shafts begin slipping or the camlocks do not hold firmly, open the camlocks and gently tighten the thumbscrew in small increments. Close the camlock and test it again until the shafts remain secure under normal use.
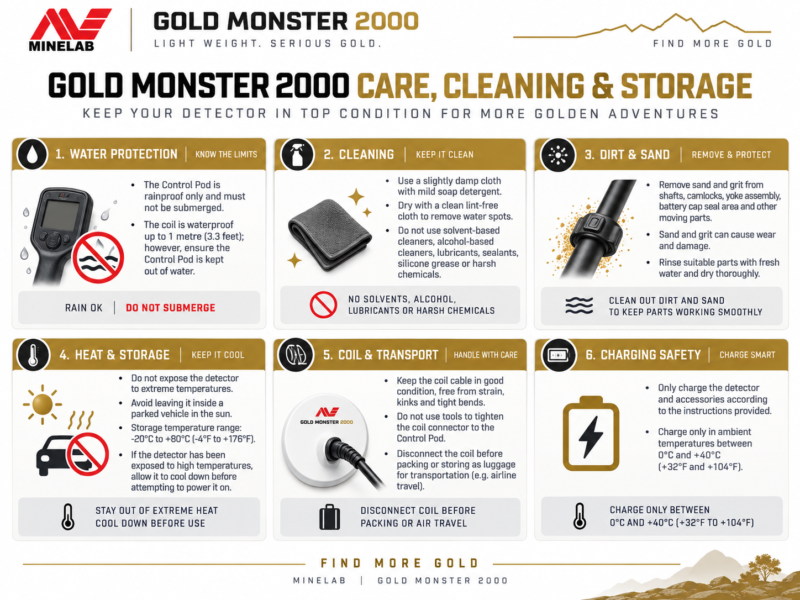
Care, Cleaning & Storage
Proper care is important for keeping the Gold Monster 2000 in good working condition, especially after use in dusty, sandy, wet, or very hot environments.
The Control Pod must not be submerged in water because it is rainproof only. The search coil, however, is waterproof to 1 meter (3.3 ft). After detecting in wet or dirty conditions, make sure the control unit remains protected from immersion.
For cleaning, Minelab recommends using a slightly damp cloth with mild soap detergent. Avoid solvent-based or alcohol-based cleaners, lubricants, sealants, silicone grease, or similar chemicals because they can damage materials and seals.
Sand and grit should also be removed from moving parts such as the shafts, camlocks, yoke assembly, battery housing, and battery seal area. The shafts, camlocks, and yoke assembly can be rinsed with fresh water and then dried thoroughly.
Storage
Avoid leaving the detector in extreme heat, especially inside a parked vehicle. Minelab lists a storage temperature range of −20°C to +80°C, but prolonged exposure to extreme heat should still be avoided.
Before packing the detector for transport or luggage, Minelab recommends disconnecting the coil. Also keep the coil cable free from tight bends, kinks, and unnecessary strain.
Software Updates & Factory Reset
The Gold Monster 2000 includes updateable software, allowing Minelab to provide future software improvements through a USB charging/data transfer cable. Minelab directs users to its product manuals and software section for the latest update files and installation instructions.
Software Updates
Before installing any update, use Minelab’s current instructions and the correct update package for the Gold Monster 2000. This helps ensure the detector remains compatible with the latest available software.
Factory Reset
A Factory Reset restores the detector to its default settings and can be useful if settings have been changed extensively or if troubleshooting requires a clean reset.
To perform a Factory Reset:
- Make sure the detector is powered off.
- Press and hold the Power button.
- Continue holding it for about 7 seconds until FP appears on the Target ID display.
- Release the button.
- The detector will then begin an Automatic Noise Cancel.
The default settings include Difficult Ground Type, Auto 2 Sensitivity, and Echo Wave™ Audio On, which Minelab describes as a practical starting setup for most conditions.
Best Gold Monster 2000 Settings for Different Ground Conditions
There is no single “best” setting for every location. Minelab’s manual recommends choosing the Ground Type and Sensitivity based on the actual soil conditions, with Auto 2 being especially useful for finding the best-performing setup.
1. Highly Mineralized or Salt-Conductive Ground
Use:
- Ground Type: Difficult
- Sensitivity: Auto 2
- Ground Balance: Easy-Trak
- Echo Wave™ Audio: On
Difficult is the default mode and is designed for highly mineralized or salt-conductive soils. Minelab states that it offers the best stability in difficult ground, along with strong hot-rock rejection.
2. Mineralized Ground Without Salt Conductivity
Use:
- Ground Type: Normal
- Sensitivity: Auto 2
- Ground Balance: Easy-Trak
Normal can provide slightly better sensitivity to ultra-fine gold than Difficult when the ground is mineralized but not wet or salt-conductive. If the detector becomes noisy, switch back to Difficult.
3. Very Mild or Benign Ground
Use:
- Ground Type: Benign
- Sensitivity: Auto 2 or high Manual sensitivity
- Ground Balance: Easy-Trak
Minelab recommends Benign only in extremely mild soil. Even lightly mineralized ground can make this mode unstable, so Normal or Difficult will often work better in real field conditions.
4. Best Method to Choose the Right Ground Type
Minelab recommends using Auto 2 Sensitivity to compare the three Ground Type settings:
- Select Auto 2.
- Detect over the soil for at least 20 seconds.
- Cycle through Difficult, Normal, and Benign.
- Choose the Ground Type that shows the highest Auto 2 Sensitivity level.
Minelab Gold Monster 2000 for Small Gold and Ultra-Fine Nuggets
One of the biggest strengths of the Gold Monster 2000 is its sensitivity to very small gold.
Minelab states that the detector operates across multiple frequencies from 12 to 75 kHz, which helps it respond to a wide range of nugget sizes, including extremely small pieces weighing below 0.01 g.
The detector is especially effective for shallow, ultra-fine gold, and Minelab specifically positions it as a detector that can recover gold that may have been missed by older single-frequency VLF detectors.
This makes the Gold Monster 2000 especially useful in areas such as old mining sites, tailings piles, and worked ground where larger targets may already have been recovered but very small gold still remains. Minelab notes that hunted-out areas can become productive again because the detector can respond to ultra-fine gold missed by other detectors.
The detector can also complement larger high-performance gold detectors such as the GPX 6000 and GPZ 7000, particularly when pinpointing targets, checking a productive patch, or recovering small nuggets around a larger target.
Where to Buy the Gold Monster 2000
The Gold Monster 2000 is available through Detectors Shop, where customers can receive product information, purchasing assistance, and support in choosing the right detector and accessories for their prospecting needs.
At Detectors Shop, our team can help you understand the detector’s settings, available coils, accessories, and the most suitable setup for your detecting conditions.
For customers looking for the Gold Monster 2000 in Dubai, the UAE, the Middle East, or for international delivery, contact Detectors Shop for current availability, pricing, shipping options, and product support.
Contact Detectors Shop today to learn more about the Minelab Gold Monster 2000.
Final Verdict: Gold Monster 2000
The Gold Monster 2000 represents a major step forward from traditional single-frequency VLF gold detectors.
Its Multi-Au™ technology, operating across multiple frequencies from 12 to 75 kHz, is designed to provide exceptional sensitivity to small and ultra-fine gold while maintaining stable performance across different ground conditions.
Features such as Echo Wave™ Audio, the Gold Chance Indicator, 0–99 Target ID, automatic sensitivity, Easy-Trak Ground Balance, and three Ground Type settings give prospectors several ways to interpret targets without sacrificing sensitivity to very small gold.
The detector is also lightweight at approximately 1.25 kg, offers around 8 hours of battery runtime, and includes a compact 5-inch Double-D coil that makes it particularly suitable for detailed searching and fine-gold recovery.
For beginners, experienced prospectors, and users who already operate detectors such as the GPX 6000 or GPZ 7000, the Gold Monster 2000 can serve as a highly capable tool for locating small gold, checking productive patches, and working previously searched areas.
Is the Gold Monster 2000 a multi-frequency detector?
Yes. The Gold Monster 2000 uses Multi-Au™ simultaneous multi-frequency technology and operates across frequencies between 12 and 75 kHz.
How small of a gold nugget can the Gold Monster 2000 detect?
Minelab states that the detector is sensitive to extremely small gold, including nuggets weighing below 0.01 g under suitable conditions.
What is the best sensitivity setting for the Gold Monster 2000?
Minelab uses Auto 2 as the factory default. Auto 2 uses a more aggressive sensitivity level, while Auto 1 provides quieter operation. Manual sensitivity is adjustable from 1 to 10.
What Ground Type should I use?
The detector has Difficult, Normal, and Benign Ground Types. Difficult is the default and is suitable for highly mineralized and salt-conductive ground, while Normal is useful in mineralized ground without strong salt conductivity. Benign should generally be reserved for very mild soil.
What does the Gold Chance Indicator do?
The Gold Chance Indicator estimates whether a target is more likely to be non-ferrous or ferrous. A reading toward the gold side suggests a non-ferrous target, while a reading toward the iron side suggests iron or a hot rock. It does not guarantee that a target is gold.
What do the Target ID numbers mean?
Target IDs range from 00 to 99 and are based on conductivity. Smaller gold often appears at lower IDs, while larger targets may produce higher numbers. However, gold can potentially appear at almost any Target ID depending on its size and shape.
Is the Gold Monster 2000 waterproof?
The search coil is waterproof to 1 meter (3.3 ft) and rated IP68. The Control Pod is IP55 rainproof, but it must not be submerged.
How long does the Gold Monster 2000 battery last?
Minelab lists approximately 8 hours of runtime with an approximate charging time of 3.5 hours. The detector is supplied with two rechargeable lithium-ion batteries.
What coil comes with the Gold Monster 2000?
The standard coil is the GM2000-05 5-inch Round Double-D coil. Minelab also lists the GM2000-10 10-inch Elliptical Double-D coil as an optional accessory.
Can the Gold Monster 2000 be used with the GPX 6000 or GPZ 7000?
Yes. Minelab describes the Gold Monster 2000 as a useful complement to detectors such as the GPX 6000 and GPZ 7000, particularly for pinpointing, patch finding, and locating smaller nuggets around excavated targets.
Does the Gold Monster 2000 support software updates?
Yes. Its software can be updated using a USB charging/data transfer cable, with update files and installation instructions provided by Minelab.
Is the Gold Monster 2000 suitable for beginners?
Minelab specifically describes it as easy to learn and suitable for beginner prospectors, while its advanced discrimination and ground-handling features also make it useful for experienced users.
Looking for the Gold Monster 2000 ? Contact Detectors Shop for availability, price, worldwide shipping, and expert product support.
Sources & References
This guide is based on official Minelab resources, including the Gold Monster 2000 User Manual, Getting Started Guide, and official product information.
Introduction
The Treasure Way Metal Detector is a deep-search detection system developed by GER Detect for locating large underground metal targets, buried valuables, and underground voids.
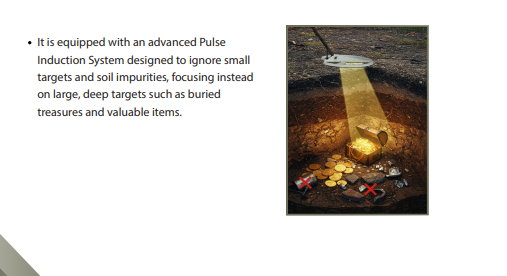
The device uses advanced Pulse Induction technology, designed to reduce the influence of small unwanted targets and soil impurities while focusing on larger and deeper targets. It also includes intelligent automatic calibration to improve performance in mineral-rich and rocky ground.
Treasure Way combines three important search functions in one device: Metal Detection, Void Detection, and Depth Determination. These systems allow the user to locate metal targets, identify underground cavities such as tunnels and caves, and estimate the depth of detected targets.
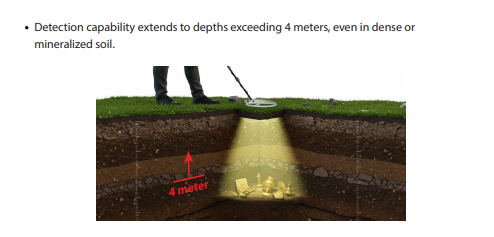
According to the official user manual, the detector is capable of reaching depths exceeding 4 meters under suitable conditions, including dense and mineralized soil.
In this complete guide, we will explain how the Treasure Way works, its Pulse Induction system, search modes, depth measurement, correct scanning technique, technical specifications, and practical tips for getting more accurate results.
Table of Contents
What Is the Treasure Way Metal Detector?
The Treasure Way Metal Detector is a deep-search metal and void detection system developed by GER Detect, designed to locate large and deep underground targets while reducing the response from small targets and soil impurities.
The detector uses Pulse Induction technology and is designed to reduce the influence of small targets and soil impurities, allowing the system to focus more effectively on larger and deeper buried targets. The official manual also states that Treasure Way includes intelligent automatic calibration to improve performance in mineral-rich rocks and difficult ground conditions.
Treasure Way combines three main detection functions in one device:
- Metal Detection System
- Void Detection System
- Depth Determination System
The Metal Detection System is designed to detect both precious and non-precious metals while using smart ground balancing to reduce the effect of mineral impurities.
The Treasure Way Metal Detector also works as an Underground Void Detector, with a dedicated system designed to identify caves, tombs, cellars, tunnels, and crypts.
The third function, the Depth Determination System, is used to estimate the depth of detected metals and underground voids, with the final result shown on the screen in centimeters.
Who Is the Treasure Way Metal Detector Designed For?
The Treasure Way Metal Detector is designed for users who are searching for larger and deeper underground targets rather than very small surface objects.
Its Pulse Induction system is specifically described in the official manual as being designed to reduce the response from small targets and soil impurities, while focusing more on large, deep targets such as buried treasures and valuable items.
This makes the device especially suitable for:
- Treasure hunters searching for large buried metal objects
- Users working in mineralized or rocky ground
- Searchers looking for deep metal targets
- Users investigating underground voids
- Searchers looking for caves, tunnels, tombs, cellars, and crypts
- Users who need target depth estimation before excavation
The detector is also designed to operate in different terrain conditions and is supported by an intelligent automatic calibration system intended to improve performance in mineral-rich ground.
Because Treasure Way includes separate systems for metal detection, void detection, and depth determination, it is more suitable for users who want a broader underground investigation tool rather than a detector focused only on basic metal identification.
Treasure Way Pulse Induction Technology
One of the key technologies behind the Treasure Way Metal Detector is its advanced Pulse Induction system.
According to the official manual, this system is designed to reduce the response from small targets and soil impurities so the detector can focus more effectively on larger and deeper underground targets.
This is especially important in difficult search environments, where mineralization and unwanted ground responses can make target identification more challenging.
The Treasure Way also includes an intelligent auto-calibration system intended to improve performance when searching through mineral-rich rocks and difficult ground conditions.
The official manual further explains that the detector is designed to work efficiently across different types of terrain and provide real-time signal response during the search.
Why Pulse Induction Matters on Treasure Way
The Pulse Induction system gives Treasure Way a clear focus on deep-search applications.
Instead of being optimized mainly for tiny surface targets, the system is designed around larger buried targets and deep-search situations.
This makes it particularly relevant for users searching for:
- Large buried metal objects
- Deep treasure targets
- Valuable underground items
- Targets in mineralized soil
- Targets in rocky ground
The manual also states that the detector can reach depths exceeding 4 meters under suitable conditions, including dense and mineralized soil.
Metal Detection System
The Metal Detection System is one of the main search modes in the Treasure Way Metal Detector.
According to the official manual, this system is designed to detect both precious and non-precious metals while using smart ground balancing technology to reduce the effect of mineral impurities and improve detection accuracy.
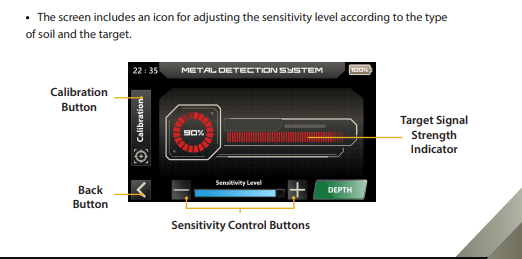
To activate the system, the user selects the Metal Detection option from the main screen. During the search, the detector should be moved in a balanced side-to-side motion while the user walks in a straight line.
When the detector receives a target signal, a red indicator gradually appears on the screen together with a percentage that represents signal strength. The response is also accompanied by a distinctive sound.
The user can also adjust the sensitivity level according to the soil conditions and the type of target being searched for.
How the Metal Detection System Works in Practice
For best results, the search coil should remain close and parallel to the ground while scanning.
The manual also emphasizes that the coil should not be moved erratically or pressed excessively against the ground, because improper scanning can reduce detection accuracy.
During a proper scan:
- Walk in a straight line
- Sweep the coil evenly from side to side
- Keep the movement balanced and consistent
- Monitor the red target indicator
- Watch the signal-strength percentage
- Adjust sensitivity when necessary
This system is particularly useful when searching for larger underground metal targets where a strong and stable response is needed before moving to depth measurement.
Void Detection System
The Void Detection System is designed to identify underground empty spaces and structures that may not produce the same response as a metal target.
According to the official Treasure Way manual, this system can be used to detect caves, tombs, cellars, tunnels, and crypts.
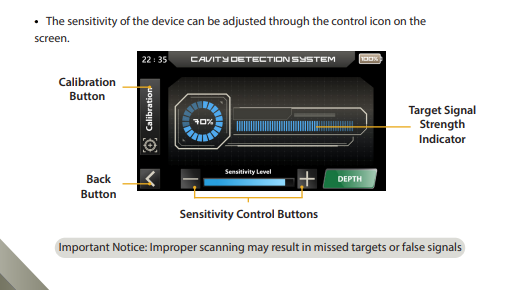
To activate it, select Detect Voids from the home screen. Once the system opens, the device begins an automatic calibration process before the search starts.
When the detector identifies a possible void, a blue indicator gradually appears on the screen, together with a percentage showing signal strength and a distinctive audio response.
The user can also adjust the sensitivity level from the control icon on the screen to better match the search conditions.
What Can the Void Detection System Find?
The official manual lists the following underground structures:
- Caves
- Tombs
- Cellars
- Tunnels
- Crypts
This makes the system useful when the search objective is not only metal detection, but also locating underground cavities or man-made spaces.
Important Scanning Note
The manual specifically warns that improper scanning may result in missed targets or false signals.
For that reason, consistent coil movement, correct calibration, and proper sensitivity settings are important when using the Void Detection System.
Depth Determination System
The Depth Determination System is designed to estimate the depth of a detected metal target or underground void after the target has already been located.
According to the official Treasure Way user manual, this system provides a depth estimate for underground metals and voids and displays the final result in centimeters.
How to Measure Target Depth
The process starts by pressing the red Capture button in the center of the screen.
A graphic then appears showing the direction in which the search coil should be moved over the target. The user sweeps the coil horizontally across the target area until the device emits a signal.
Continue sweeping until the sound stops, then press the Capture button again. After locating the target correctly, select the Depth option on the search screen.
The system then guides the user through the final measurement steps. Once the scan is completed, the result appears on the screen showing the estimated target depth in centimeters.
Why This System Is Important
The depth function adds another layer of information after target detection.
Instead of only knowing that a target or void is present, the user can also obtain an estimated depth before deciding whether to investigate the area further.
For deep-search applications, this can be useful when evaluating whether a target is close to the surface or located much deeper underground.
Important Use Note
The quality of the depth estimate depends on correct target positioning and proper coil movement.
The manual instructs the user to move the coil horizontally over the target and follow the on-screen direction graphics carefully during the measurement process.
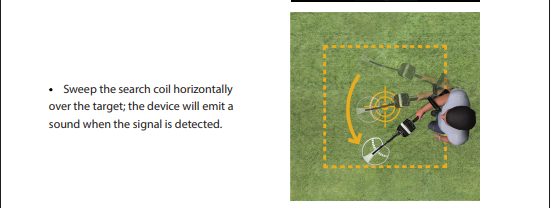
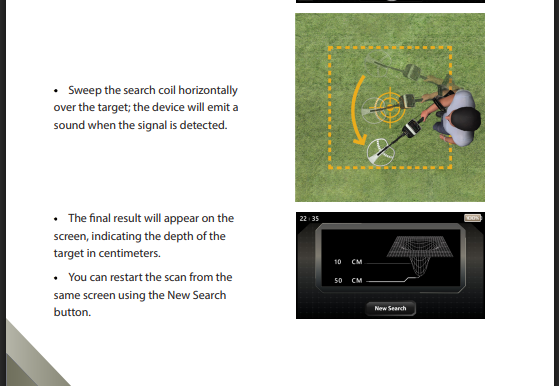
How Deep Can the Treasure Way Metal Detector Detect?
According to the official user manual, the Treasure Way Metal Detector is capable of detecting at depths exceeding 4 meters under suitable search conditions, including dense and mineralized soil.
This depth specification is one of the main reasons the detector is positioned as a deep-search system rather than a detector focused primarily on small, shallow targets.
The manual does not provide a fixed guaranteed depth for every target type. Instead, it emphasizes that correct operation, soil conditions, calibration, interference levels, and scanning technique all affect detection performance.
Treasure Way Detection Systems Overview
| System | Main Function | What It Detects |
|---|---|---|
| Metal Detection System | Detects underground metal targets | Precious and non-precious metals |
| Void Detection System | Detects underground empty spaces | Caves, tombs, cellars, tunnels, and crypts |
| Depth Determination System | Estimates target depth | Metals and underground voids |
Treasure Way Key Specifications
| Feature | Specification |
|---|---|
| Detection Technology | Pulse Induction |
| Detection Depth | Over 4 meters under suitable conditions |
| Search Coil | 45 cm |
| Display | 4.3-inch TFT LCD Touch Panel |
| Battery Runtime | Up to 10 hours |
| Languages | English, German, French, Spanish, Persian, Arabic |
| Coil Waterproof Rating | Up to 30 cm |
| Detector Body | Weatherproof, not waterproof |
What Affects Detection Depth?
Several factors can influence the practical depth achieved during a search.
These include:
- Target size
- Target type
- Soil mineralization
- Ground conditions
- Sensitivity settings
- Calibration quality
- Coil movement
- Nearby electrical or metal interference
The manual specifically warns that improper use or excessive noise interference may reduce the device’s ability to confirm a target and determine its depth accurately.
Deep Targets in Mineralized Ground
Treasure Way includes an intelligent auto-calibration system intended to improve performance in mineral-rich rocks and difficult ground conditions.
Its Pulse Induction system is also designed to reduce the effect of small unwanted targets and soil impurities, helping the detector focus more effectively on larger and deeper targets.
Depth Detection vs Depth Measurement
It is important to distinguish between two different functions:
Detection depth refers to how deep the detector may be able to locate a target.
Depth measurement refers to the dedicated Depth Determination System, which estimates the depth of a detected target and displays the final result in centimeters.
These are related, but they are not the same thing.
How to Use the Treasure Way Metal Detector
Using the Treasure Way Metal Detector correctly begins with proper assembly, calibration, and coil positioning.
Before starting any search, the official manual recommends making sure the battery is fully charged, all components are connected correctly, and the device is being used away from sources of interference such as power lines, mobile phones, electronic equipment, and nearby metal objects.
Step 1: Assemble the Detector
Start by inserting the detector arm into its designated position and tightening it securely.
The arm can then be extended to a comfortable length using the locking mechanisms. Make sure all locks are properly closed before beginning the search.
Next, attach the main control unit to the arm handle and secure the battery to the base of the armrest.
Connect the battery cable to the correct port on the main unit.
Finally, connect the search coil to the lower shaft using the plastic screw, wrap the coil cable around the arm, and connect the cable to the search coil port on the main unit.
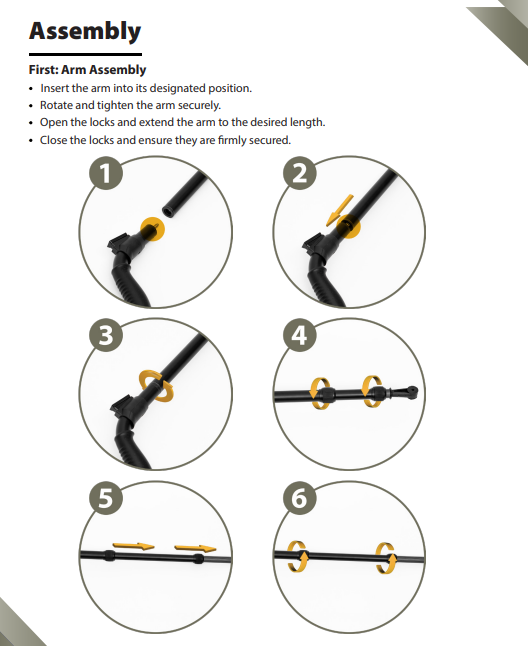
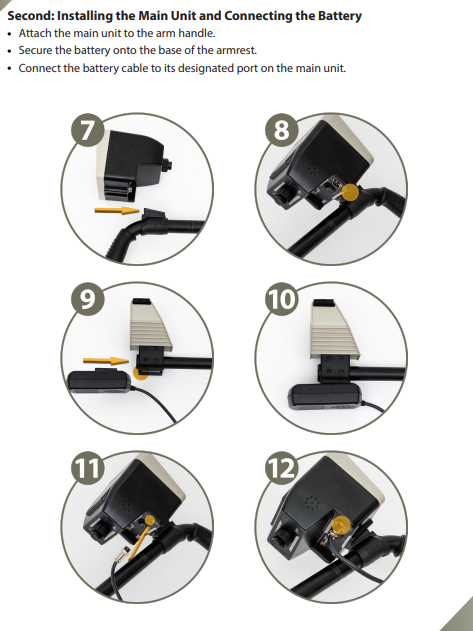
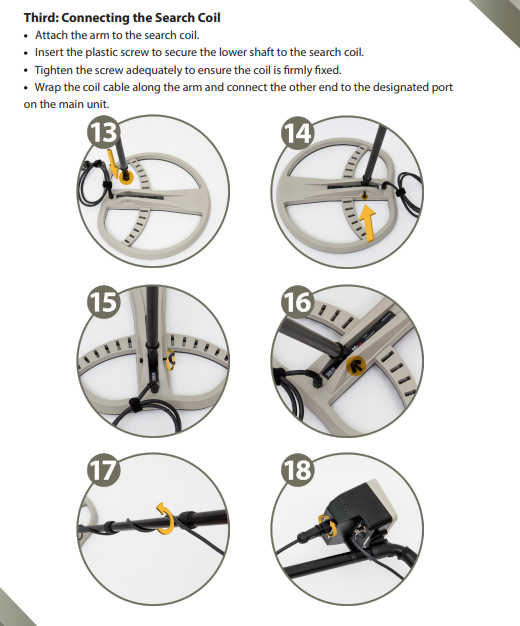
Step 2: Power On the Device
Turn on the Treasure Way using the power button located on the rear of the main control unit.
The manual then instructs the user to gently position the search coil close to the ground and keep it parallel to the surface before activating the battery.
Step 3: Allow Automatic Calibration
Before entering any search system, the search coil must remain pointed toward the ground so the device can complete its automatic calibration process.
This calibration step is especially important when searching in mineralized ground because Treasure Way uses smart ground balancing and automatic calibration to reduce interference from soil mineralization.
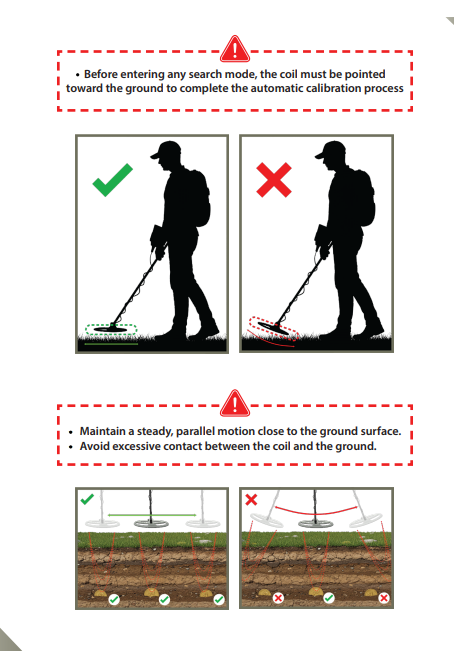
Step 4: Keep the Coil Parallel to the Ground
During the search, keep the coil close to the ground and move it in a steady, parallel motion.
Avoid excessive contact between the search coil and the ground, because uncontrolled movement or incorrect positioning may reduce search accuracy.
Step 5: Select the Search System
From the main interface, select the system that matches your search objective:
- Metal Detection for underground metal targets
- Detect Voids for underground cavities and structures
- Depth Determination after a target has been located
Each search mode has its own calibration, sensitivity, and signal response controls.
Correct Scanning Technique with Treasure Way
Correct scanning technique is essential for getting reliable results from the Treasure Way Metal Detector. The official manual repeatedly emphasizes stable coil movement, proper calibration, and avoiding excessive contact with the ground.
During the search, the coil should remain close and parallel to the ground while the user moves it from side to side in a balanced and consistent manner. The user should also walk in a straight line rather than making sudden changes in direction.
Correct Coil Movement
For better results:
- Keep the search coil close to the ground
- Maintain a parallel position to the surface
- Sweep from side to side smoothly
- Keep the movement balanced and consistent
- Walk in a straight line
- Avoid sudden changes in angle or height
- Do not drag or press the coil heavily against the ground
The manual warns that improper scanning can lead to missed targets or false signals, especially when using the Void Detection System.
Correct vs Incorrect Scanning
| Correct Scanning | Incorrect Scanning |
|---|---|
| Coil remains parallel to the ground | Coil is tilted during movement |
| Smooth side-to-side sweep | Fast or irregular swinging |
| Consistent search height | Constantly changing coil height |
| Straight walking line | Sudden changes in direction |
| Stable movement | Jerky or uncontrolled motion |
| Light movement above the ground | Excessive contact with the ground |
Why Scanning Technique Matters
Treasure Way relies on signal strength, calibration, sensitivity, and ground balancing to identify targets correctly.
If the coil is moved too quickly, too high, or at an inconsistent angle, the device may receive weaker or unstable signals.
The manual also states that excessive interference or incorrect use may reduce the device’s ability to confirm a target and determine its depth accurately.
Adjusting Sensitivity
The Metal Detection and Void Detection systems both include sensitivity controls.
The sensitivity level can be adjusted according to the soil conditions and the target being searched for.
Higher sensitivity is not always better. The goal is to use a setting that provides a stable signal without excessive noise.
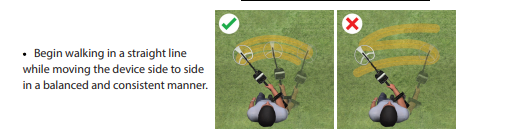
Treasure Way Performance in Mineralized Soil
One of the most important strengths of the Treasure Way Metal Detector is its ability to work in difficult ground conditions, especially areas with high mineral content.
According to the official user manual, the detector includes an intelligent auto-calibration system designed to improve its ability to penetrate mineral-rich rocks and operate more effectively in challenging terrain.
The Metal Detection System also uses smart ground balancing technology, which helps reduce the effect of mineral impurities and improve target detection accuracy.
Why Mineralized Soil Is Challenging
Mineralized ground can create unwanted responses and interfere with metal detection signals.
Treasure Way is designed to reduce this problem by combining:
- Automatic calibration
- Smart ground balancing
- Pulse Induction technology
- Adjustable sensitivity
These features help the detector stay more stable and focus on larger, deeper targets instead of reacting strongly to soil impurities.
Detection Depth in Difficult Ground
The official manual states that Treasure Way can reach depths exceeding 4 meters, including in dense or mineralized soil, under suitable search conditions.
This makes the detector particularly relevant for users working in rocky or mineral-rich areas where conventional detectors may be more affected by ground conditions.
Recommended Settings in Mineralized Areas
The manual does not provide one fixed sensitivity value for all mineralized soils. Instead, it allows the user to adjust sensitivity according to the soil and target conditions.
For this reason, the best approach is to:
- Allow the device to complete automatic calibration
- Keep the coil stable and parallel to the ground
- Adjust sensitivity gradually
- Avoid excessive interference from nearby electronics and metals
- Recheck unstable signals before confirming a target
Mineralized Soil Performance Summary
| Feature | Benefit in Mineralized Soil |
|---|---|
| Auto Calibration | Helps adapt the detector to ground conditions |
| Smart Ground Balance | Reduces the influence of mineral impurities |
| Pulse Induction | Focuses more on larger and deeper targets |
| Sensitivity Control | Allows adjustment based on soil conditions |
| Deep Search Capability | Designed to work at depths exceeding 4 meters under suitable conditions |
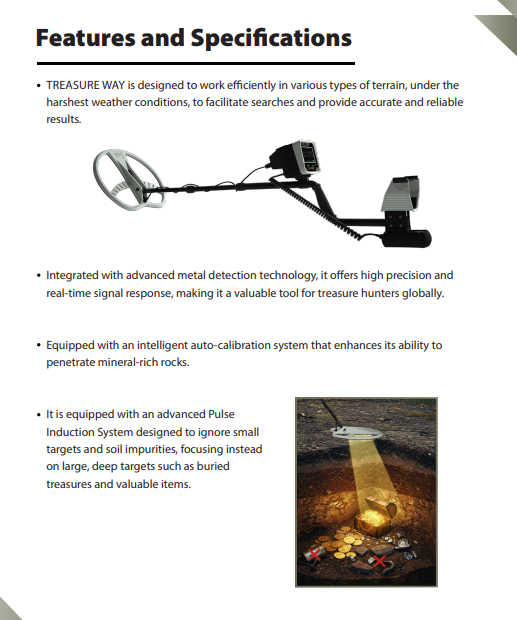
Treasure Way User Interface and Controls
The Treasure Way Metal Detector uses a touchscreen interface designed to give the user quick access to the main search systems and device settings.
According to the official manual, the user interface includes controls for time adjustment, volume, screen brightness, language selection, Metal Detection, Void Detection, and general settings, while the battery status and current time remain visible on the screen.
Main Interface Functions
| Control | Function |
|---|---|
| Metal Detection | Activates the metal search system |
| Void Detection | Activates the underground void search system |
| Settings | Opens device configuration options |
| Brightness | Adjusts display brightness |
| Volume | Controls sound level |
| Language | Changes the interface language |
| Time | Adjusts the displayed time |
| Battery Status | Shows remaining battery level |
Touchscreen Display
The Treasure Way uses a 4.3-inch TFT LCD touchscreen with a resolution of 480 × 272 pixels.
The screen displays the target response visually during searching, including signal strength percentages, system indicators, sensitivity controls, and calibration functions depending on the selected mode.
Sensitivity Controls
Both the Metal Detection and Void Detection systems provide sensitivity adjustment controls.
In Metal Detection mode, sensitivity can be changed according to the soil and the target being searched for.
The Void Detection interface also includes sensitivity controls to adapt the system to the search conditions.
Calibration Control
The search interfaces include a calibration function that allows the device to adjust to the surrounding ground conditions.
The manual states that calibration takes place automatically before searching, while the interface also provides a calibration control during operation.
Multilingual Interface
Treasure Way supports six languages:
- English
- German
- French
- Spanish
- Persian
- Arabic
This makes the detector easier to operate for users in different regions, particularly in the Middle East where Arabic language support is useful.
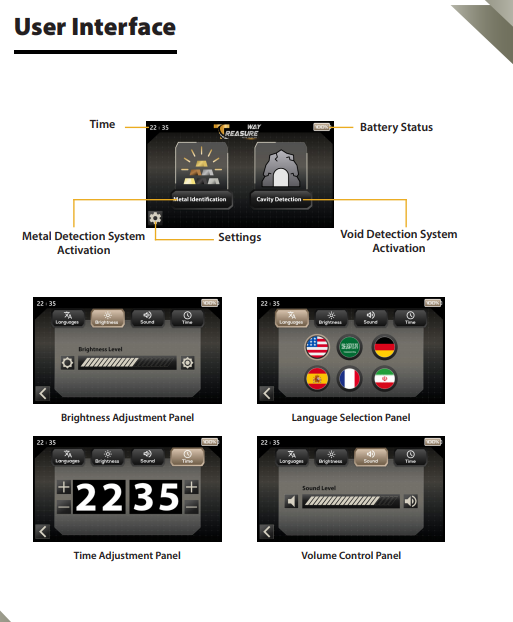
Treasure Way Technical Specifications
The Treasure Way Metal Detector combines deep-search Pulse Induction technology with a 4.3-inch touchscreen, a large search coil, and an external rechargeable battery designed for extended field use.
According to the official user manual, the detector operates at a 500 Hz Pulse Induction frequency and uses a 72 MHz data processing speed. The system includes a 45 cm search coil, which is intended for larger and deeper targets.
Main Technical Specifications
| Specification | Treasure Way |
|---|---|
| Detection Technology | Pulse Induction |
| PI Frequency | 500 Hz |
| Display | 4.3-inch TFT LCD |
| Touch Panel | Resistive |
| Display Resolution | 480 × 272 |
| Data Processing Speed | 72 MHz |
| Search Coil Diameter | 45 cm |
| Battery Type | External rechargeable Li-ion |
| Battery Voltage | 11.1 VDC |
| Battery Capacity | 55.5 Wh |
| Operating Time | Up to 10 hours |
| Coil Waterproof Rating | Up to 30 cm |
| Detector Waterproof Rating | Weatherproof only, not waterproof |
| Closed Length | 920 mm |
| Open Length | 1410 mm |
| Main Unit Length | 174 mm |
Audio System
The Treasure Way includes a built-in dynamic speaker and also supports headphones.
The official specifications list an audio frequency range of 350–1500 Hz and a sound output of approximately 84 ± 3 dB.
Operating and Storage Conditions
The detector is designed to operate across a wide range of field conditions.
| Condition | Specification |
|---|---|
| Operating Temperature | 0°C to 70°C |
| Operating Humidity | Up to 95% non-condensing |
| Storage Temperature | -20°C to 70°C |
| Storage Humidity | Up to 98% relative humidity |
Battery Specifications
The system uses an external rechargeable Li-ion battery.
According to the manual:
- Voltage: 11.1 VDC
- Capacity: 55.5 Wh
- Runtime: Up to 10 hours
- Battery operating temperature: 0°C to 50°C
- Battery storage temperature: -5°C to 70°C
Waterproof and Weather Protection
The search coil is rated for water exposure up to approximately 30 cm, while the detector itself is not waterproof and should be treated as weatherproof only.
This distinction is important during field use: the coil can tolerate limited shallow-water exposure, but the main electronic unit should be protected from rain and direct water contact.
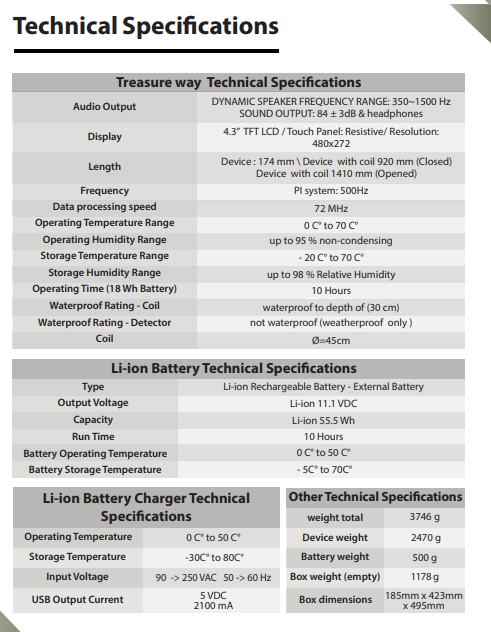
Treasure Way Accessories and Package Contents
The Treasure Way Metal Detector package includes the main components required for field operation, transportation, charging, and audio monitoring.
According to the official user manual, the standard package includes:
- Main Control Unit
- Search Coil
- Device Arm
- External Battery
- Carrying Bag
- Headphones
- Wall Charger
- Car Charger
- Warranty Card
Package Contents Overview
| Accessory | Purpose |
|---|---|
| Main Control Unit | Operates the detector and displays search information |
| Search Coil | Performs the ground scanning and target detection |
| Device Arm | Supports the control unit and search coil |
| External Battery | Powers the detector during field use |
| Carrying Bag | Protects and transports the device |
| Headphones | Allows clearer audio monitoring |
| Wall Charger | Charges the battery from a standard power source |
| Car Charger | Allows charging from a vehicle |
| Warranty Card | Provides warranty information |
Search Coil
The Treasure Way package includes a 45 cm search coil, which is one of the key components of the detector.
The coil connects to the lower shaft using the provided fastening screw, while the cable is wrapped along the detector arm and connected to the designated port on the main control unit.
According to the technical specifications, the search coil is waterproof to a depth of approximately 30 cm.
External Battery
Treasure Way uses an external rechargeable Li-ion battery.
The battery is mounted at the base of the armrest and connected directly to the main unit.
The official specifications list a battery capacity of 55.5 Wh with an operating time of up to 10 hours.
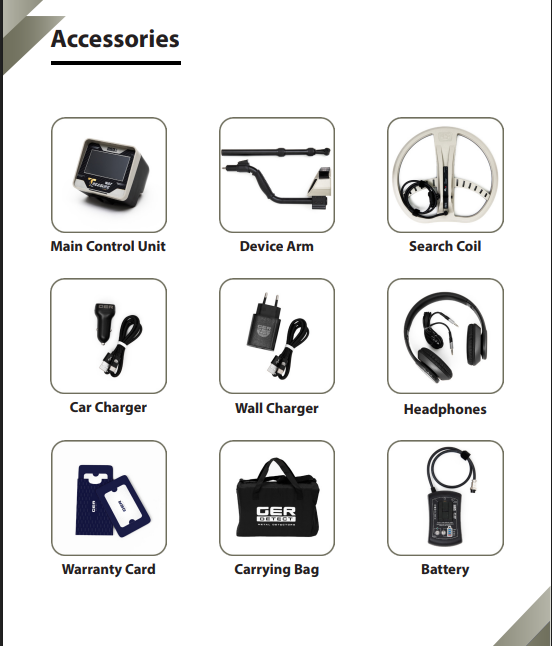
Advantages of the Treasure Way Metal Detector
The Treasure Way Metal Detector combines deep-search Pulse Induction technology with dedicated systems for metal detection, void detection, and depth measurement.
One of its main strengths is its focus on large and deep underground targets, rather than only small shallow objects. The official manual states that the Pulse Induction system is designed to reduce the response from small targets and soil impurities while focusing more effectively on larger and deeper targets.
Other important advantages include:
- Pulse Induction technology for deep-search applications
- Smart ground balancing
- Intelligent auto-calibration
- Metal Detection System
- Void Detection System
- Depth Determination System
- Adjustable sensitivity
- 45 cm search coil
- Up to 10 hours of operating time
- Multilingual interface
- 4.3-inch touchscreen
- Designed for mineralized and difficult ground conditions
The manual also states that the detector can reach depths exceeding 4 meters under suitable conditions, including dense and mineralized soil.
Important Operating Tips
For better results with Treasure Way, the official manual recommends careful preparation and consistent scanning technique.
Before searching, make sure the battery is fully charged and all components are connected correctly. The detector should also be kept away from strong interference sources such as mobile phones, electronic devices, nearby metals, and power sources.
During scanning:
- Keep the search coil close and parallel to the ground
- Use smooth and balanced side-to-side movements
- Avoid excessive contact between the coil and the ground
- Allow the device to complete calibration before searching
- Adjust sensitivity according to the soil and target
- Recheck weak or unstable signals before confirming a target
The manual specifically warns that improper scanning or excessive interference can reduce the device’s ability to confirm a target and determine its depth accurately.
Treasure Way Warranty
According to the official user manual, the main unit is covered by a two-year warranty against electronic malfunctions.
The warranty does not cover damage caused by misuse, drops, unauthorized opening of the unit, or physical impact.
The battery, charger, and tablet are not included in the warranty coverage.
Is Treasure Way a Pulse Induction metal detector?
Yes. The official manual states that Treasure Way uses an advanced Pulse Induction system designed to reduce the influence of small targets and soil impurities while focusing more on large and deep targets.
How deep can the Treasure Way Metal Detector detect?
According to the official manual, Treasure Way can reach depths exceeding 4 meters under suitable conditions, including dense and mineralized soil.
Can Treasure Way detect gold?
The Metal Detection System is designed to detect both precious and non-precious metals. The manual does not state that the device identifies gold specifically as a unique metal type, so it is more accurate to describe it as a detector for precious and non-precious metals.
Can Treasure Way detect underground voids?
Yes. Treasure Way includes a dedicated Void Detection System designed to detect caves, tombs, cellars, tunnels, and crypts.
Can Treasure Way measure target depth?
Yes. The Depth Determination System estimates the depth of detected metals and voids and displays the final result in centimeters.
Does Treasure Way work in mineralized soil?
Yes. The manual describes an intelligent auto-calibration system and smart ground balancing intended to improve performance in mineral-rich and difficult ground conditions.
What size is the Treasure Way search coil?
The official technical specifications list a 45 cm search coil.
How long does the Treasure Way battery last?
The official manual lists an operating time of up to 10 hours.
Is the Treasure Way waterproof?
The search coil is waterproof to approximately 30 cm, but the detector itself is listed as weatherproof only, not waterproof.
How many languages does Treasure Way support?
The interface supports six languages: English, German, French, Spanish, Persian, and Arabic.
Where to Buy the Treasure Way Metal Detector
For more information about the Treasure Way Metal Detector, current availability, specifications, and ordering options, visit the official product page at Detectors Shop:
https://detectors-shop.com/product/treasure-way/
You can also review manufacturer information from UIG Detectors:
https://uigdetectors.com/product/treasure-way-metal-detector/
Final Verdict
The Treasure Way Metal Detector is designed for users who need a deep-search system focused on large underground metal targets and voids.
Its combination of Pulse Induction technology, automatic calibration, smart ground balancing, metal detection, void detection, and depth determination gives it a broader role than a conventional shallow-search detector.
The official manual states that Treasure Way can operate at depths exceeding 4 meters under suitable conditions, including dense and mineralized soil, while also providing a dedicated system for estimating target depth in centimeters.
Its 45 cm search coil, 4.3-inch touchscreen, sensitivity controls, multilingual interface, and up to 10 hours of battery life make it a serious option for users searching for larger and deeper underground targets in challenging terrain.
For users looking for a detector that combines deep metal detection, underground void detection, and depth measurement, Treasure Way offers a practical all-in-one search platform.
Final CTA
Explore the Treasure Way Metal Detector
View full specifications, availability, and ordering information:
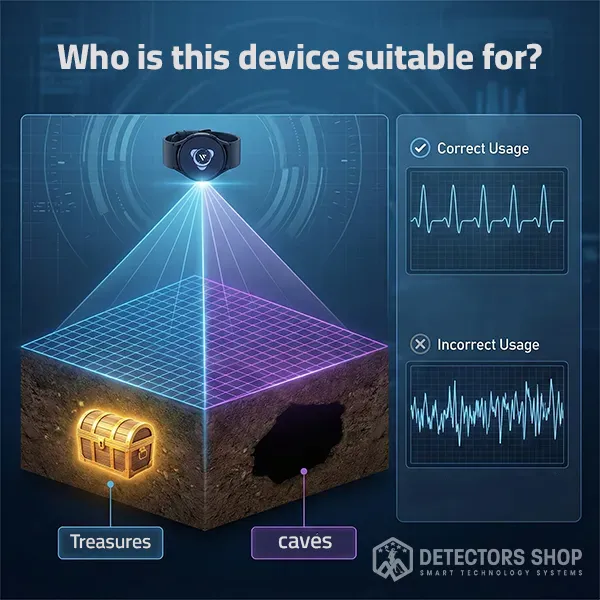
UIG Watch Detector underground exploration. Despite its very small size, it combines several scanning functions that can be used to locate metals, archaeological targets, tunnels, caves, passageways, and underground voids.
What makes the UIG Watch especially interesting is the way it combines a lightweight main unit with a smartphone and smartwatch interface. The user can perform live scans, 3D imaging, wall scans, and depth analysis while following the results directly through the connected application.
According to the official user manual, the UIG Watch uses three professional scanning and imaging techniques and can operate in seven languages, including English and Arabic. The 3D imaging system is stated to reach depths of up to 30 meters underground under suitable conditions.
This guide covers the device in detail, from its operating systems and scanning methods to target interpretation, depth estimation, specifications, accessories, and practical tips for getting better field results.
Table of Contents
What Is the UIG Watch Detector?
The UIG Watch Detector is a compact live-scanning and 3D imaging device developed for users who need more than a basic metal detector. Instead of relying only on a conventional search coil and audio signal, the system focuses on scanning, imaging, and analyzing changes beneath the ground.
The device can be used to search for precious metals, archaeological targets, tunnels, caves, passageways, and underground voids. It also includes dedicated wall-scanning capabilities, which makes it suitable for examining old structures and archaeological walls.
One of its main advantages is portability. The main unit weighs approximately 85 grams, making it much lighter than many traditional ground-imaging systems. The device communicates through Bluetooth and works with a smartphone application and smartwatch interface during scanning operations.
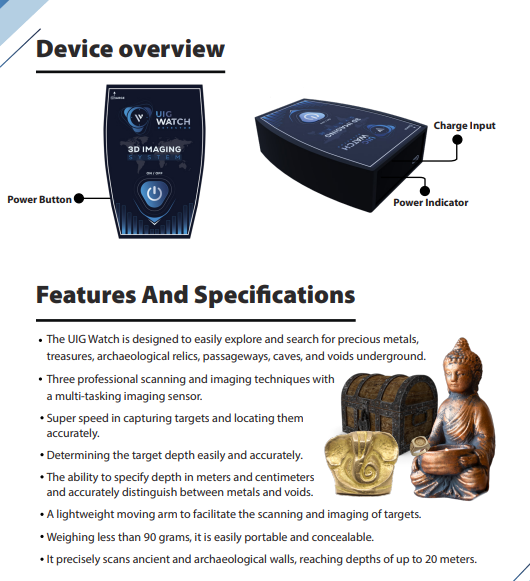
What Can the UIG Watch Detector Find?
The UIG Watch Detector is designed to detect several types of underground targets, not only metals. According to the official manual, the system can be used to search for precious metals, treasures, archaeological relics, passageways, tunnels, caves, and underground voids.
This makes the device useful in situations where the user wants to investigate both solid targets and empty spaces beneath the ground. During live scanning, the system uses different graphical responses to help distinguish between a metal target and a void.
Metal Targets
When the device detects a target during live scanning, the graphical display gradually moves toward yellow and red. The signal percentage and chart response also increase, while the sound becomes faster as the signal gets stronger.
This response can help the user identify the strongest area of the signal before moving to a more detailed scan.
Underground Voids
The UIG Watch can also detect changes that may indicate underground voids. According to the manual, a void produces a different response, with the graphical representation moving toward green, cyan, and blue tones, depending on the operating interface.
This function is particularly useful when searching for underground cavities, tunnels, caves, or other empty spaces.
Archaeological Structures and Passageways
The system is also intended for scanning areas where there may be archaeological structures or passageways below the surface.
Because the device combines live scanning with 3D imaging, the user can first identify an unusual area and then perform a more detailed imaging scan to study the target zone more carefully.
Wall Scanning
The UIG Watch Detector is not limited to ground scanning. It can also be used for scanning walls.
The manual instructs the user to hold the device horizontally and parallel to the wall at a distance of approximately 2 to 10 cm, then recalibrate when moving to a different wall.
This feature is useful when examining old or archaeological walls where there may be hidden cavities or targets behind the surface.
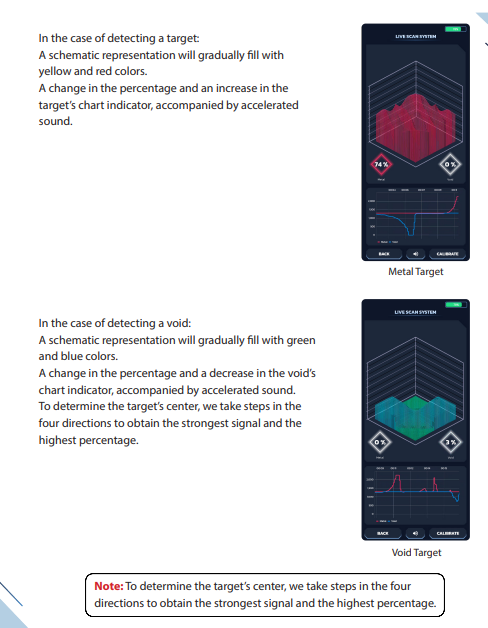
UIG Watch Detector Search Systems Explained
The UIG Watch Detector is built around two main working methods: Live Scan and 3D Imaging. Both systems are designed to help the user study underground targets, but each one serves a different purpose.
The Live Scan system is useful for fast target checking and signal tracking, while the 3D Imaging system is intended for a more detailed scan of a selected area. The official manual explains both systems for use with a smartphone and with the smartwatch interface.
Live Scan System
The Live Scan System is used to check the ground in real time while moving through the search area.
To begin, the main unit should be fixed securely and kept straight and stable toward the ground. After opening the application and selecting Live Scan, the device first calibrates with the soil. Once calibration is complete, the user walks slowly through the search area while keeping the device stable.
The manual recommends moving in one direction without changing direction during the scan. If the user needs to change direction, the device should be recalibrated before continuing.
During scanning, the system gives different visual and audio responses depending on what it detects.
- A metal target produces a response that moves toward yellow and red.
- A void produces a response that moves toward blue and cyan or green-blue tones.
- Sound and vibration intensity increase as the signal becomes stronger.
To locate the center of a target, the manual recommends checking the signal from four directions and identifying the point with the strongest response.
Live Scan with a Smartphone
The Live Scan system can also be operated directly through the mobile application.
After calibration, the phone display shows several elements, including a graphical signal representation, signal percentage, chart response, recalibration control, sound control, and navigation options.
This makes the smartphone useful when the user wants to see more detailed live information during the scan.
Live Scan with the Smartwatch
The smartwatch offers a more compact way to control the scan while moving in the field.
The user opens the UIG Watch Detector application on the smartwatch, selects Live Scan, waits for soil calibration, and then starts moving slowly through the selected area.
The watch can provide target or void indications through visual changes, vibration, and sound, which allows the user to monitor the scan without constantly holding the phone.
3D Imaging System
The 3D Imaging System is the more detailed scanning mode of the UIG Watch Detector.
Before starting a 3D scan, the user can configure several search parameters, including:
- Number of columns
- Number of steps in each column
- Soil type
- Search direction
- Automatic or manual scanning mode
The available soil types listed in the manual are:
Sandy, Clay, Rocky, and Mixed.
The user can also choose between different search movement patterns such as zigzag, bidirectional, or parallel scanning.
Automatic and Manual Scan Modes
The 3D Imaging System includes two scan modes.
In Automatic Mode, the device captures each reading automatically as the user moves through the scan grid.
In Manual Mode, the user stops at each step and presses the capture button manually.
The manual recommends taking close, equal steps of around 30 to 40 cm while keeping the device stable and directed toward the ground.
After the scan is complete, the application processes the data and displays the result as a 3D shape.
The result changes according to the captured values:
- Colors moving toward red indicate a possible target area.
- Colors moving toward blue indicate a possible void.
The user can then rotate the 3D result, change the viewing perspective, show or hide scan values, and review the area in different display modes.
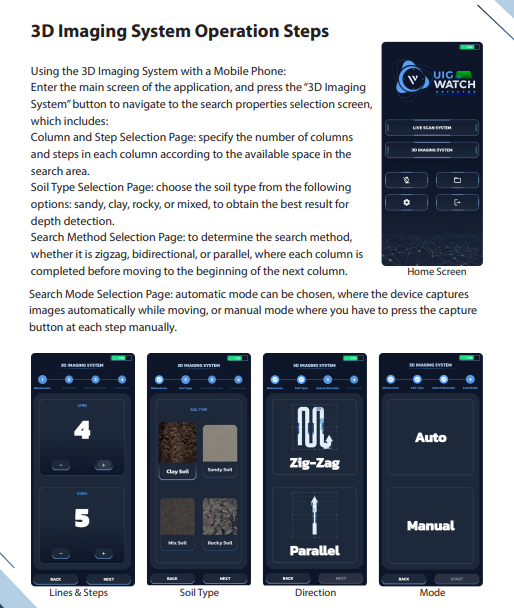
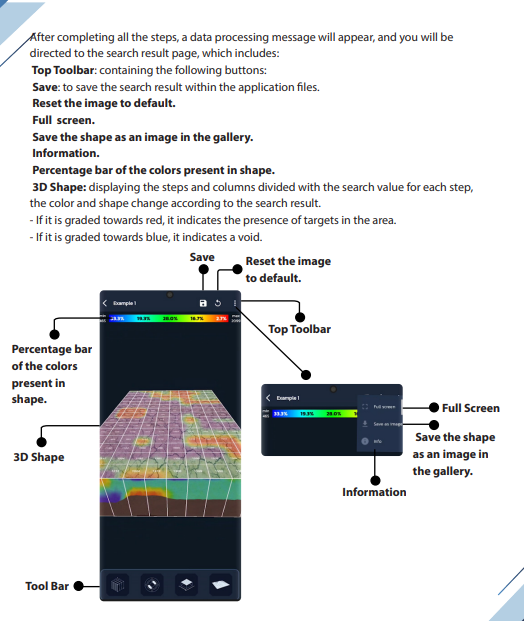
How to Use the UIG Watch Detector Step by Step
Using the UIG Watch Detector correctly is important because the quality of the scan depends heavily on calibration, movement, step spacing, and keeping the main unit stable.
The official manual explains different procedures for Live Scan and 3D Imaging, but both systems start with the same basic principle: the device must be stable and correctly calibrated before the user begins moving through the search area.
Step 1: Prepare the Device
Before starting the search, make sure the battery is sufficiently charged and all required components are correctly connected.
The manual recommends reviewing the instructions before operation and avoiding nearby sources of interference such as metal objects, mobile phones, phone networks, and other electronic devices.
For ground scanning, attach the device holder to the leg and place the main unit securely inside it. The device should remain straight and stable, pointing toward the ground.
Step 2: Connect the Smartwatch
Before using the smartwatch interface, the watch must be connected to the mobile phone.
The manual describes three possible situations:
- The watch is not connected to the phone.
- The watch is connected, but the UIG Watch application is not installed.
- The watch is connected and the application is ready to use.
If the application is missing, it can be installed on the smartwatch through the phone. Once the watch and app are ready, the user can switch from phone operation to smartwatch operation.
Step 3: Select the Search System
From the main application screen, choose the system you want to use.
For a quick real-time search, select:
Live Scan
For a structured scan that produces a detailed 3D result, select:
3D Imaging
The choice depends on whether you want to quickly locate an abnormal signal or perform a complete mapped survey of a selected area.
Step 4: Calibrate the Device
Calibration is one of the most important steps.
After selecting the search mode, keep the device still and directed toward the ground while the system calibrates with the soil.
Do not start walking before calibration is complete.
If you change the search direction or move to a different area, the manual instructs the user to recalibrate the device before continuing.
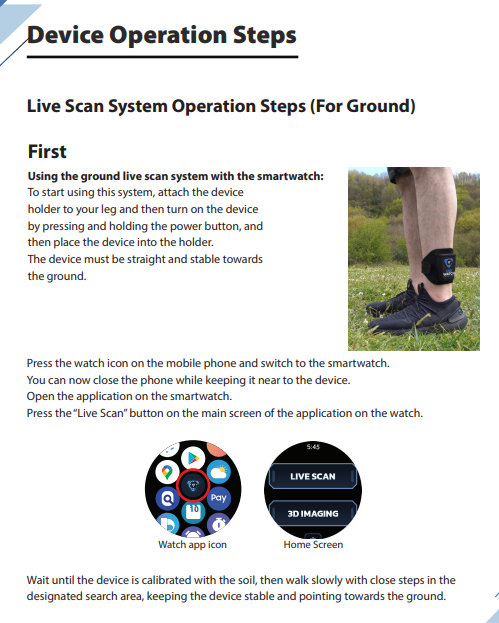
Step 5: Move Slowly and Keep the Device Stable
During Live Scan, walk slowly using close steps while keeping the unit stable and directed toward the ground.
Movement should remain in one direction.
If an obstacle blocks the route, the manual recommends moving slightly to the right or left while maintaining the same general scanning direction, then continuing forward.
This is important because sudden changes in direction or device angle can affect the consistency of the scan.
Step 6: Watch the Signal Response
During Live Scan, the application displays a changing visual response based on the signal.
For a possible metal target, the graphical display moves toward yellow and red, while the signal percentage and chart strength increase.
For a possible void, the display moves toward green and blue, accompanied by changes in the chart and sound response.
The sound becomes faster as the response becomes stronger.
Step 7: Find the Center of the Target
When a strong signal appears, do not immediately assume that the first position is the center.
The manual recommends checking the target from four directions.
Move around the suspected area and compare the signal strength. The point that produces the strongest signal and highest percentage is used to identify the target center.
This step is especially useful before moving to a detailed 3D scan.
How to Perform a 3D Imaging Scan
The 3D Imaging System requires a more structured scanning process.
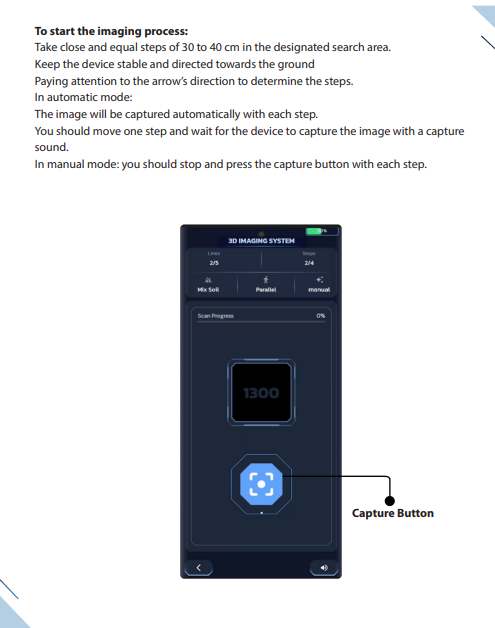
Step 1: Define the Search Grid
Before starting, choose the number of columns and the number of steps in each column according to the size of the area you want to scan.
For better accuracy, the manual recommends selecting the maximum practical number of rows and columns whenever possible.
Step 2: Select the Soil Type
Choose the soil type that best matches the search area:
- Sandy
- Clay
- Rocky
- Mixed
This setting is used by the system during depth analysis.
Step 3: Choose the Search Direction
The application offers several scanning patterns, including:
- Zigzag
- Bidirectional
- Parallel scanning
Choose the pattern that best fits the shape and size of the area.
Step 4: Choose Automatic or Manual Mode
In Automatic Mode, the system captures a reading automatically after each step.
In Manual Mode, the user stops and presses the capture button manually at each scanning point.
Both methods can produce a 3D scan, but manual mode gives the operator direct control over the exact moment each reading is recorded.
Step 5: Begin the Scan
Stand still, stabilize the device toward the ground, and press Start.
The device calibrates with the soil before the scanning screen appears.
During the scan, the screen shows information about:
- Current and remaining columns
- Current and remaining steps
- Search progress percentage
- Movement direction
- Captured search values
Step 6: Keep Equal Step Distances
The manual recommends taking close and equal steps of approximately 30 to 40 cm.
Keep the device stable and directed toward the ground throughout the scan.
In automatic mode, move one step and wait until the device captures the reading before taking the next step.
In manual mode, stop after every step and press the capture button.
Step 7: Review the 3D Result
After all columns and steps are completed, the application processes the collected data and displays a 3D result.
The manual describes the result as follows:
- A result moving toward red indicates a possible target.
- A result moving toward blue indicates a possible void.
The result can then be rotated, displayed in 2D or 3D, viewed from different angles, and saved for later analysis.
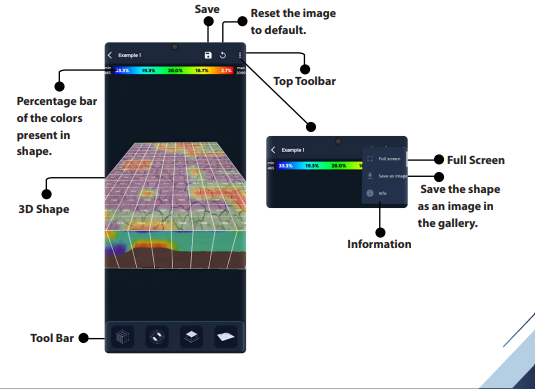
How to Read UIG Watch Detector 3D Scan Results and Determine Target Depth
Reading the UIG Watch Detector 3D scan results correctly is one of the most important parts of using the device. The system does not only show whether a signal is present; it also provides a visual 3D representation of the scanned area so the user can study the location, shape, intensity, and possible depth of the detected anomaly.
After the scan is completed, the application processes the captured data and displays a 3D shape made from the values collected at each step and column. The color and shape of the result change according to the scan data. According to the official manual, results graded toward red indicate the presence of a target, while results graded toward blue indicate a void.
Understanding the 3D Color Results
The 3D result uses color differences to help the user interpret the scanned area.
A stronger shift toward red is associated with a possible target response, while a stronger shift toward blue is associated with a possible underground void. The application also includes a color percentage bar that helps the user understand how much of each color is present in the final 3D shape.
The manual does not state that color alone identifies a specific metal type. For that reason, the safest interpretation is to use the colors to distinguish between a likely target response and a likely void response, rather than claiming that a particular color confirms gold or another specific metal.
Locating the Target Inside the Scan Area
The application includes tools that allow the user to identify the location of a target or void within the scanned grid.
The manual states that one of the toolbar functions can identify the location of the target or void in the search area and provide depth information for areas with a high probability of containing a target or void.
This is useful after the 3D scan is complete because it helps the user connect the visual anomaly on the screen with a physical location in the scanned area.
Determining Target Depth
The UIG Watch is designed to estimate the depth of detected targets and voids.
The official manual states that the device can determine target depth and display the measurement in meters and centimeters.
Within the 3D result tools, the user can select the target or void location and obtain a depth estimate for the area with the highest probability of containing the anomaly.
It is important to understand that the manual describes this as a depth result associated with the high-probability target or void area. It should therefore be treated as a scan-based estimate rather than an absolute measurement.
Use Multiple Views Before Making a Decision
The 3D analysis screen allows the user to study the result from different perspectives.
Available options include:
- Full 3D view
- Diagram view
- 2D view
- Showing or hiding scan values
- Showing or hiding the surface or wall
- Changing the viewing perspective
- Changing the color map
- Increasing or decreasing the shape resolution
Using more than one view can make it easier to understand where the strongest anomaly appears and whether its position remains consistent within the scan.
Save the Scan for Later Analysis
The application allows the scan result to be saved for later review.
The user can save the full search result inside the application, save the 3D shape as an image, and add a name or notes to the saved search operation.
This is especially useful when comparing more than one scan of the same area.
A Practical Way to Confirm a Suspicious Area
For a more reliable interpretation, it is better to compare the result with another scan of the same area rather than relying on one image only.
The manual specifically recommends using the maximum practical number of rows and columns for better accuracy.
A larger and more consistent scan grid generally gives the application more measurement points to display, which can make the final 3D shape easier to interpret.
UIG Watch Detector Technical Specifications
The UIG Watch Detector combines a compact design with technical features intended for field scanning and 3D imaging.
According to the official user manual, the main unit operates at 1 kHz, uses 2.4 GHz Bluetooth, and provides an operating time of up to 10 hours with its internal rechargeable battery. The device is weatherproof, but it is not waterproof, so it should not be used in rainy conditions or exposed directly to water.
The internal battery is a 3.7 V Li-ion battery with a capacity of 5.18 Wh. The charger operates with an input range of 90–250 VAC, 50–60 Hz, and provides a USB output of 5 VDC / 2100 mA.
Main Technical Specifications
- Operating frequency: 1 kHz
- Data processing speed: 72 MHz
- Bluetooth: 2.4 GHz
- Operating time: Up to 10 hours
- Internal rechargeable battery
- Battery type: Li-ion 3.7 VDC
- Battery capacity: 5.18 Wh
- Waterproof rating: Not waterproof – weatherproof only
- Main unit weight: 85 g
- Total package weight: 580 g
- Carrying bag dimensions: 210 × 185 × 95 mm
UIG Watch Package Contents
The UIG Watch package includes the main components required to operate and transport the system.
According to the official manual, the package contains:
- UIG Watch main unit
- Smartwatch
- Carrying bag
- Device carrier
- Charger
- Charger cable
- Car charger
- Smartwatch charger
- Warranty card
The smartwatch is supplied with the device to support convenient field operation and access to Live Scan and 3D Imaging functions.
Important Tips for Better UIG Watch Results
Like any scanning and imaging system, good results depend on more than simply turning on the device and walking over the search area.
Proper calibration, stable movement, correct soil selection, and consistent scanning are essential.
Always keep the main unit stable and directed correctly during the search. Sudden movements or unnecessary changes in direction can reduce the quality of the scan.
When performing 3D imaging, use equal steps and maintain approximately 30 to 40 cm between each step, as recommended in the official manual.
For better scan accuracy, the manual also recommends using the maximum practical number of rows and columns in the search area.
If you change direction during a Live Scan, stop and recalibrate the system before continuing.
Important Safety and Operating Notes
Before using the UIG Watch Detector, several important operating instructions should be followed.
The device should not be used during rainy conditions, and all components should be properly connected before starting a search.
The battery should be sufficiently charged before operation. The manual recommends recharging it before the battery level drops below approximately 10%.
Users should also avoid nearby sources that may interfere with the scanning process, including electronic devices, mobile phones, metal objects, and other sources of electromagnetic interference.
Only the original charger supplied with the device should be used.
UIG Watch Detector Warranty
According to the official user manual, the main electronic unit is covered by a two-year warranty against electronic malfunctions.
However, the warranty does not cover damage caused by misuse, impacts, opening the unit, drops, or other user-related damage.
The manual also states that the smartwatch, battery, charger, and other accessories are excluded from the main unit warranty.
For this reason, users should carefully follow the operating instructions and protect the main unit and accessories during transportation and field use.
Who Is the UIG Watch Detector For?
The UIG Watch Detector is suitable for users who want a compact system capable of combining live scanning and 3D imaging in one portable setup.
It can be useful for users interested in:
- Searching for underground metal targets
- Investigating archaeological areas
- Detecting underground voids
- Searching for tunnels and caves
- Examining passageways
- Scanning archaeological walls
- Creating 3D images of selected search areas
Its lightweight design also makes it practical for users who prefer a system that is easier to transport than many larger ground imaging devices.
UIG Watch Advantages
One of the main advantages of the UIG Watch is the combination of multiple scanning functions in a very compact device.
The main unit weighs approximately 85 grams, while the system provides Live Scan and 3D Imaging capabilities through smartphone and smartwatch operation.
Other important advantages include:
- Live target and void scanning
- 3D underground imaging
- Ground scanning
- Wall scanning
- Target center identification
- Depth estimation
- Automatic and manual scanning modes
- Multiple soil type settings
- Smartphone operation
- Smartwatch operation
- Seven supported languages
The manual lists the supported languages as English, Arabic, Spanish, French, German, Portuguese, and Persian.
Is the UIG Watch a Gold Detector?
The UIG Watch is designed to search for underground metal targets, archaeological targets, tunnels, caves, passageways, and voids. It combines Live Scan and 3D Imaging technology rather than operating like a conventional coil-based metal detector.
How Deep Can the UIG Watch Detector Reach?
According to the official user manual, the 3D Imaging System can reach a maximum stated depth of up to 30 meters underground.
The actual scan result depends on the search conditions, scan setup, target area, and correct operation of the system.
Can the UIG Watch Detect Underground Voids?
Yes. The system is designed to detect underground voids in addition to metal targets.
During Live Scan and 3D analysis, void responses are represented differently from target responses.
Can UIG Watch Detect Tunnels and Caves?
The official manual lists tunnels, caves, passageways, and underground voids among the types of underground structures the device is designed to search for.
Does UIG Watch Have 3D Imaging?
Yes. The device includes a dedicated 3D Imaging System that allows the user to define a scan grid, select soil type, choose the search direction, and operate in automatic or manual scanning mode.
Can UIG Watch Determine Target Depth?
Yes. The official manual states that the system can determine target depth and display measurements in meters and centimeters.
Can UIG Watch Scan Walls?
Yes. The device includes wall-scanning functionality.
During wall scanning, the unit should be kept parallel to the wall and positioned approximately 2 to 10 cm from the surface.
Can I Use the UIG Watch with a Smartwatch?
Yes. Live Scan and 3D Imaging functions can be accessed through the compatible smartwatch application after the watch is connected and the UIG Watch application is installed.
Can I Use UIG Watch with a Smartphone?
Yes. The smartphone application can be used for Live Scan, 3D Imaging, scan setup, and detailed analysis of the final 3D results.
How Long Does the Battery Last?
The official technical specifications state an operating time of up to 10 hours.
Is the UIG Watch Waterproof?
No. According to the official technical specifications, the device is weatherproof only and not waterproof.
What Soil Types Can Be Selected?
The 3D Imaging System allows the user to select:
Sandy soil
Clay soil
Rocky soil
Mixed soil
What Do Red and Blue Colors Mean in the 3D Scan?
According to the official manual, scan results that move toward red indicate a possible target, while results moving toward blue indicate a possible void.
Where to Buy the Original UIG Watch Detector
When purchasing an advanced imaging detector such as the UIG Watch Detector, it is important to buy from a trusted supplier that can provide the original device, proper support, and guidance on correct operation.
At Detectors Shop, customers can get more information about the UIG Watch Detector, its available package, current price, shipping options, and product support.
For full product details, visit:
UIG Watch Detector Product Page
Final Verdict – Is the UIG Watch Detector Worth Considering?
The UIG Watch Detector stands out mainly because of the amount of scanning functionality packed into a very small and lightweight system.
It combines Live Scan, 3D Imaging, ground scanning, wall scanning, target and void identification, and depth estimation while allowing the user to operate the system through a smartphone or smartwatch.
According to the official manual, the 3D Imaging System has a stated maximum search depth of up to 30 meters, while the wall-scanning capability is stated at up to 20 meters.
Its compact 85-gram main unit, multiple scanning modes, soil selection options, and 3D analysis tools make it an interesting solution for users who want a portable imaging system for investigating underground targets and voids.
However, accurate results depend heavily on correct calibration, stable movement, equal scanning steps, proper soil selection, and careful interpretation of the final scan.
For users willing to learn the correct scanning technique and follow the operating instructions, the UIG Watch Detector offers a versatile combination of portability, live scanning, and 3D underground imaging in one system.
Final CTA
Looking for the original UIG Watch Detector?
Explore the full specifications, price, availability, and shipping options from Detectors Shop.
View UIG Watch Detector:
https://detectors-shop.com/product/uig-watch-detector/
Gold and metal detectors work by sending signals into the ground and analyzing the response that comes back from buried objects. In most conventional detectors, this process is based on electromagnetic fields generated through a search coil. When the signal reaches a metallic object, the metal reacts and creates a secondary response that the detector can measure. The device then processes this response and converts it into useful information such as sound, Target ID numbers, or visual indicators. Different detector technologies process these signals in different ways, which is why some detectors are better for small gold nuggets while others are designed for deeper or larger targets. Understanding these differences is the first step to choosing the right detector for the search task.
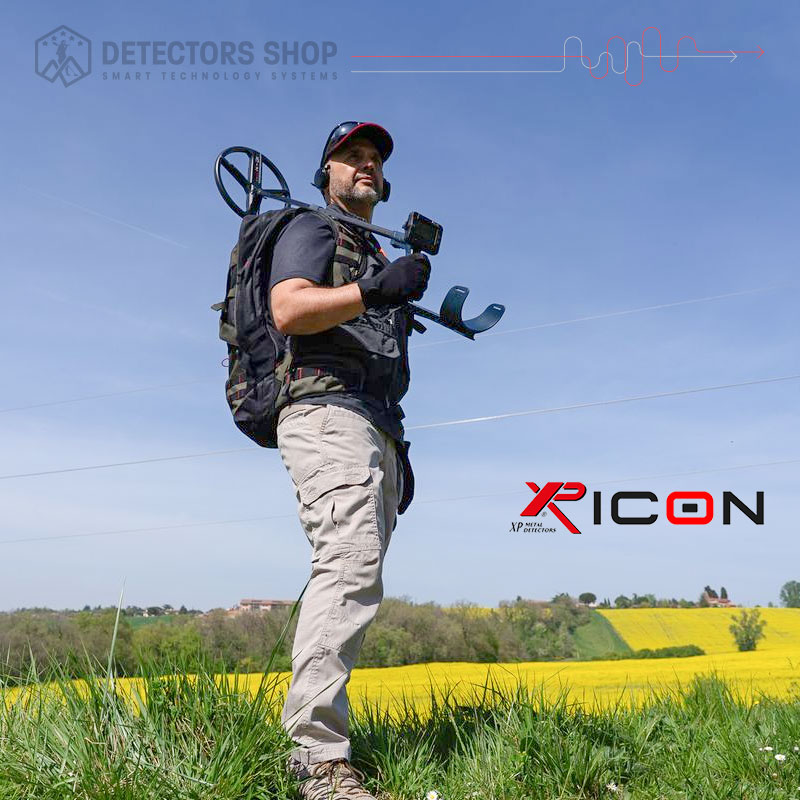
Table of Contents
Choosing the Right Detector for Your Search
The best metal detector depends on what you are searching for and the environment in which you plan to work. Some detectors are designed for small gold nuggets, coins, and jewelry, while others are better suited for larger buried metals, deeper targets, underground cavities, or wide-area exploration. For example, XP DEUS II and XP DEUS II HF2 are excellent choices for conventional metal detecting and gold prospecting. For users looking for different detection approaches, systems such as Treasure Way, Deep Seeker, UIG Ground Scanner, Gold Hunter Smart, and Titan 500 Smart provide specialized solutions for different types of searches. Choosing the correct technology is often more important than simply choosing the most powerful detector.
Professional Gold and Metal Detectors at Detectors Shop
At Detectors Shop, we offer a wide range of professional metal detectors in Dubai and advanced detection systems designed for different search applications. designed for different search applications. Our selection includes advanced metal detectors from XP as well as specialized GER Detect systems for gold, metals, ground scanning, and deeper underground exploration. Devices such as XP DEUS II HF2, Treasure Way, UIG Ground Scanner, Deep Seeker, Gold Hunter Smart, and Titan 500 Smart represent different detection technologies rather than a single solution for every search. This allows users to choose a detector based on their target, terrain, required depth, and level of experience. Our goal is to help customers select the technology that best matches their actual search requirements.
Different Technologies, Different Detectors
There is no single detector that is ideal for every type of target. XP DEUS II and DEUS II HF2 are suited to traditional coil-based metal detecting, while other systems in our range are designed for specialized applications. UIG Ground Scanner can be introduced when discussing ground scanning and subsurface visualization, while Gold Hunter Smart and Titan 500 Smart fit naturally into the section about long-range search systems. Deep Seeker and Treasure Way can also be presented in the sections that explain deeper and specialized detection methods. By connecting each detector to the technology it actually uses, the article remains educational while also helping readers discover the most suitable products available at Detectors Shop.
VLF Technology
VLF, or Very Low Frequency, is one of the most widely used technologies in modern metal detectors. A VLF detector uses a search coil to transmit a continuous electromagnetic signal into the ground and then measures the response from buried metallic objects. This technology is especially effective for identifying coins, jewelry, small metal targets, and natural gold when the detector is properly tuned for the soil conditions. VLF systems are also known for their ability to provide target discrimination and Target ID information, which helps users distinguish between ferrous and non-ferrous metals before digging. Detectors such as XP DEUS II and XP DEUS II HF2 are strong examples of advanced VLF-based detecting systems designed for high sensitivity, fast target response, and versatile field use.
Multi-Frequency and FMF Technology
Multi-frequency detectors can operate on more than one frequency, allowing them to respond effectively to a wider range of targets and ground conditions. Instead of relying on a single frequency, these systems analyze target responses across multiple frequencies to improve stability, sensitivity, and identification. This is especially useful when searching for different types of metals in changing soil conditions or when moving between beaches, fields, and mineralized ground. XP DEUS II uses advanced FMF technology to provide fast target response, strong discrimination, and excellent versatility across many search environments. XP DEUS II HF2 extends this capability toward higher-frequency applications, making it particularly suitable for small targets and natural gold prospecting.
Pulse Induction (PI) Technology
Pulse Induction, or PI, works by sending powerful electrical pulses through the search coil and measuring how long the resulting signal takes to decay. This method is highly effective in difficult ground conditions because it is generally less affected by mineralized soil and saltwater than many conventional detectors. PI technology is often used when searching for deeper metallic targets, larger buried objects, and gold in challenging terrain. It is also valued for its strong penetration and stable performance in environments where ground noise can reduce the effectiveness of other technologies. For users who need more depth and reliable performance in mineralized areas, PI-based systems can be a strong choice.
Ground Balance
Ground balance helps a metal detector separate real target signals from interference caused by minerals naturally present in the soil. Highly mineralized ground can produce false signals or reduce detection performance, especially when searching for small gold targets. By adjusting the detector to the ground conditions, the system can ignore much of this unwanted mineral response and focus more clearly on buried metal. Some detectors use manual ground balance, while others provide automatic or tracking modes that continuously adapt as the soil changes. Proper ground balancing improves stability, target identification, and overall detection depth, making it one of the most important settings for serious metal detecting and gold prospecting.
Metal Discrimination
Metal discrimination is the detector’s ability to analyze a target signal and estimate what type of metal may be buried underground. By studying factors such as conductivity and signal response, the detector can help separate ferrous metals like iron from non-ferrous targets such as gold, silver, copper, and aluminum. This does not guarantee perfect identification, because target size, depth, shape, soil conditions, and nearby metals can all influence the reading. However, good discrimination can save time by helping users avoid many unwanted targets. Advanced detectors such as XP DEUS II provide detailed Target ID information, tone options, and discrimination settings that give the user greater control during the search.
Target Identification
Target identification gives the user more information about a detected object before excavation. Modern detectors analyze the returned signal and may display a numerical Target ID, conductivity range, tone, or visual indicator that represents the probable type of metal. Higher or lower values can help distinguish between targets such as iron, coins, jewelry, and other non-ferrous metals. However, Target ID should always be treated as an estimate rather than a guarantee, because depth, soil conditions, target orientation, and nearby objects can change the reading. Experienced users usually combine the Target ID with audio response and signal stability to make a more accurate decision before digging.
3D Ground Scanning
3D ground scanning systems are designed to analyze underground structures and create a visual representation of what may be beneath the surface. Instead of only giving an audio signal, these systems collect data from multiple scan points and process it into images or maps that can help reveal metallic objects, cavities, tunnels, and other subsurface anomalies. Their performance depends heavily on correct scanning technique, soil conditions, calibration, and software interpretation. Devices such as UIG Ground Scanner are designed for users who need more detailed underground analysis rather than simple target detection. This type of technology is especially useful when the goal is to understand the shape, position, and approximate depth of a target area before excavation.
Long-Range Detection Systems
Long-range detection systems are designed to help users search large areas and identify possible target directions before moving to a more focused search. These systems are commonly used for gold, metals, and underground targets where covering a wide area quickly is important. Unlike conventional coil-based detectors, long-range systems use different sensing and directional methods depending on the device design and manufacturer. Models such as Gold Hunter Smart, Titan 500 Smart, and Deep Seeker are built for users who need broader search coverage and multiple search modes. These devices are often used as part of a larger search process, where the suspected target location is then checked more precisely with another detection or scanning system.
What Affects Detection Depth?
Detection depth depends on several factors, and no detector can achieve the same depth in every location or with every target. Larger metallic objects are generally easier to detect at greater depths than very small targets, while soil mineralization can reduce signal strength and stability. Search coil size, operating frequency, target orientation, moisture, electromagnetic interference, and detector settings also influence performance. A device that performs very well in clean soil may behave differently in highly mineralized or salty ground. This is why manufacturers usually provide maximum or estimated depth figures under specific conditions rather than a guaranteed depth for every search.
Which Technology Is Best for Gold?
The best technology for gold detection depends on the type of gold, target size, depth, and ground conditions. High-frequency VLF and multi-frequency detectors are usually better for small natural gold nuggets and shallow targets, while Pulse Induction systems are often preferred for highly mineralized soil and deeper searching. 3D ground scanners are more suitable when the goal is to analyze larger underground anomalies, cavities, or buried structures rather than simply detect a small metal target. Long-range systems are designed for broader area exploration and directional searching. For this reason, choosing the right gold detector starts with defining exactly what you want to find and where you plan to search.
Best Gold and Metal Detectors by Technology
Different detector technologies are designed for different search purposes, so the best device depends on what the user wants to find. XP DEUS II is a versatile choice for coins, jewelry, and general metal detecting, while XP DEUS II HF2 is especially suitable for small targets and natural gold prospecting. Treasure Way is a strong option for users looking for deeper search capability, while UIG Ground Scanner is designed for 3D ground analysis and underground scanning. For wider-area and directional searches, systems such as Gold Hunter Smart, Titan 500 Smart, and Deep Seeker provide specialized search modes for different target types. Matching the detector to the correct technology is the most important step toward achieving reliable results in the field.
How Do Gold and Metal Detectors Work ?
Many users ask how deep can a gold detector detect, but there is no single depth that applies to every device. Detection depth depends on target size, soil conditions, search coil size, operating frequency, and the technology used by the detector. A small gold nugget may only be detected at limited depth, while a larger buried metal object can produce a detectable signal much deeper underground. The performance of a gold detector technology also changes significantly between VLF, pulse induction, 3D scanning, and long-range systems. For this reason, depth specifications should always be considered together with the target type and search environment.
How Deep Can a Gold Detector Detect?
Many users ask how deep can a gold detector detect, but there is no single depth that applies to every device. Detection depth depends on target size, soil conditions, search coil size, operating frequency, and the technology used by the detector. A small gold nugget may only be detected at limited depth, while a larger buried metal object can produce a detectable signal much deeper underground. Different gold detector technology also affects performance, especially when comparing VLF, pulse induction, 3D scanning, and long-range systems. For this reason, depth specifications should always be considered together with the type of target and the conditions of the search area.
Gold Detector Frequency: Why Does It Matter?
Gold detector frequency plays an important role in how a detector responds to different target sizes and soil conditions. Higher frequencies are generally more sensitive to very small gold nuggets and tiny metallic targets, while lower frequencies can provide better response on larger objects and may penetrate the ground differently. A multi frequency metal detector can use more than one operating frequency to improve versatility across different targets and environments. Advanced systems using FMF technology are designed to analyze multiple frequencies and provide more stable target information in changing ground conditions. This is why frequency should always be matched to the type of gold or metal you want to detect.
Metal Detector Working Principle
The metal detector working principle is based on transmitting a signal into the ground and measuring how underground objects react to it. In conventional detectors, the search coil creates an electromagnetic field that interacts with conductive materials beneath the surface. When a metallic object enters this field, it produces a secondary signal that travels back toward the detector. The control unit analyzes this response and converts it into audio tones, Target ID values, or visual information. The strength and character of the response change according to the metal type, target size, depth, and surrounding soil. This basic process is the foundation of most modern coil-based metal detection systems.
How Do Gold and Metal Detectors Work ?
Many people ask how does a gold detector work and whether it can specifically recognize gold underground. A gold detector does not simply identify an object because it is gold; instead, it analyzes the electromagnetic response produced by the target. Gold has particular conductivity characteristics, but its response can overlap with other non-ferrous metals depending on size and shape. Advanced detectors use frequency, discrimination, Target ID, and audio information to help the operator evaluate the target. High-frequency detectors are particularly useful for detecting small natural gold nuggets. The final identification, however, normally requires recovering and inspecting the target.
VLF Metal Detector for Gold and Metals
A VLF metal detector is widely used for gold prospecting, coin hunting, jewelry searching, and general metal detection. VLF systems provide excellent sensitivity to small targets and usually offer detailed discrimination and Target ID features. Higher-frequency VLF detectors can be particularly effective when searching for small natural gold in suitable ground conditions. Devices such as XP DEUS II HF2 combine advanced frequency options with fast response and lightweight wireless operation. VLF technology is also popular because users can adjust discrimination, ground balance, sensitivity, and audio settings according to the search environment. This makes it one of the most versatile technologies available today.
Pulse Induction Metal Detector
A pulse induction metal detector uses short, powerful electrical pulses rather than a continuous signal. After each pulse, the detector measures the electromagnetic response returning from the ground and any metallic objects beneath it. PI technology is especially useful in highly mineralized soil, saltwater environments, and areas where conventional detectors may experience strong ground interference. It is commonly chosen for deeper targets and larger buried metallic objects. However, target discrimination may differ from that found on advanced VLF systems. For difficult terrain and depth-oriented searches, Pulse Induction remains an important technology in professional metal detection.
Ground Balance Metal Detector Technology
A ground balance metal detector is designed to reduce the unwanted signals produced by naturally occurring minerals in the soil. Without proper ground balance, mineralized ground can create false signals, unstable Target ID readings, and reduced detection depth. Manual ground balance allows experienced users to precisely adjust the detector, while automatic systems can analyze the soil and select an appropriate setting. Some advanced detectors also provide tracking ground balance that continuously adjusts as soil conditions change. This feature becomes particularly important when prospecting for natural gold in highly mineralized environments. Correct ground balance can significantly improve detector stability and target response.
Metal Detector Discrimination
Metal detector discrimination helps users decide whether a detected target is likely to be desirable or unwanted before digging. The detector analyzes the electrical response of the object and may classify it according to conductivity or ferrous characteristics. Iron targets can often be identified and rejected, while non-ferrous metals such as gold, silver, copper, and aluminum generate different responses. Advanced systems allow users to customize discrimination levels and audio tones according to their search preferences. However, very deep or unusual targets can sometimes produce less accurate readings. Experienced detectorists therefore combine discrimination with Target ID, audio quality, and repeated scanning from different directions.
How Does a 3D Ground Scanner Work?
A 3D ground scanner collects measurements across a defined search area and converts the collected data into a visual representation of underground anomalies. Instead of relying only on an audio response, the user performs organized scan lines while the system records changes beneath the surface. Specialized software can then display differences that may indicate metallic objects, cavities, voids, tunnels, or other underground structures. Systems such as UIG Ground Scanner are designed for this type of detailed subsurface analysis. Accurate scanning requires correct technique, consistent movement, and careful interpretation of the resulting data. 3D scanning is therefore different from conventional metal detecting with a search coil.
Long Range Gold Detector Systems
A long range gold detector is intended to help searchers cover larger areas and identify possible directions toward selected targets. These systems operate differently from conventional VLF or Pulse Induction detectors and are generally used during the initial exploration stage of a search. Devices such as Gold Hunter Smart and Titan 500 Smart provide specialized search systems designed for different target categories and field conditions. Long-range searching can be particularly useful when the area to be explored is too large for immediate detailed scanning. Once a potential location is identified, users can perform additional confirmation using a conventional detector or ground scanning system. Combining technologies can provide a more structured search process.
Conventional Detection vs 3D Scanning vs Long-Range Search
Each detection technology serves a different purpose. Conventional VLF and multi-frequency detectors are ideal when the searcher needs direct target detection, discrimination, and accurate pinpointing. Pulse Induction systems are commonly used for difficult ground conditions and deeper metallic targets. A 3D ground scanner is better suited to mapping subsurface anomalies and examining larger underground structures. Long-range systems are designed to cover wider search areas and indicate possible target directions. Understanding these differences prevents users from expecting one device to perform every type of search. The best detector is the one whose technology matches the actual target and environment.
How Do Gold and Metal Detectors Work in Mineralized Soil?
The question how do metal detectors work in mineralized soil is especially important for gold prospectors. Minerals such as iron oxides can generate their own electromagnetic response and interfere with the signal coming from a real target. Modern detectors compensate for this using ground balance, signal filtering, frequency adjustment, and specialized search programs. Pulse Induction technology can also perform well in heavily mineralized environments because it handles ground response differently from conventional VLF systems. Proper detector setup is essential because excessive sensitivity may actually make the detector less stable. Experienced users adjust the detector according to the ground rather than always using maximum power.
Can Gold Detectors Distinguish Gold from Other Metals?
Gold detectors can provide information that helps users estimate whether a target may be gold, but no conventional detector can guarantee the composition of an underground object before recovery. Gold, aluminum, copper, and other non-ferrous metals can sometimes produce similar conductivity readings. Target ID, discrimination, frequency, signal stability, and audio characteristics help narrow the possibilities. Advanced detectors provide considerably more information than a simple audio signal, allowing experienced users to make better decisions before digging. Small natural gold can also produce a different response from large jewelry or buried gold objects. For this reason, understanding the detector’s signals is just as important as selecting the detector itself.
Which Gold Detector Should You Choose?
Choosing the right gold detector begins with defining the target and search environment. For natural gold, small nuggets, coins, and jewelry, devices such as XP DEUS II and XP DEUS II HF2 provide advanced conventional detection capabilities. Users interested in underground scanning can consider UIG Ground Scanner, while other specialized search requirements may be better suited to Treasure Way or Deep Seeker. For wider-area exploration, Gold Hunter Smart and Titan 500 Smart provide additional search approaches. There is no single detector that is best for every situation. Matching the technology to the target, soil, depth, and search area is the most important consideration.
Gold and Metal Detectors at Detectors Shop
Detectors Shop provides professional gold and metal detection systems for different search applications and environments. Our range includes advanced XP metal detectors as well as specialized GER Detect systems for gold searching, ground scanning, deep detection, and wider-area exploration. Models such as XP DEUS II, XP DEUS II HF2, Gold Hunter Smart, Titan 500 Smart, Deep Seeker, Treasure Way, and UIG Ground Scanner cover several different detection technologies. This gives customers the ability to select a system based on their actual search requirements rather than relying on a single technology. Professional guidance can also help users understand which detector is most appropriate for their target and field conditions.
For buyers comparing different budgets and technologies, our complete guide to gold detector machine price in UAE explains price ranges, detector categories, and what affects the final cost.
Frequently Asked Questions
How does a gold detector work?
A gold detector sends a signal into the ground and analyzes the response generated by metallic objects. Depending on the technology, it may use VLF, multiple frequencies, Pulse Induction, ground scanning, or another detection method. The resulting signal is then converted into audio, Target ID, or visual information that helps the user evaluate the target.
How do metal detectors work?
Metal detectors generally create an electromagnetic field around the search coil. When a metallic object enters that field, it generates a secondary electromagnetic response. The detector measures this response and processes it to provide information about the possible target.
What frequency is best for detecting gold?
Higher frequencies are generally more sensitive to small natural gold nuggets, while lower frequencies tend to respond well to larger targets. Multi-frequency and FMF systems offer greater versatility because they can work with several frequencies depending on the detector and search program.
Can a metal detector detect only gold?
No conventional metal detector can detect only gold while completely ignoring every other metal. Gold detectors use Target ID, discrimination, conductivity, frequency, and audio information to help users distinguish probable gold targets from other metals.
How deep can a gold detector detect?
There is no fixed answer to how deep can a gold detector detect. Depth depends on the size of the target, detector technology, search coil, ground mineralization, frequency, orientation, settings, and environmental conditions. Larger objects can generally be detected deeper than very small gold nuggets.
What is the difference between VLF and Pulse Induction?
VLF detectors are known for sensitivity, discrimination, and detailed target identification, while Pulse Induction detectors are often preferred for mineralized ground, saltwater, and deeper targets. The best option depends on the intended search.
Conclusion
Understanding how gold and metal detectors work makes it easier to choose the correct device and use it effectively. VLF, multi-frequency, FMF, Pulse Induction, 3D scanning, and long-range technologies each solve different detection challenges. Factors such as target size, depth, soil mineralization, operating frequency, and search technique can all affect performance. Rather than choosing a detector only according to its advertised depth, users should first identify what they want to find and where they plan to search. With the right technology and proper setup, modern gold and metal detectors can provide powerful tools for professional exploration and prospecting.
Introduction
Keeping your XP metal detector updated is one of the easiest ways to ensure that you are using the latest improvements, compatibility updates, bug fixes, and performance enhancements released by XP Metal Detectors.
Depending on the model, XP firmware updates can apply to the detector’s remote control, wireless headphones, coils, and other compatible accessories. In some cases, different components must also be updated to compatible firmware versions to continue working together correctly.
In this complete guide, we will explain how to update XP metal detectors step by step, including the update process for XP DEUS II, XP ICON, XP DEUS, WS6, WSA II, and other compatible XP accessories.
You will also learn how to update XP metal detectors what you need before starting, how to access the official XP updater, how to avoid common update mistakes, and how to solve the most frequent firmware update problems.
Table of Contents
What You Need Before Updating Your XP Metal Detector
how to update XP metal detectors Before starting the update process, prepare everything you need in advance to avoid interruptions or connection problems.
You will need:
- A compatible XP metal detector or accessory
- A Windows PC or compatible computer
- A stable internet connection
- The correct USB data cable
- A sufficiently charged remote control or wireless headphones
- Access to the official XP update page
- A supported web browser when using the XP online updater
It is also a good idea to write down any custom programs or personal settings before updating, especially if you use modified search programs that you may want to restore later.
Important: Use the correct XP USB/data cable for the component you are updating. A charging-only cable may not allow the updater to detect the device.
How to Access the Official XP Updater
how to update XP metal detectors ??
XP provides official update tools for supported detectors and accessories. For the safest update process, always use the official XP website rather than third-party download pages.
Step 1 – Open the XP Updates Page
Go to the official XP Metal Detectors website and open the Updates section.
Step 2 – Choose Your Detector
Select the product you want to update XP metal detectors , such as:
Step 3 – Open the Correct Updater
Each detector family uses its own update process. Make sure you select the updater that matches your detector and accessory.
For DEUS II, the updater may include separate options for components such as:
- Remote Control
- WS6
- WSA II / WSA II XL
- Compatible stereo headphones
Step 4 – Follow the On-Screen Instructions
Once the updater opens, follow the instructions shown on the screen carefully. Do not connect or disconnect the device until the updater asks you to do so.
Important: Always choose the correct detector and accessory before starting. Using the wrong updater or interrupting the process may cause the update to fail.
How to Update XP DEUS II Remote Control – Step by Step
Updating the DEUS II Remote Control is straightforward when you follow the correct sequence. XP recommends using its official updater and the correct USB data cable supplied with the detector.
Step 1 – Charge the Remote Control
Before starting, make sure the DEUS II Remote Control has enough battery power.
Avoid beginning a firmware update when the battery is very low, as an unexpected shutdown during installation can interrupt the process.
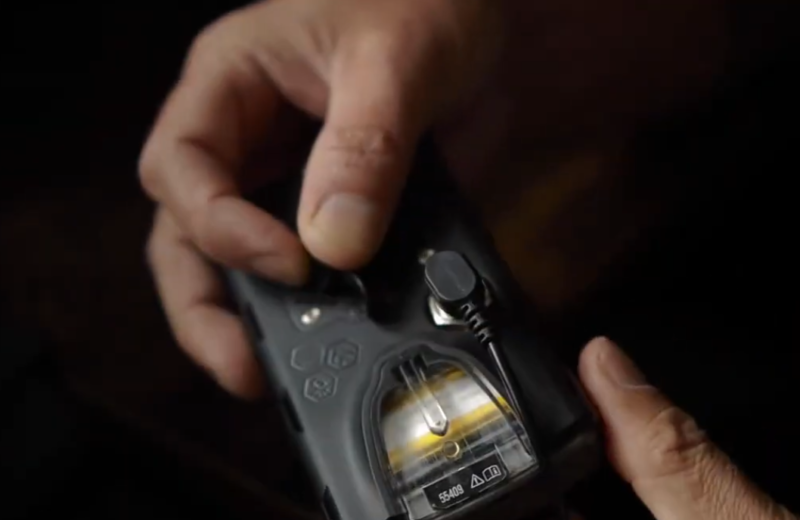
Step 2 – Open the Official XP Updater
Open the official XP update page on your computer and select the DEUS II update XP metal detectors.
For the online updater, XP recommends using a compatible browser such as Google Chrome or Microsoft Edge. how to update XP metal detectors
Step 3 – Put the DEUS II Remote Control in Update Mode
On the DEUS II Remote Control, navigate to:
OPTION → CONFIG → UPDATE → CONFIRM
Once confirmed, the remote control will be ready to communicate with the updater.
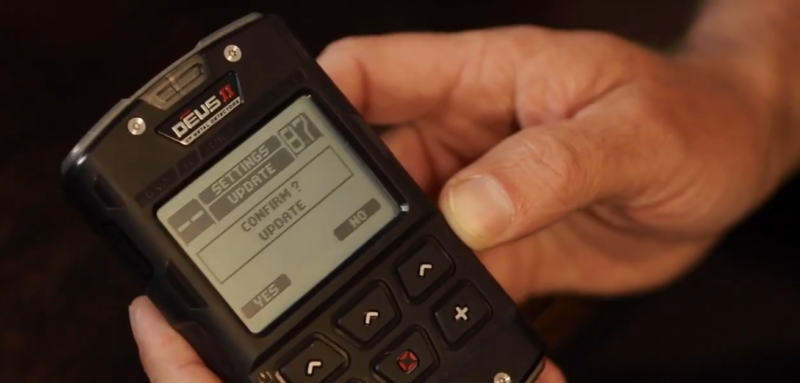
Step 4 – Connect the Remote Control to the Computer
Use the correct XP USB cable supplied with the DEUS II and connect the Remote Control to a USB port on your computer.
Make sure the cable is properly connected and avoid using a charging-only USB cable.
Step 5 – Select the Firmware Version
Inside the update XP metal detectors, select the firmware version you want to install.
In most cases, users should choose the latest stable version available unless XP specifically recommends another version for compatibility reasons.
Step 6 – Start the Firmware Update
Follow the instructions displayed by the update XP metal detectors and begin the installation.
The updater will transfer the firmware to the DEUS II Remote Control and install it automatically.
Step 7 – Do Not Disconnect the Device
While the update is running:
- Do not unplug the USB cable.
- Do not turn off the computer.
- Do not switch off the Remote Control.
- Do not close the updater page.
Wait until the updater confirms that the firmware installation has finished successfully.
Step 8 – Restart the DEUS II Remote Control
After the update XP metal detectors confirms that the process is complete, disconnect the cable only when instructed and restart the Remote Control.
Step 9 – Check the Firmware Version
After restarting the detector, open the system information menu and verify that the new firmware version has been installed correctly.
Important: If you use wireless headphones such as WS6, WSA II, WSA II XL, or compatible stereo XP headphones, update them to the firmware version required by the Remote Control. XP warns that incompatible firmware versions between components can prevent them from working together correctly.
XP’s official instructions confirm the DEUS II update path through OPTION → CONFIG → UPDATE → CONFIRM, and they also stress that the remote and compatible wireless headphones should be kept on matching firmware versions where required.
How to Update XP WS6 Headphones – Step by Step
If you use the XP WS6 wireless headphones with your DEUS II, they should be updated whenever XP requires the headphones and Remote Control to use compatible firmware versions.
Step 1 – Open the WS6 Settings
Turn on the WS6 module and press the menu button to access the options.
Navigate to the configuration menu.
Step 2 – Enter Update Mode
From the WS6 menu, select:
CONFIG → UPDATE
Press and hold the required button to confirm update mode.
The WS6 will now be ready to connect to the XP updater.
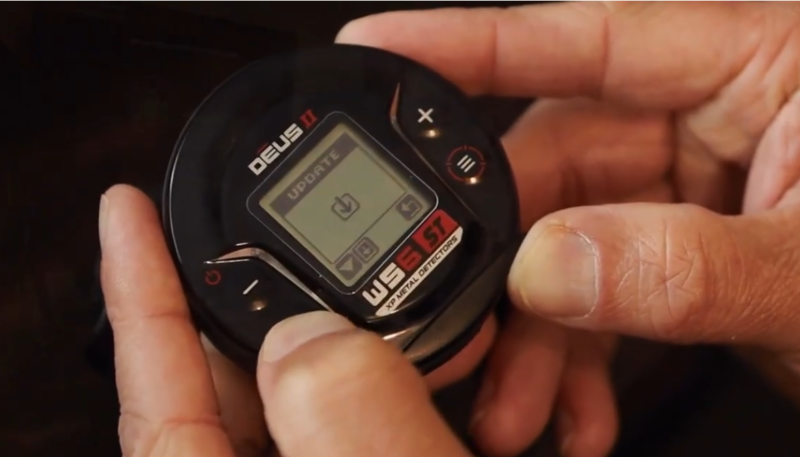
Step 3 – Open the XP Updater
On your computer, open the official XP updater and select the WS6 option.
Make sure you are using the updater intended for the WS6 and not another XP accessory.
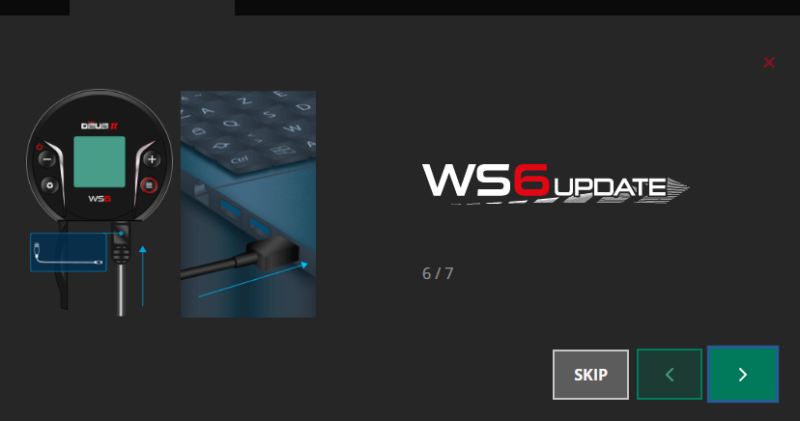
Step 4 – Connect the WS6 to the Computer
Use the correct single USB data cable supplied for the WS6.
Connect the WS6 directly to your computer when the updater asks you to do so.
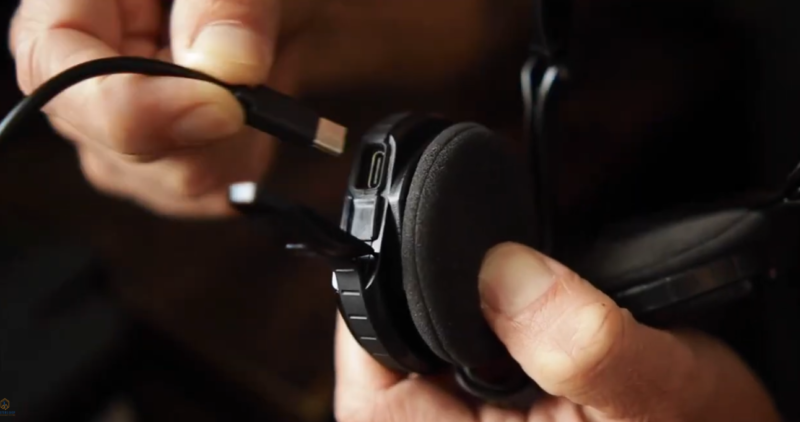
Step 5 – Select the Firmware Version
Choose the firmware version required for your DEUS II system.
For proper compatibility, the WS6 should use the version specified by XP for the Remote Control firmware you have installed.
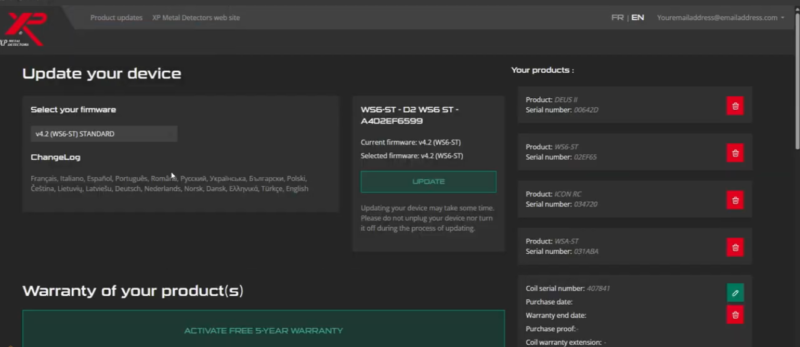
Step 6 – Start the Update
Follow the instructions displayed on the XP updater and begin the firmware installation.
Do not disconnect the WS6 while the update is in progress.
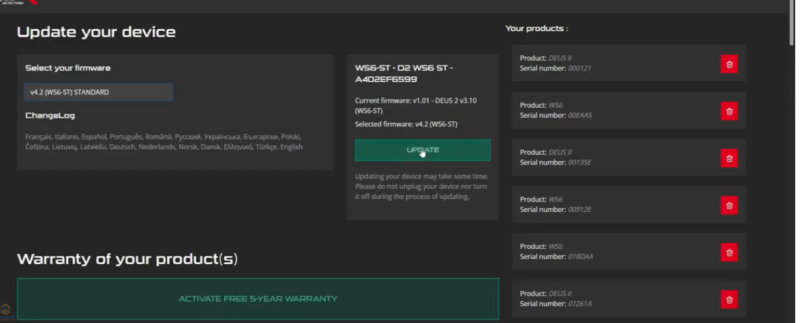
Step 7 – Wait for the Update to Finish
Keep the WS6 connected until the updater confirms that the installation has completed successfully.
Do not close the updater, unplug the cable, or switch off the computer during this process.
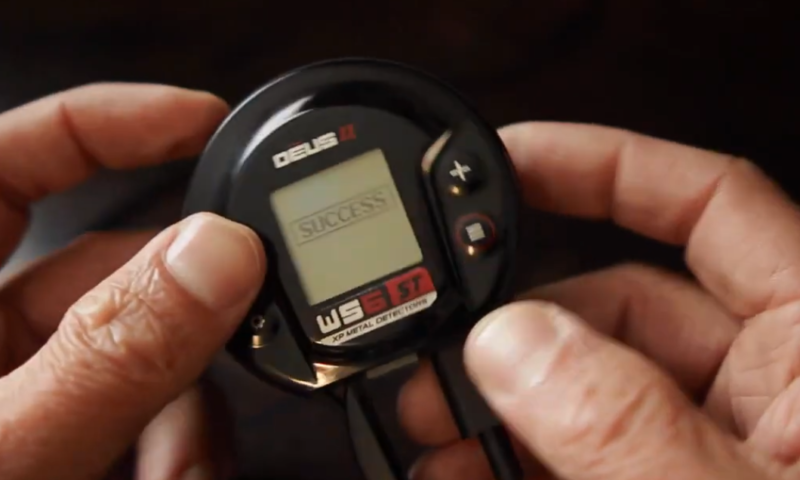
Step 8 – Restart the WS6
Once the update XP metal detectors is complete, disconnect the cable only when instructed and restart the WS6.
Step 9 – Reconnect the WS6 to DEUS II
Turn on the DEUS II Remote Control and verify that the WS6 connects normally.
If the headphones do not reconnect after the update, check that the Remote Control and WS6 are using compatible firmware versions.
Important: XP specifically recommends updating the WS6 and DEUS II Remote Control to the same required firmware version to ensure correct wireless communication.
How to Update XP WSA II and WSA II XL Headphones – Step by Step
The XP WSA II and WSA II XL wireless headphones can also receive firmware updates through the official XP updater. XP recommends keeping them on the same firmware version as the DEUS II Remote Control to ensure proper communication.
Step 1 – Charge the Headphones
Before starting, make sure your WSA II or WSA II XL headphones are sufficiently charged.
XP recommends having at least 50% battery level before beginning a firmware update.
Step 2 – Open the Official XP Updater
On your computer, open the official XP updater.
Select the:
WS6 or WSAII
tab at the top of the updater page.
The WSA II and WSA II XL use the same updater option.
Step 3 – Put the Headphones in Update Mode
To place the WSA II or WSA II XL headphones into update mode:
- Press the – button.
- Then press the + button.
- Hold both buttons together for approximately 12 seconds.
The headphones will then be ready for the firmware update.
Step 4 – Connect the Correct USB Cable
Connect the headphones to your computer using the single USB DATA cable supplied with the headphones.
Important: Do not use the three-output DEUS II charging cable for this step. XP specifically requires the single USB data cable for updating the WSA II and WSA II XL.
Step 5 – Select the Firmware Version
Follow the instructions displayed by the XP updater and select the firmware version that matches your DEUS II system.
Step 6 – Start the Firmware Update
Begin the update and keep the headphones connected while the firmware is being transferred and installed.
Do not unplug the USB cable or close the updater during the process.
Step 7 – Wait for Confirmation
Wait until the updater confirms that the firmware installation has completed successfully.
Only disconnect the headphones when the updater indicates that it is safe to do so.
Step 8 – Restart and Test the Headphones
Restart the WSA II or WSA II XL headphones and turn on your DEUS II Remote Control.
Confirm that the headphones reconnect and operate normally.
Compatibility Warning: XP states that the DEUS II Remote Control and WSA II / WSA II XL headphones must use the same required firmware version. If the versions do not match, the headphones may not communicate with the Remote Control correctly.
XP’s official instructions specifically state that WSA II and WSA II XL use the same updater tab, enter update mode by holding – and + for about 12 seconds, and must use the single USB DATA cable rather than the three-output cable.
How to Update XP ICON / ICON X – Step by Step
XP provides a dedicated updater for the XP ICON and ICON X detectors. The update process is designed to keep the detector’s remote control and compatible wireless headphones up to date with the latest functions and improvements.
Step 1 – Charge the ICON or ICON X Components
Before starting, make sure the Remote Control and any wireless headphones you plan to update have sufficient battery power.
Avoid starting a firmware update with a nearly empty battery.
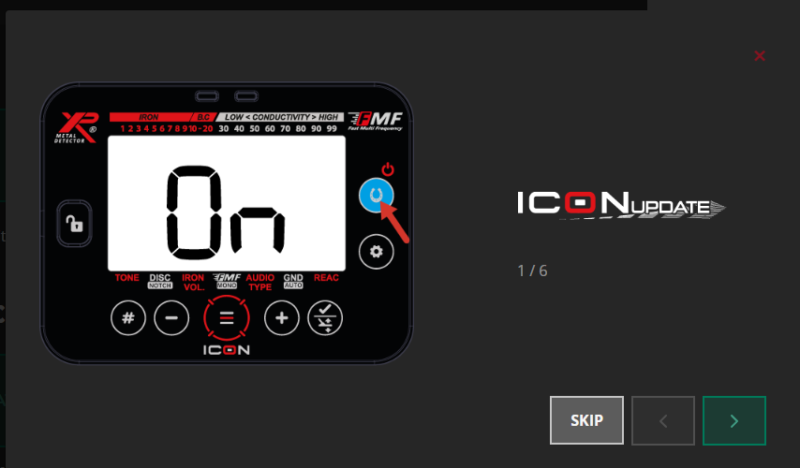
Step 2 – Open the Official XP Updates Page
Go to the official XP Metal Detectors website and open the Updates section.
Select:
ICON / ICON X
Then open the official ICON Updater.
Step 3 – Select the Component You Want to Update
The ICON update XP metal detectors can be used to update supported components of the detector system, including the Remote Control and compatible wireless headphones.
Choose the correct component before continuing.
Step 4 – Connect the Remote Control
Use the correct USB data cable and connect the ICON or ICON X Remote Control to your computer when the updater asks you to do so.
Make sure the USB connection is stable throughout the process.
Step 5 – Follow the Updater Instructions
The official XP updater will guide you through the required steps.
Follow every instruction shown on the screen carefully and do not disconnect the Remote Control while firmware is being transferred or installed.
Step 6 – Install the Available Firmware
Choose the firmware version offered by the official updater and start the installation.
Wait until the update process reaches completion.
Step 7 – Wait for Confirmation
Do not disconnect the USB cable until the updater confirms that the update has finished successfully.
Closing the browser or disconnecting the device during installation may interrupt the update.
Step 8 – Restart the Remote Control
Once the updater confirms completion, disconnect the device when instructed and restart the ICON or ICON X Remote Control.
Step 9 – Update Compatible Wireless Headphones
If your detector is paired with compatible XP wireless headphones, return to the ICON updater and update the headphones when required.
Follow the specific on-screen instructions for the headphone model you are using.
Step 10 – Test the Detector
After completing the updates:
- Turn on the detector.
- Confirm that the Remote Control starts normally.
- Check the wireless headphone connection.
- Confirm communication with the search coil.
- Perform a short detection test.
If all components connect normally, the update has been completed successfully.
Important: Always use the official XP ICON updater and follow the instructions displayed on screen. The exact update procedure may change as XP releases new firmware versions.
How to Update the Original XP DEUS – Step by Step
The original XP DEUS can also receive firmware updates through the official XP updater. Depending on the update, the process may involve the Remote Control, wireless headphones, and coil software.
For proper operation, XP recommends keeping all DEUS components on the same compatible firmware version.
Step 1 – Fully Charge All DEUS Components
Before starting the update, make sure the following components are fully charged:
- DEUS Remote Control
- Wireless headphones
- Search coils
A firmware update should not be started with a low battery level.
Step 2 – Open the Official DEUS Updater
Go to the official XP Metal Detectors Updates page and select:
DEUS UPDATER
Use the English version of the updater and follow the instructions displayed on the screen.
Step 3 – Prepare the DEUS Remote Control
Turn on the Remote Control and follow the updater instructions to place it in the required update mode.
Do not connect the USB cable before the updater asks you to do so.
Step 4 – Connect the Remote Control
Use the single USB data cable recommended by XP.
Connect the DEUS Remote Control directly to the computer when prompted by the updater.
Important: Do not use the three-output charging cable for the firmware update.
Step 5 – Select the Firmware Version
Choose the firmware version available through the official DEUS updater.
Unless you have a specific compatibility reason to use another version, install the latest stable firmware offered by XP.
Step 6 – Update the Remote Control
Start the firmware installation and keep the Remote Control connected until the updater confirms that the process has finished successfully.
Do not unplug the USB cable during installation.
Step 7 – Update the Wireless Headphones
After updating the Remote Control, follow the updater instructions to update the compatible DEUS wireless headphones.
The headphones should use the same compatible firmware version as the Remote Control.
Step 8 – Update the Search Coils When Required
Some DEUS firmware updates may also include coil software.
Follow the official updater instructions carefully and make sure all coils used with the detector are updated when required.
Step 9 – Restart the DEUS System
After all required components have been updated:
- Restart the Remote Control.
- Restart the headphones.
- Select the correct coil.
- Confirm that all components communicate normally.
Step 10 – Test the Detector
Perform a quick functional test after the update.
Check:
- Coil connection
- Wireless headphone connection
- Audio response
- Target detection
- Saved programs and settings
Important Compatibility Rule: XP states that the DEUS Remote Control, headphones, and coils should use the same compatible firmware version. For example, components running different major firmware versions may not communicate correctly.
XP’s official DEUS V6 instructions specifically say that the Remote Control, headphones, and coils should all be updated to the same version, and its current update page still provides a dedicated DEUS updater for these components.
What to Do After Updating Your XP Metal Detector
Once the firmware update is complete, do not start detecting immediately. Take a few minutes to confirm that all components are working correctly and that the update was installed successfully.
1. Check the Installed Firmware Version
Open the detector’s system information menu and confirm that the expected firmware version is displayed.
If the version number has not changed, repeat the update process and make sure the installation completed successfully.
2. Reconnect Wireless Headphones
Turn on your XP wireless headphones and check that they connect normally to the Remote Control.
If they do not connect, confirm that both components are running compatible firmware versions.
3. Check Coil Connection
Verify that the search coil is recognized by the detector and responds correctly.
If the coil is not detected, check the pairing settings and confirm whether the firmware update also required a coil update.
4. Reconnect the MI-6 Pinpointer
If you use an XP MI-6 pinpointer, check that it is still paired correctly after the update.
Reconnect or re-pair it if necessary.
5. Restore Custom Programs
Some firmware update XP metal detectors may reset or modify custom settings.
If you saved your preferred programs before updating, re-enter them and confirm that all important parameters are correct.
6. Test the Audio
Check the headphones and detector audio before going into the field.
Test:
- Volume
- Audio type
- Target tones
- Wireless connection
- MI-6 audio, if connected
7. Perform a Quick Detection Test
Pass a few known metal targets under the coil and confirm that the detector responds normally.
This simple test can help identify connection or configuration issues before you begin a full detecting session.
8. Restart the Complete System
Finally, switch off the Remote Control, headphones, and accessories, then restart the entire system once.
If all components connect normally and the detector responds correctly, the firmware update is complete.
Tip: After every major firmware update, spend a few minutes reviewing the detector settings. New firmware versions may introduce additional options, audio features, compatibility changes, or improvements that are worth testing.
XP Firmware Update Problems and Solutions
Even when the update process is simple, connection issues, incorrect cables, incompatible firmware versions, or interrupted installations can sometimes cause problems. The solutions below cover the most common XP firmware update issues.
XP Updater Does Not Detect the Detector
If the updater cannot detect your XP device:
- Disconnect and reconnect the USB cable.
- Try another USB port on the computer.
- Make sure you are using a USB data cable, not a charging-only cable.
- Close and reopen the updater.
- Restart the detector and enter update mode again.
- If using an online updater, try Google Chrome or Microsoft Edge.
USB Device Not Recognized
If Windows does not recognize the detector or headphones, first verify the cable and USB port.
Avoid USB hubs whenever possible and connect the XP device directly to the computer.
If the problem continues, restart the computer and repeat the process.
Firmware Update Stops or Freezes
If the update appears to stop:
- Do not immediately disconnect the device.
- Wait for the updater to respond.
- Check that the internet connection is still active.
- Avoid closing the browser or update software during installation.
If the updater reports an error, restart the process from the beginning using the official XP updater.
DEUS II Remote Control Will Not Enter Update Mode
Confirm that you are following the correct menu path:
OPTION → CONFIG → UPDATE → CONFIRM
If the update option is unavailable, check the firmware-specific instructions provided by XP, as older versions may use slightly different procedures.
WS6 Does Not Connect After the Update
One of the most common causes is a firmware mismatch between the WS6 and DEUS II Remote Control.
Check the installed firmware version on both devices and update the WS6 again if necessary.
WSA II or WSA II XL Does Not Work After Updating
Verify that:
- The headphones were updated using the correct updater option.
- The correct single USB data cable was used.
- The firmware version is compatible with the DEUS II Remote Control.
Restart both devices after confirming the firmware versions.
The Search Coil Does Not Connect
If the coil no longer communicates with the detector:
- Restart the detector.
- Check that the correct coil is selected.
- Re-pair the coil if necessary.
- Verify whether the firmware update required a coil update.
For the original XP DEUS, coil firmware compatibility can be especially important.
The Update Fails Before Completion
Common causes include:
- Unstable USB connection
- Incorrect USB cable
- Low battery
- Browser interruption
- Computer sleep mode
- Internet connection failure
Repeat the update only after correcting the likely cause.
The Detector Restarts After an Update
A restart after firmware installation can be normal.
Allow the detector to complete the startup process and then check the installed firmware version.
If the detector repeatedly restarts or fails to load normally, reconnect it to the official updater and follow XP’s recovery or update instructions.
Custom Programs Have Disappeared
Some updates may reset or modify saved user settings.
This is why it is recommended to record important custom programs before installing new firmware.
Re-enter your preferred settings after confirming that the update was completed successfully.
The Remote and Headphones Show Different Firmware Versions
Do not ignore a firmware mismatch.
XP requires compatible firmware versions between the Remote Control and supported wireless headphones for proper communication.
Update the component that is still running the older or incompatible version.
Important: If an update repeatedly fails, avoid experimenting with unofficial firmware files or third-party update tools. Return to the official XP updater and follow the instructions for your exact detector and accessory.
XP Firmware Update Safety Tips and Important Warnings
Firmware updates are generally safe when the official XP procedure is followed correctly. However, interrupting the process or using the wrong connection method can cause update failures.
Use Only the Official XP Updater
Always download or access firmware updates through the official XP Metal Detectors website.
Avoid unofficial firmware files, modified software, or third-party download pages.
Use the Correct USB Data Cable
Not every USB cable can transfer data.
A charging-only cable may power the device without allowing the updater to recognize it.
Always use the cable recommended by XP for the specific Remote Control, headphones, or accessory you are updating.
Do Not Disconnect the Device During Installation
Never unplug the USB cable while firmware is being transferred or installed.
Wait until the updater confirms that the process has finished.
Keep the Battery Sufficiently Charged
Make sure the component being updated has enough battery power before starting.
This reduces the risk of the device shutting down during installation.
Prevent the Computer from Entering Sleep Mode
During the update, keep the computer active.
Avoid:
- Sleep mode
- Automatic shutdown
- Restarting the computer
- Closing the updater
- Disconnecting from the internet
Update Compatible Components When Required
An XP detector may contain several wireless components that communicate with each other.
Depending on the detector and firmware version, this may include:
- Remote Control
- Wireless headphones
- Search coils
- Compatible accessories
If XP requires multiple components to use matching or compatible firmware versions, update all of them before returning to normal use.
Save Important Settings Before Updating
Write down any important custom programs, audio settings, discrimination settings, or other personal configurations before installing a major firmware update.
This makes it easier to restore your preferred setup if settings are reset.
Do Not Force an Update After an Error
If the updater reports a failure, first identify the likely cause.
Check:
- USB cable
- USB port
- Battery level
- Internet connection
- Correct updater
- Correct update mode
Then restart the update process using the official instructions.
Verify the Detector After Every Update
Once the firmware installation is complete, check that the detector, headphones, coil, and accessories communicate correctly before using the detector in the field.
Best Practice: Treat every major XP firmware update as a complete system update. Check all components, verify their compatibility, and perform a short functional test before your next detecting session.
Frequently Asked Questions About XP Firmware Updates
What is the latest XP DEUS II firmware version?
The latest available firmware version can change whenever XP releases a new update. Always check the official XP Metal Detectors update page before starting the process to confirm the current version.
How do I update my XP DEUS II?
Open the official XP updater, put the DEUS II Remote Control into update mode, connect it using the correct USB data cable, select the firmware version, and follow the on-screen instructions until the update is complete.
Do I need to update my XP headphones too?
Yes, when XP requires matching or compatible firmware versions, the wireless headphones should be updated as well. This is especially important with components such as WS6, WSA II, and WSA II XL.
How do I update XP WS6 headphones?
Enter the WS6 update mode from the configuration menu, connect the WS6 to the computer using the correct USB data cable, select WS6 in the official XP updater, and follow the installation instructions.
How do I update WSA II or WSA II XL headphones?
Open the WSA II updater option, place the headphones into update mode by holding the required buttons, connect them using the correct single USB data cable, and follow the updater instructions.
Can I update an XP detector without a computer?
This depends on the detector and the update method currently provided by XP. For firmware procedures that require the official online updater or USB connection, a compatible computer is required.
Why does my WS6 not connect after an update?
The most common cause is incompatible firmware between the WS6 and the DEUS II Remote Control. Check both versions and update the component that is running an incompatible version.
Will an XP firmware update erase my custom programs?
Some updates may reset or change stored settings. It is a good idea to write down your custom programs and important settings before updating.
Can I install an older XP firmware version?
Older firmware availability depends on what XP currently provides through its official updater. If an older version appears in the firmware selection menu, it may be available for installation.
What should I do if the XP updater does not detect my detector?
Check the USB data cable, try another USB port, restart the updater, confirm that the device is in update mode, and make sure you are using the correct official updater.
Is XP firmware free?
Yes. Official XP firmware updates are provided by XP Metal Detectors for supported devices and accessories.
How long does an XP firmware update take?
The exact time depends on the device, firmware version, internet connection, and computer. The most important point is to leave the device connected until the updater confirms that the process is complete.
Should the Remote Control and headphones use the same firmware?
When XP specifies matching firmware versions, yes. Using incompatible versions can prevent the Remote Control and wireless headphones from communicating correctly.
Is it safe to interrupt an XP firmware update?
No. Do not disconnect the USB cable, shut down the computer, or close the updater while firmware is being installed. Wait until the updater confirms completion.
Official XP Update Resources
For firmware update XP metal detectors , always use the official XP Metal Detectors website and the update tool intended for your exact detector or accessory.
Recommended official resources include:
- XP Metal Detectors Updates Page
- XP DEUS II Updater
- XP ICON / ICON X Updater
- XP DEUS Updater
- Official XP User Manuals
- Official XP Firmware Release Notes
how to update XP metal detectors Before installing any firmware, check the official XP update page for the latest instructions, supported devices, compatibility notes, and available firmware versions.
Important: Avoid downloading firmware files from unofficial websites, forums, or file-sharing services. Using the official XP updater is the safest way to keep your detector and accessories compatible.
Conclusion
Updating your XP metal detector is an important part of keeping the system compatible with the latest firmware improvements, accessories, and performance updates released by XP Metal Detectors.
Whether you use XP DEUS II, XP ICON, ICON X, the original XP DEUS, WS6, WSA II, or other compatible XP accessories, the safest approach is always the same: use the official XP updater, follow the instructions carefully, use the correct USB data cable, and never interrupt the firmware installation.
After every update, check the firmware version, reconnect your wireless components, verify coil communication, restore any custom settings if necessary, and perform a short detection test before returning to normal use.
Because XP continues to release new firmware versions, this guide should be checked and update XP metal detectors whenever a new version becomes available.
xp gold price
XP Product
-
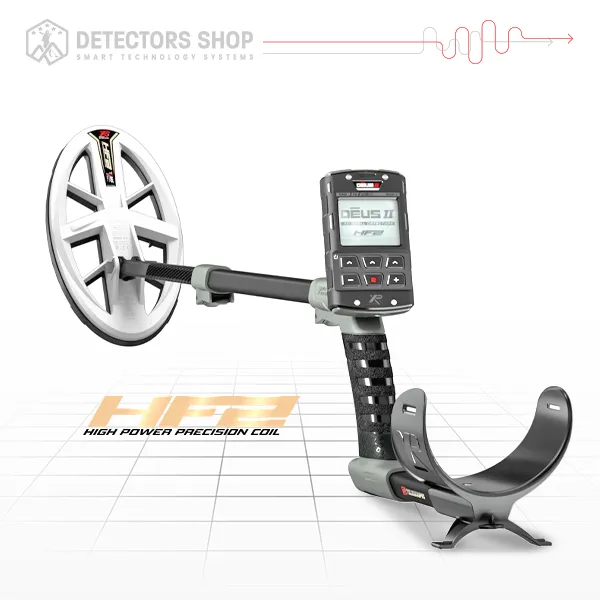
Deus Gold
$ 1,800 -
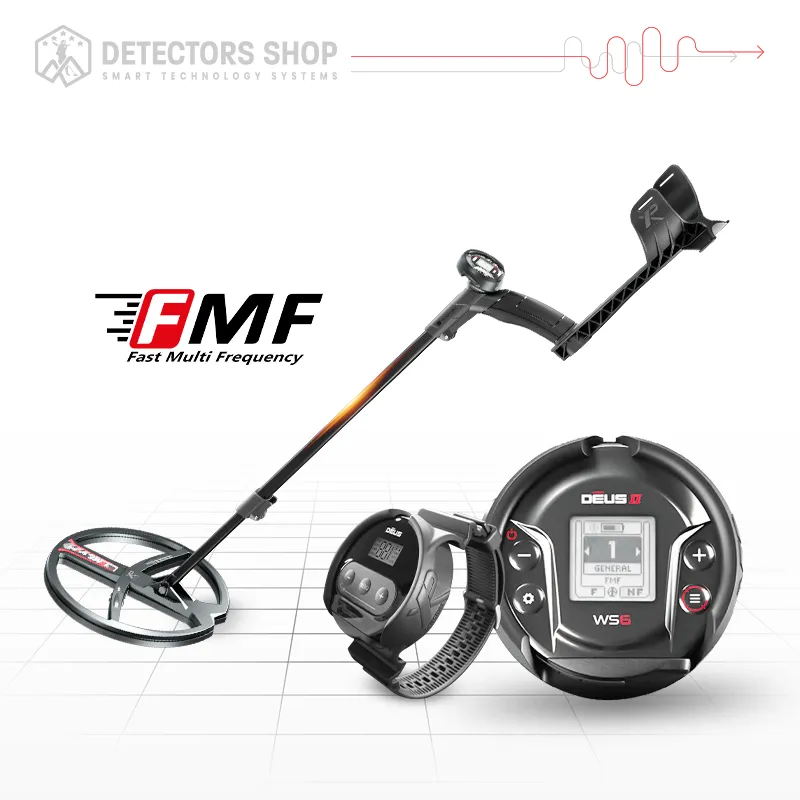
DEUS II WS6
$ 1,450 -
GOLD PAN PREMIUM
$ 165 -
HF2 Search Coil
$ 400 -
Pinpointer MI-6
$ 250 -
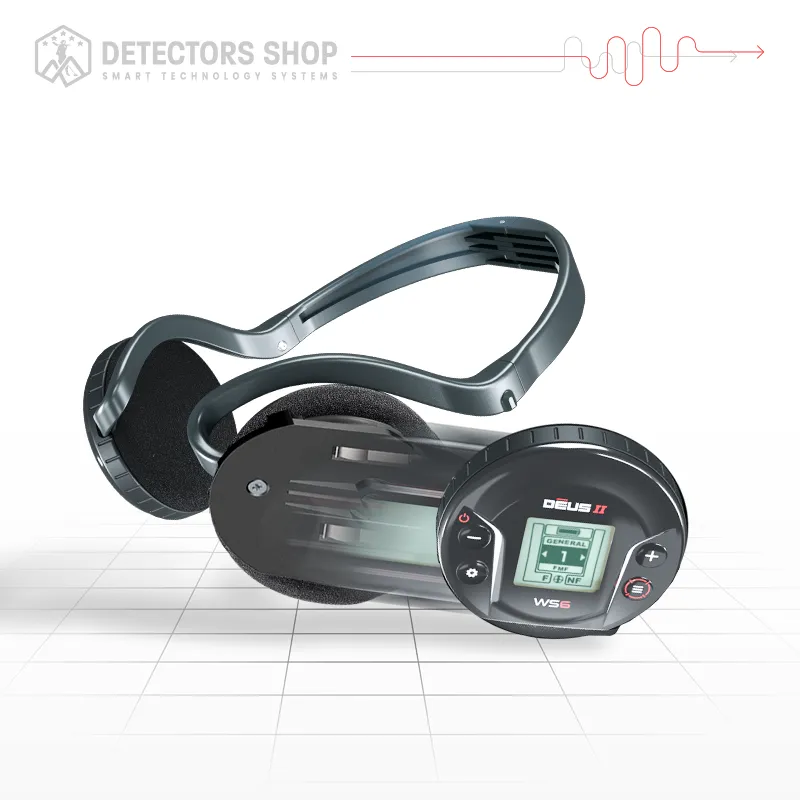
WS6 Headphones
$ 400
Introduction
Minelab gold detectors are among the most recognized prospecting machines in the world, particularly for users searching for natural gold, nuggets, and difficult targets in highly mineralized ground. Minelab currently offers several detectors for gold prospecting, ranging from specialized machines such as the GPX 6000, GPZ 7000, SDC 2300, and GOLD MONSTER series to versatile multi-purpose models such as the MANTICORE and EQUINOX 900.
What makes the Minelab range interesting is that these detectors are not all designed for exactly the same type of search. Some are optimized for very small natural gold, others for larger or deeper nuggets, and some are built to provide an easier entry point for beginners.
For example, the GPX 6000 uses Minelab’s GeoSense-PI™ technology and is designed to detect targets ranging from sub-gram gold to larger deep nuggets while maintaining stability in mineralized soil. The GPZ 7000, meanwhile, sits at the high end of Minelab’s prospecting range and is aimed at users prioritizing serious gold prospecting and deep-target performance.
In this complete Minelab gold detectors guide, we will compare the most important Minelab models, explain which detector is best for different types of gold prospecting, examine their technologies and strengths, and help you understand which machine may be the better choice depending on your target and search environment.
We will also look at professional alternatives from XP Metal Detectors, including the XP DEUS II, DEUS GOLD, and XTREM HUNTER, for users whose search requirements go beyond traditional Minelab-style gold prospecting.
Table of Contents
Best Minelab Gold Detectors at a Glance
Before comparing each model in detail, here is a quick overview of the main Minelab gold detectors and the type of user each one is best suited for.
| Model | Best For | Main Technology | Key Strength |
|---|---|---|---|
| Minelab GPZ 7000 | Serious gold prospecting | ZVT | Deep gold and larger nuggets |
| Minelab GPX 6000 | Small to medium gold nuggets | GeoSense-PI | Lightweight, fast and sensitive |
| Minelab SDC 2300 | Small gold in difficult ground | Pulse Induction | Compact and stable in mineralized soil |
| Minelab GOLD MONSTER | Beginners and small gold | High-frequency VLF | Easy operation and strong sensitivity to small gold |
| Minelab MANTICORE | Multi-purpose detecting | Multi-IQ+ | Gold, coins, relics and general detecting |
| Minelab EQUINOX 900 | Versatile all-round use | Multi-IQ | Gold prospecting plus coins and relics |
Which Minelab Is Best for Gold?
There is no single Minelab detector that is best for every gold prospecting situation.
The right choice depends mainly on:
- Gold size
- Expected depth
- Ground mineralization
- Search environment
- User experience
- Weight and portability
- Budget
For example, the GPZ 7000 is aimed at users who prioritize deep gold performance and larger nuggets, while the GPX 6000 offers a lighter and more streamlined setup with excellent sensitivity to smaller gold.
The SDC 2300 is a strong option for difficult mineralized ground and compact field use, while the GOLD MONSTER range is easier for users who want a simpler detector for small natural gold.
Multi-purpose detectors such as MANTICORE and EQUINOX 900 are better suited to users who want one detector for several applications rather than gold prospecting alone.
Quick Recommendation
| Your Main Goal | Recommended Minelab |
|---|---|
| Deep gold and larger nuggets | GPZ 7000 |
| Small and medium gold nuggets | GPX 6000 |
| Difficult mineralized ground | SDC 2300 |
| Beginner gold prospecting | GOLD MONSTER |
| Gold + coins + relics | MANTICORE |
| Versatile general detecting | EQUINOX 900 |
Minelab GPZ 7000 Review: Deep Gold & Serious Prospecting
The Minelab GPZ 7000 is the flagship model in Minelab’s specialist gold prospecting range and is designed for users who prioritize maximum depth, larger nuggets, and serious performance in highly mineralized ground.
Its main technology is ZVT™ — Zero Voltage Transmission, which Minelab developed specifically to improve gold detection depth while maintaining stable operation in difficult soil. Minelab states that the GPZ 7000 can provide up to 40% more depth than previous GPX Series detectors under suitable conditions.
What Makes the GPZ 7000 Different?
The GPZ 7000 combines several technologies:
- ZVT™ Technology
- Super-D search coil
- Advanced ground balance
- GPS and mapping
- Wireless audio
- Multiple gold and ground modes
The standard GPZ14 Super-D coil measures approximately 14 × 13 inches and is designed to remain sensitive to a wide range of gold sizes while maintaining good stability in mineralized soil.
Best Targets for GPZ 7000
The GPZ 7000 is particularly strong when searching for:
- Medium and large gold nuggets
- Deeply buried gold
- Previously worked goldfields
- Gold in highly mineralized ground
- Larger targets missed by less powerful prospecting detectors
Minelab itself describes the GPZ 7000 as its strongest performer on medium to larger nuggets, while still maintaining useful sensitivity to smaller shallow targets.
Gold Modes
The GPZ 7000 includes three main Gold Modes:
- High Yield
- General
- Extra Deep
It also provides three Ground Type settings:
- Normal
- Difficult
- Severe
This allows the operator to adapt the detector according to both the expected target size and the mineralization level of the ground.
GPS and Mapping
One feature that separates the GPZ 7000 from many conventional gold detectors is its built-in GPS system.
The detector can store:
- FindPoints
- WayPoints
- GeoHunts
This allows prospectors to record productive locations, track previously searched ground, and return to promising areas later.
Weight and Battery Life
The GPZ 7000 weighs approximately 3.32 kg, including the standard GPZ14 coil and battery.
Battery operating time is rated at approximately 8 hours with GPS, backlight, and wireless functions enabled.
Because of its weight, Minelab includes a Pro-Swing harness, which helps distribute the load during longer prospecting sessions.
Is the GPZ 7000 Waterproof?
The complete detector is not waterproof.
The standard GPZ14 search coil is waterproof to approximately 1 meter, while the detector control unit is weather-resistant rather than fully submersible.
Who Should Choose the GPZ 7000?
The GPZ 7000 is best suited to experienced prospectors who:
- Search primarily for natural gold
- Want maximum performance on medium and large nuggets
- Work in highly mineralized goldfields
- Prioritize depth over low weight
- Are comfortable using a specialized gold detector
For users whose main objective is deep natural gold rather than general coin, relic, or beach detecting, the GPZ 7000 remains one of Minelab’s most specialized options.
Minelab GPX 6000 Review: Lightweight PI Performance for Small & Deep Gold
The Minelab GPX 6000 is one of Minelab’s most popular dedicated gold prospecting detectors, especially for users who want strong sensitivity to small gold without the weight and complexity of the GPZ 7000.
Its core technology is GeoSense-PI™, a pulse induction platform that analyzes ground and target signals in real time. The goal is to maintain a stable threshold while preserving sensitivity to both very small gold and larger, deeper nuggets in mineralized soil.
What Is GeoSense-PI?
GeoSense-PI continuously evaluates the ground response and target signal so the detector can adapt to changing mineralization.
This is particularly useful in goldfields where soil conditions vary rapidly and where conventional detectors can become unstable.
Minelab positions the GPX 6000 as capable of detecting:
- Sub-gram gold
- Small nuggets
- Medium-sized gold
- Larger deep nuggets
while maintaining good stability in mineralized ground.
Ground Modes
The GPX 6000 provides several ground-related operating options, including:
- Normal
- Difficult
- Severe
- EMI Cancel
- Conductive Ground Cancel
These modes help the detector adapt to mineralized soil, conductive ground, and electromagnetic interference.
Automatic Ground Balance and Noise Cancel
One of the biggest advantages of the GPX 6000 is simplicity.
The detector includes:
- Automatic Ground Balance
- Automatic Noise Cancel
- Manual Quick-Trak ground adjustment
- Automatic sensitivity options
This makes it easier to operate than many traditional pulse induction detectors, especially for users who do not want to spend a lot of time manually tuning the machine.
Sensitivity
Sensitivity can be adjusted manually from 1 to 10, while the detector also provides automatic sensitivity modes.
This allows beginners to rely on automatic operation, while experienced users can manually adjust the detector according to ground conditions.
Coil Options
The GPX 6000 supports several coil options designed for different prospecting situations.
The main options include:
- GPX 11″ Monoloop Coil – well suited to small and fine gold
- GPX 14″ Double-D Coil – useful in salt-affected or difficult ground
- GPX 17″ Monoloop Coil – better for covering larger areas and searching for bigger nuggets
The coils are waterproof to approximately 1 meter.
Weight and Portability
One of the strongest selling points of the GPX 6000 is its weight.
The detector weighs approximately 2.1 kg, significantly lighter than the GPZ 7000.
Its carbon-fiber shaft also collapses to approximately 67 cm, making it easier to carry and transport between prospecting locations.
Battery Life
The rechargeable lithium-ion battery provides approximately 8 hours of operating time, depending on usage conditions.
The removable battery design also makes it practical for longer field sessions where spare batteries may be required.
Is the GPX 6000 Waterproof?
The detector control box is splash and rain resistant, but it is not designed for full underwater use.
The compatible search coils are waterproof to approximately 1 meter.
GPX 6000 vs GPZ 7000
The two detectors target slightly different users.
| Feature | GPX 6000 | GPZ 7000 |
|---|---|---|
| Main Technology | GeoSense-PI | ZVT |
| Weight | Approx. 2.1 kg | Approx. 3.32 kg |
| Small Gold | Excellent | Very good |
| Large Deep Gold | Excellent | Stronger focus |
| Ease of Use | Easier | More advanced |
| Portability | Excellent | Heavier |
| Best For | Small to large nuggets, mobility | Serious deep gold prospecting |
If portability and sensitivity to small gold are priorities, the GPX 6000 is generally the more practical option.
If maximum performance on larger and deeper gold is the priority and additional weight is not a major concern, the GPZ 7000 may be the better fit.
Who Should Choose the GPX 6000?
The GPX 6000 is especially suitable for:
- Prospectors searching for small gold nuggets
- Users working in mineralized soil
- Users who want a lighter PI detector
- Prospectors covering large areas on foot
- Beginners who want strong automatic features
- Experienced users who still want manual control when needed
For many gold prospectors, the GPX 6000 offers one of the strongest balances between sensitivity, depth, simplicity, and portability in Minelab’s specialist gold range.
Minelab SDC 2300 Review: Compact Gold Detection in Mineralized Ground
The Minelab SDC 2300 is a compact pulse induction gold detector designed for users who need strong sensitivity to small gold nuggets in difficult, highly mineralized terrain.
Its main technology is MPF™ — Multi Period Fast Pulse Induction, which rapidly switches between transmit and receive signals to improve clarity and reduce residual noise. This helps the detector respond more clearly to very small gold targets, even in mineralized ground.
What Makes the SDC 2300 Different?
The SDC 2300 stands out because it combines:
- Pulse Induction technology
- Strong sensitivity to small gold
- Compact foldable design
- Full waterproofing to 3 meters
- Automatic ground tracking
- Simple controls
- Rugged construction
Minelab specifically positions it as a detector for small to medium gold nuggets in highly mineralized or variable ground, while still offering useful depth on larger nuggets.
Compact and Portable Design
One of the biggest advantages of the SDC 2300 is its folding design.
The detector collapses to approximately 40 cm, making it much easier to transport in a backpack or vehicle.
When fully extended, it measures approximately 150 cm, and its weight is around 2.3 kg.
This makes it particularly practical for prospectors working in:
- Remote goldfields
- Creek beds
- Rocky terrain
- Narrow search areas
- Locations requiring long hikes
8-Inch Monoloop Coil
The standard SDC 2300 includes an 8-inch round Monoloop coil.
The smaller coil size is especially useful for:
- Small gold nuggets
- Tight spaces
- Rocky terrain
- Creek beds
- Areas with difficult ground conditions
Minelab does not currently offer other branded coil sizes for the SDC 2300, so the detector is designed around this compact 8-inch configuration.
Ground Balance and Mineralized Soil
The detector includes:
- Automatic Ground Tracking
- Fast Ground Balance
- Automatic Noise Cancel
These functions help the SDC 2300 remain stable when moving through changing mineralization.
This is one of the main reasons the detector has developed a strong reputation for searching goldfields where conventional VLF detectors may struggle with ground noise.
Normal and Salt Modes
The SDC 2300 has two main detecting modes:
Normal Mode
Provides sensitivity levels from 1 to 5 and is intended for general gold prospecting.
Salt Mode
Provides sensitivity levels from 1 to 3 and is intended for conductive salt environments.
This makes the detector useful not only in inland goldfields but also in certain salt-affected areas.
Waterproof to 3 Meters
Unlike the GPX 6000 and GPZ 7000, the SDC 2300 itself is fully waterproof to approximately 3 meters (10 feet).
This makes it particularly useful for:
- Riverbeds
- Creeks
- Shallow underwater prospecting
- Shorelines
- Wet environments
Its compact coil is also well suited to working between rocks and underwater obstacles.
Does SDC 2300 Have Metal Discrimination?
No.
This is important to clarify because some Minelab specification pages display general discrimination fields that can be confusing.
Minelab’s own FAQ specifically states that the SDC 2300 does not have a metal discrimination function.
The detector is designed primarily for gold prospecting rather than selectively identifying different metal categories before excavation.
Visual and Audio Target Response
The SDC 2300 uses a simple LED-based interface instead of a large digital screen.
It includes 9 LED indicators that provide information about detection, battery status, and threshold level.
Target strength is also communicated through audio. A weaker response may indicate a smaller or deeper target, while a stronger response may indicate a larger or shallower target.
Who Should Choose the SDC 2300?
The SDC 2300 is particularly well suited to:
- Prospectors searching for small gold
- Highly mineralized goldfields
- Creek and river prospecting
- Users who need a waterproof gold detector
- Prospectors who value compact equipment
- Users who prefer simple controls over complex menus
SDC 2300 vs GPX 6000
| Feature | SDC 2300 | GPX 6000 |
|---|---|---|
| Technology | MPF Pulse Induction | GeoSense-PI |
| Small Gold | Excellent | Excellent |
| Mineralized Ground | Excellent | Excellent |
| Waterproofing | 3 m full detector | Coil waterproof; control box not submersible |
| Weight | Approx. 2.3 kg | Approx. 2.1 kg |
| Portability | Excellent folding design | Excellent lightweight design |
| Coil Options | Limited | Several options |
| Ease of Use | Very simple | Simple with more control |
| Best Use | Small gold + difficult terrain + water | Broad gold prospecting |
If your priority is a compact waterproof detector for small gold in difficult mineralized terrain, the SDC 2300 remains one of Minelab’s most specialized options.
If you want broader coil options, lower weight, and greater flexibility across different nugget sizes, the GPX 6000 is generally the more versatile choice.
Minelab GOLD MONSTER Review: Best for Beginners & Small Gold
The Minelab GOLD MONSTER series is designed for users who want a simpler and lighter approach to natural gold prospecting, especially when the main target is small gold nuggets and fine gold.
The two main models are the GOLD MONSTER 1000 and the newer GOLD MONSTER 2000. While both are aimed at gold prospecting, the GOLD MONSTER 2000 introduces a more advanced multi-frequency platform and improved target information.
GOLD MONSTER 1000
The GOLD MONSTER 1000 is a high-frequency VLF detector operating at 45 kHz.
Its main strengths are simplicity and sensitivity to very small gold.
Key features include:
- 45 kHz VLF technology
- Automatic Ground Balance
- Automatic Sensitivity
- Automatic Noise Cancel
- Gold Chance Indicator
- Lightweight design
- Simple controls
The detector weighs approximately 1.33 kg, and the standard 5-inch Double-D coil is waterproof to approximately 1 meter. The control unit itself is splash and rain resistant rather than fully submersible.
This makes the GOLD MONSTER 1000 particularly suitable for:
- Beginners
- Small gold nuggets
- Fine gold
- Shallow prospecting
- Rocky terrain
- Users who want minimal manual adjustment
GOLD MONSTER 2000
The GOLD MONSTER 2000 represents a major step forward in the GOLD MONSTER range.
Instead of a single 45 kHz frequency, it uses Minelab’s Multi-Au™ simultaneous multi-frequency technology, operating across approximately 12 to 76 kHz.
Minelab describes Multi-Au as a system combining high VLF sensitivity with signal-processing techniques inspired by Pulse Induction technology, improving ground handling and target discrimination in mineralized soil.
Small Gold Sensitivity
The GOLD MONSTER 2000 is specifically optimized for extremely small gold.
Minelab states that its multi-frequency operation can detect nuggets below 0.01 g under suitable conditions, which shows how strongly the detector is focused on fine gold prospecting.
Gold Chance Indicator
One of the most useful features of the GOLD MONSTER 2000 is its real-time Gold Chance Indicator.
The detector provides a numerical Target ID scale from 0 to 99 together with visual and audio information to help the operator distinguish likely gold targets from iron, hot rocks, and unwanted objects.
Echo Wave Audio
The GOLD MONSTER 2000 also introduces Echo Wave™ Audio.
This system combines sensitive detection audio with discrimination tones, allowing users to hear subtle target responses while also receiving information about whether a target is more likely to be gold or an unwanted object.
GOLD MONSTER 1000 vs GOLD MONSTER 2000
| Feature | GOLD MONSTER 1000 | GOLD MONSTER 2000 |
|---|---|---|
| Technology | 45 kHz VLF | Multi-Au simultaneous multi-frequency |
| Frequency | 45 kHz | Approx. 12–76 kHz |
| Target ID | Basic Gold Chance indication | 0–99 Target ID + Gold Chance |
| Ground Handling | Automatic | Advanced automatic ground control |
| Small Gold Sensitivity | Excellent | Extremely high |
| Weight | Approx. 1.33 kg | Approx. 1.25 kg |
| Standard Coil | 5″ DD | 5″ DD |
| Best For | Beginners and small gold | Fine gold + more advanced prospecting |
Which GOLD MONSTER Should You Choose?
Choose the GOLD MONSTER 1000 if you want a simple, proven, high-frequency detector for small gold without many complex settings.
Choose the GOLD MONSTER 2000 if you want:
- Greater sensitivity to extremely small gold
- Multi-frequency operation
- Better target information
- More advanced ground handling
- Improved discrimination between gold, iron, and hot rocks
For beginners who want a straightforward entry into Minelab gold prospecting, the GOLD MONSTER range remains one of the easiest places to start.
Minelab vs XP: Best Alternatives for Different Search Goals
Minelab is especially strong in natural gold prospecting, but not every user is searching for the same type of target.
If your goal includes coins, relics, beaches, underwater use, or large deep metallic objects, there are situations where an XP detector may be the better fit.
XP DEUS II: Best All-Round Alternative
The XP DEUS II is a strong alternative for users who want one detector that can handle several different search environments.
It is especially suitable for:
- Coins
- Relics
- Small gold
- Mineralized ground
- Wet beaches
- Saltwater
- Underwater searching
- General-purpose detecting
Its FMF Fast Multi Frequency technology, very low weight, wireless design, and waterproofing make it more versatile than a specialist Minelab gold machine when the user does not want to focus only on natural gold.
XP DEUS GOLD: Best for Gold-Focused XP Users
The XP DEUS GOLD is aimed more directly at gold prospecting and users searching for natural gold and small targets.
It can be a strong option for prospectors who want:
- A lightweight detector
- Fast target response
- High-frequency gold sensitivity
- Easier portability
- Strong performance in mineralized terrain
For users who like the XP platform but want a setup focused more heavily on gold, DEUS GOLD is the more specialized choice.
XP XTREM HUNTER: Best for Large Deep Metallic Targets
The XP XTREM HUNTER should not be compared directly with a GPX 6000 or GOLD MONSTER for tiny nuggets.
Its purpose is different.
XTREM HUNTER is designed for:
- Large buried metallic objects
- Deep relics
- Large masses
- Targets that conventional small-coil detectors may miss at depth
This makes it a better alternative when the target is expected to be large and deep, rather than small natural gold.
Minelab vs XP: Which Is Better?
| Search Goal | Better Fit |
|---|---|
| Tiny natural gold nuggets | Minelab GPX 6000 / GOLD MONSTER |
| Deep medium-to-large gold | Minelab GPZ 7000 |
| Compact waterproof gold prospecting | Minelab SDC 2300 |
| Gold + coins + relics + beach | XP DEUS II |
| Lightweight XP gold prospecting | XP DEUS GOLD |
| Large deep buried metallic targets | XP XTREM HUNTER |
| Underwater multi-purpose detecting | XP DEUS II |
The key point is that Minelab and XP are not always direct competitors for the exact same search task.
Minelab’s specialist prospecting machines are excellent choices for natural gold, while XP offers broader versatility for users who also want coins, relics, beach hunting, underwater detection, or large deep-target searching.
Which Detector Should You Choose?
Choose GPX 6000 if your priority is small-to-medium natural gold with strong portability.
Choose GPZ 7000 if you are focused on serious deep gold prospecting and larger nuggets.
Choose SDC 2300 if you want a compact waterproof gold detector for difficult mineralized terrain.
Choose a GOLD MONSTER if you want an easier entry into small-gold prospecting.
Choose XP DEUS II if you want one detector for gold, coins, relics, beaches, and underwater use.
Choose XP DEUS GOLD if your main goal is gold prospecting but you prefer the lightweight XP platform.
Choose XP XTREM HUNTER if your target is a large metallic object expected at significant depth.
How to Choose the Best Minelab Gold Detector
Choosing the best Minelab gold detector depends mainly on what type of gold you are searching for, the ground conditions, and how much portability you need.
For most users, the decision can be simplified like this:
Choose the GPZ 7000 if your priority is maximum performance on medium and larger gold at depth.
Choose the GPX 6000 if you want excellent sensitivity to small and medium nuggets with a lighter and easier-to-use setup.
Choose the SDC 2300 if you frequently search highly mineralized ground, creeks, rivers, or wet environments and want a compact waterproof detector.
Choose the GOLD MONSTER if you are a beginner or mainly interested in small and shallow natural gold.
If your search objectives include more than natural gold, it may be worth considering alternatives such as:
- XP DEUS II for gold, coins, relics, beaches, and underwater detecting.
- XP DEUS GOLD for lightweight gold-focused prospecting.
- XP XTREM HUNTER for large, deeply buried metallic targets.
The best detector is therefore not necessarily the most expensive model. It is the detector that best matches your target size, expected depth, soil mineralization, search environment, and experience level.
Minelab Gold Detectors FAQ
Which Minelab detector is best for gold?
There is no single best Minelab detector for every situation. The GPX 6000 is a strong choice for small and medium gold nuggets, while the GPZ 7000 is better suited to serious prospecting for deeper and larger gold. The SDC 2300 is excellent for difficult mineralized terrain and wet environments, while the GOLD MONSTER range is easier for beginners and users targeting very small gold.
Is GPX 6000 better than GPZ 7000?
It depends on the search goal. The GPX 6000 is lighter, easier to use, and highly sensitive to small gold. The GPZ 7000 is heavier and more specialized, but it is designed for stronger performance on medium-to-large nuggets and deeper targets.
Which Minelab detector is best for beginners?
The GOLD MONSTER range is generally the easiest starting point for beginners because it offers simple controls, automatic ground handling, and strong sensitivity to small gold.
Which Minelab detector is best for small gold nuggets?
The GPX 6000, SDC 2300, and GOLD MONSTER models are all strong choices for small gold. The best option depends on ground conditions, budget, and whether the user prefers Pulse Induction or VLF-style detection.
Which Minelab detector is best for deep gold?
The GPZ 7000 is Minelab’s most specialized option for deep gold prospecting, particularly for medium and larger nuggets.
Is the SDC 2300 waterproof?
Yes. The SDC 2300 is fully waterproof to approximately 3 meters, making it especially useful for creeks, rivers, and shallow underwater prospecting.
Can Minelab gold detectors work in mineralized ground?
Yes. Models such as the GPX 6000, GPZ 7000, and SDC 2300 are specifically designed to maintain stable performance in difficult and highly mineralized ground.
Are Minelab detectors only for gold?
No. Some Minelab models, such as MANTICORE and EQUINOX 900, are multi-purpose detectors suitable for gold, coins, relics, and general detecting.
What is the best alternative to Minelab?
It depends on the target. The XP DEUS II is a strong all-round alternative for gold, coins, relics, beaches, and underwater use. The XP DEUS GOLD is more focused on gold prospecting, while the XP XTREM HUNTER is designed for large and deeply buried metallic targets.
Final Verdict
Minelab remains one of the strongest names in professional gold prospecting, with each model serving a different type of user.
The GPZ 7000 is best suited to users focused on deep and larger gold. The GPX 6000 offers an excellent balance of sensitivity, portability, and ease of use. The SDC 2300 stands out in difficult mineralized ground and wet environments, while the GOLD MONSTER series provides a simpler entry point for small-gold prospecting.
However, the best detector is not always the one with the highest price or the most advanced technology.
If your search includes coins, relics, beaches, underwater targets, or large deep metallic objects, alternatives such as the XP DEUS II, XP DEUS GOLD, and XP XTREM HUNTER may provide a better fit for your specific goals.
The most important decision is therefore to match the detector to the target type, expected depth, soil conditions, and search environment.
Sources & References
This guide was prepared using official and first-party information from:
- Minelab – Official Gold Prospecting Detector Pages
- Minelab – Official Technical Specifications
- Minelab – Official Product Manuals and Brochures
- XP Metal Detectors – Official Product Information
- Detectors Shop – Product Pages and technical support information
Where specifications, operating modes, waterproof ratings, technologies, or performance recommendations are mentioned, priority was given to the manufacturers’ official documentation.
Introduction
The XP DEUS II is a high-performance wireless metal detector developed and manufactured in France by XP Metal Detectors. It is built around XP’s FMF® Fast Multi Frequency technology, which processes multiple frequencies simultaneously to deliver fast target response, improved target identification, and strong performance across a wide variety of ground conditions.
FMF System, Sound Systems, VLF System
Unlike conventional detectors that rely on a single fixed frequency, the DEUS II uses different combinations of low, medium, and high frequencies depending on the selected search program. This allows the detector to adapt to a broad range of targets, from small coins and fine jewelry to gold nuggets, relics, and larger deeply buried metallic objects.
One of the DEUS II’s strongest advantages is its versatility. It is designed for both land and underwater detection, with the search coil and remote control rated IP68 for depths of up to 20 meters. The system is also completely wireless and extremely lightweight, with certain configurations starting from approximately 750 grams.
The detector also offers advanced control over discrimination, sensitivity, reactivity, ground balance, audio response, frequency selection, target identification, pinpointing, and custom search settings. In addition, it supports multiple audio systems, wireless headphones, the XP MI-6 pinpointer, software updates, and the XP GO TERRAIN mobile application.
In this complete XP DEUS II review, we will examine its FMF technology, search programs, frequencies, gold and relic performance, beach and diving capabilities, ground settings, discrimination, audio options, wireless accessories, correct setup, and practical field use.
Customers purchasing the XP DEUS II from Detectors Shop receive a 5-year warranty and professional support from our team in Dubai.
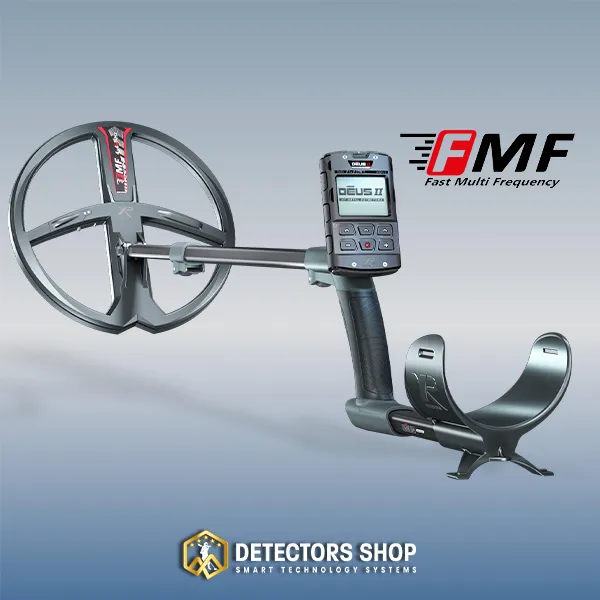
Table of Contents
XP DEUS II at a Glance
Before going deeper into the search programs and advanced settings, here is a quick overview of the most important XP DEUS II specifications and capabilities.
| Feature | XP DEUS II |
|---|---|
| Manufacturer | XP Metal Detectors |
| Country of Manufacture | France |
| Detection Technology | FMF® Fast Multi Frequency |
| Wireless System | Fully wireless |
| Main Search Configuration | Factory programs + user-customizable programs |
| Single-Frequency Mode | DEUS MONO |
| Mono Frequency Range | 4 to 45.4 kHz with standard FMF coils |
| HF2 Frequency Range | Up to 120 kHz in mono mode |
| Waterproof Rating | IP68 |
| Maximum Diving Depth | Up to 20 meters |
| Target ID Scale | 0 to 99 digital conductivity scale |
| Ground Balance | Grab, Tracking, and Manual in DEUS MONO |
| Pinpoint Mode | Yes |
| Gold Prospecting Program | Gold Field |
| Relic Program | Relic |
| Beach Programs | Diving, Beach, Beach Sens |
| Sensitivity Adjustment | 0 to 99 |
| Reactivity Control | Yes |
| Iron Volume | Adjustable |
| Discrimination | Advanced visual and audio discrimination |
| Audio Options | PWM, Square, High Square, Low Square |
| Wireless Headphones | WS6ST, WSAST, WSAXL ST |
| Pinpointer Compatibility | XP MI-6 |
| Mobile App Support | XP GO TERRAIN |
| Software Updates | Yes |
| Weight | From about 750 g depending on configuration |
| Warranty | 5 years from Detectors Shop |
The DEUS II is not built around one fixed frequency profile. Its FMF programs use different combinations of simultaneous frequencies depending on the selected program, while DEUS MONO allows the user to work in a single-frequency configuration. The official manual states that standard mono operation covers seven main frequencies from about 4 to 45.4 kHz, while the HF2 coil extends the upper range much further.
The detector is also designed for both land and sea use. XP states that the remote control and search coil are IP68 waterproof to 20 meters, while the system can also be configured in very lightweight wireless setups starting at approximately 750 g.
How to Use XP DEUS II: Quick Start Guide
The XP DEUS II is designed to be easy to set up once the main components are assembled correctly. Before adjusting advanced settings, start by preparing the detector, connecting the search coil and remote control, and making sure the system is ready for operation.
Step 1: Assemble the XP DEUS II
Attach the lower stem to the FMF search coil using the supplied washer, screw, and spacer, then gently tighten the connection. Insert the remote control into its mount and adjust the armrest to a comfortable position before starting your search.
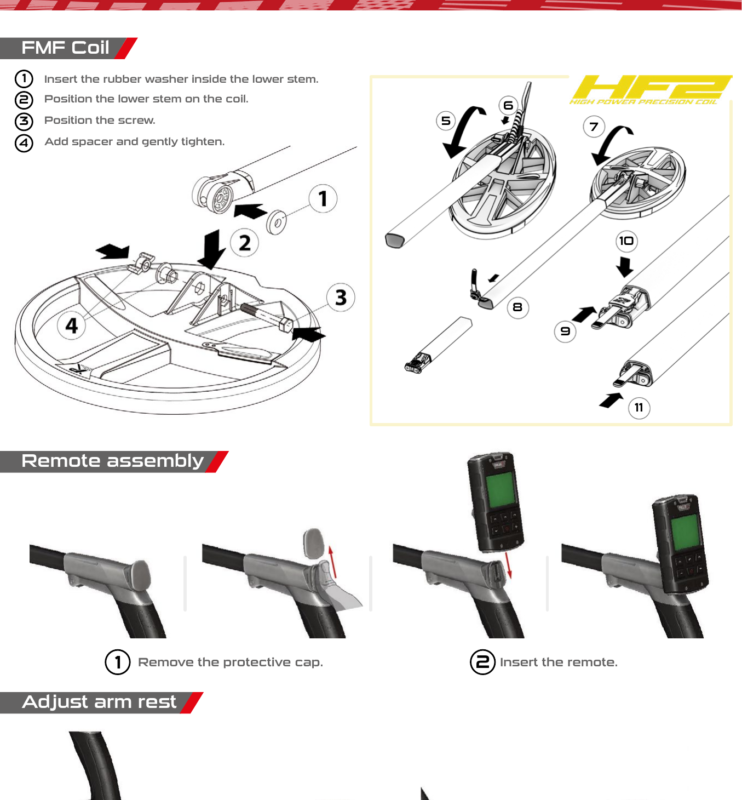
Step 2: Switch On the XP DEUS II
After charging the detector, press and hold the remote control power button for about one second to switch on the XP DEUS II. Choose the desired audio output. If the WS6ST or other compatible XP wireless headphones are already paired, they can switch on automatically.
When the coil is active, its LED flashes approximately once per second. By default, the DEUS II starts in Factory Program No. 1 — General, which is a practical starting program for normal detecting.
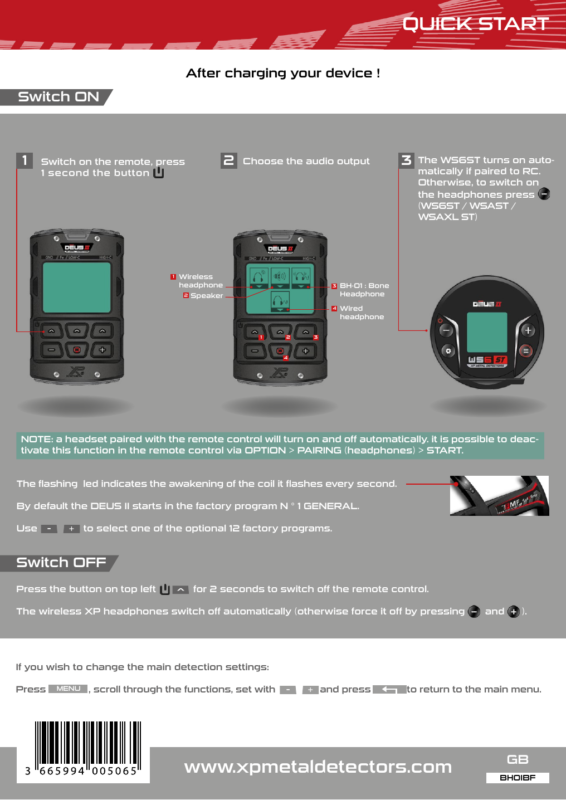
Step 3: Select a Search Program
After switching on the XP DEUS II, choose the search program that best matches your target and ground conditions. Use the + or – buttons on the remote control to move between the 12 factory programs.
By default, the DEUS II starts in Program No. 1 — General. This is a good starting point for normal land detecting and is suitable for both beginners and experienced users. Other programs are designed for more specific situations, such as Gold Field for natural gold, Relic for large deep targets, and Diving, Beach, and Beach Sens for saltwater environments.
Step 4: Run a Frequency Scan
Before adjusting Sensitivity or other advanced settings, run a Frequency Scan if electromagnetic interference is present. The XP DEUS II can automatically scan the available detecting frequencies and identify a quieter channel with less interference.
This is especially useful near power lines, other metal detectors, urban areas, or whenever the detector becomes unstable for no obvious reason. XP specifically recommends starting with a frequency scan before reducing Sensitivity when EMI is the likely cause.
Step 5: Perform Ground Balance
Before beginning the search, check the ground conditions and perform a ground balance when necessary. The XP DEUS II provides Grab, Tracking, and Manual ground adjustment, with Manual mode available only in DEUS MONO. For most situations, XP recommends using Grab because it is quick and accurate.
To perform Grab, find a clean area without a metal target, then hold the Ground Balance control while pumping the coil up and down approximately 15 cm above the soil. Continue until the ground response becomes quieter and the displayed ground value stabilizes.
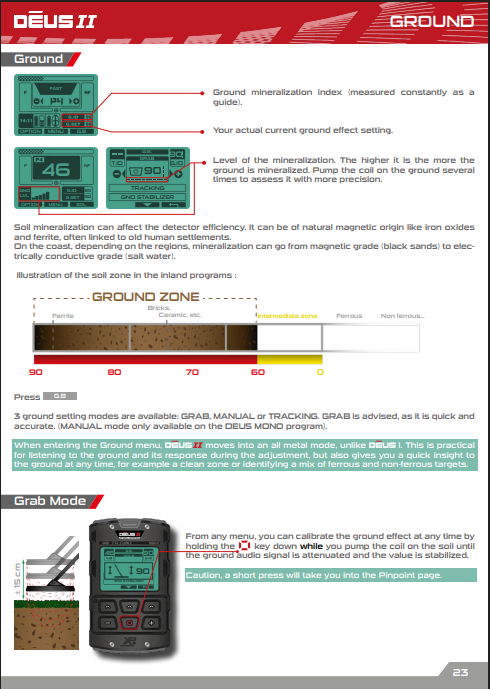
Step 6: Adjust the Sensitivity
Set the Sensitivity to a stable level before beginning your search. On the XP DEUS II, Sensitivity can be adjusted from 0 to 99, while the official manual notes that the most commonly used values are generally between 70 and 90.
If the detector produces too many false signals, reduce the Sensitivity gradually. XP specifically recommends lowering it in trashy areas or near sources of electromagnetic interference such as power lines, electric fences, and radio transmitters.
A good practical approach is to use the highest Sensitivity setting that remains stable in the current environment rather than simply setting it to 99.
Step 7: Start Sweeping the Search Coil
Begin searching by moving the coil smoothly from side to side while keeping it parallel to the ground and as close to the surface as practical without repeatedly touching it. Keeping the coil close to the ground improves sensitivity to both small and deeper targets.
For a more complete search, slightly overlap each sweep with the previous one. Slower, controlled sweeps can also improve the chances of detecting and identifying weak or deep targets, especially in mineralized or target-rich ground.
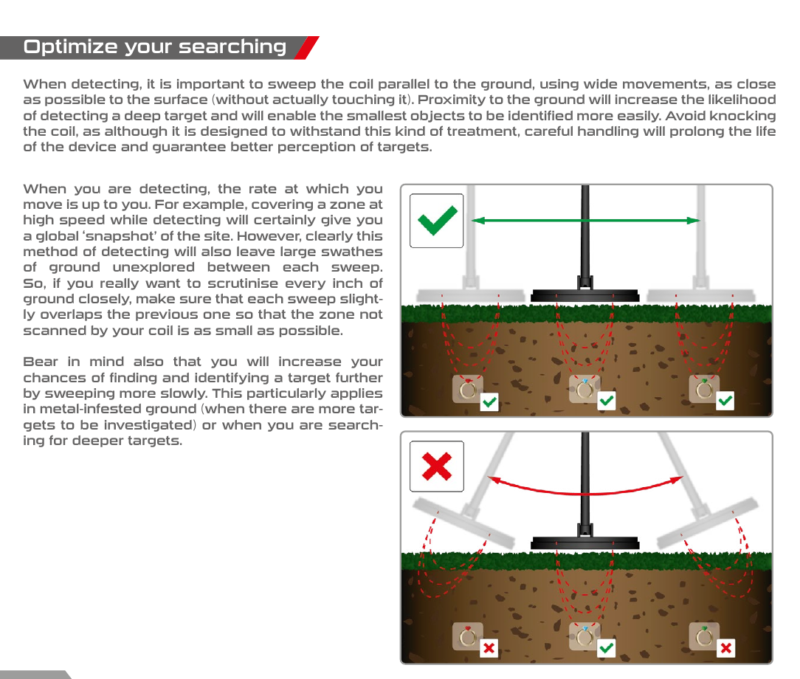
Step 8: Confirm and Locate the Target
When the XP DEUS II produces a repeatable target response, slow down and sweep the same area again from another direction. Listen to the audio response and check the Target ID and ferrous / non-ferrous information on the remote control before deciding whether to investigate the target.
If the exact position is difficult to determine, reduce the width of your sweeps and approach the target from a second direction at approximately 90 degrees. The intersection of the strongest responses helps identify the center of the target. You can then use the dedicated Pinpoint mode for more precise target locating before digging.
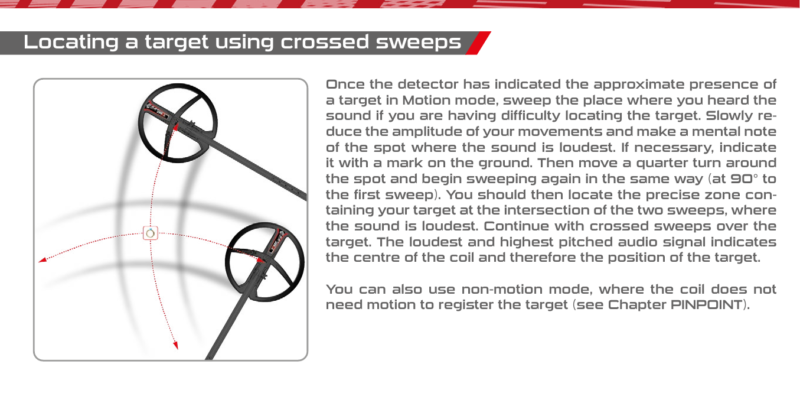
Once these basic steps are complete, the XP DEUS II is ready for normal field searching. As you gain experience, you can further optimize performance by adjusting Reactivity, frequency, discrimination, audio settings, ground behavior, and other advanced parameters explained later in this guide.
How XP DEUS II FMF Technology Works
At the heart of the XP DEUS II is XP’s FMF® Fast Multi Frequency technology. Instead of operating on only one frequency at a time, the detector can process several frequencies simultaneously, allowing it to respond quickly to a wide range of metallic targets while maintaining strong target identification across different soil conditions.
The DEUS II does not use the same frequency combination in every program. Each factory program uses a specific combination of low, medium, and high frequencies together with its own signal processing and ground behavior. This allows the detector to be adapted to different search objectives rather than relying on one universal multi-frequency profile.
Why Multiple Frequencies Matter
Different frequencies react differently to different targets.
In general:
- Lower frequencies are well suited to larger and higher-conductivity targets.
- Higher frequencies provide increased sensitivity to smaller and lower-conductivity targets.
- Simultaneous multi-frequency operation allows the detector to cover a wider target range without forcing the operator to choose only one frequency.
The DEUS II manual explains that higher frequencies are particularly useful for small targets, especially in mineralized ground, while lower frequencies can be more effective on large masses or grouped coins.
FMF Frequency Limits
Within the FMF programs, the user can choose different maximum frequency limits.
With standard FMF coils, the selectable maximum frequency limits include:
- 14 kHz
- 24 kHz
- 40 kHz
The purpose of changing the maximum frequency is not simply to increase or reduce depth. It changes the detector’s sensitivity profile toward different target types and ground conditions.
For example:
14 kHz maximum
Can help focus more on high-conductivity targets and reduce response to very small conductors.
24 kHz maximum
Provides a middle ground between target sensitivity and stability.
40 kHz maximum
Offers the widest standard FMF frequency range and greater sensitivity to a broad variety of targets, including smaller non-ferrous objects.
The official manual describes 40 kHz as the most versatile of these standard FMF limits because it covers the widest frequency range.
DEUS MONO: Single-Frequency Operation
The XP DEUS II also includes DEUS MONO, a dedicated single-frequency program.
With standard FMF coils, the DEUS MONO program provides seven main frequencies from approximately 4.0 to 45.4 kHz, with frequency shifts available around each main frequency.
This creates a total of 49 selectable frequency positions in standard mono operation.
DEUS MONO can be useful when:
- Strong electromagnetic interference affects FMF operation
- The operator wants to focus on a specific target category
- A particular single frequency performs better in a specific location
- The user prefers traditional single-frequency behavior
Frequency and Target Type
The DEUS II manual provides a useful general relationship between frequency and target response.
| Frequency Range | Typical Strength |
|---|---|
| Low frequencies | Larger masses, grouped coins, high-conductivity targets |
| Mid frequencies | General-purpose detecting, coins and medium-sized targets |
| High frequencies | Small coins, fine jewelry, small low-conductivity targets |
| Very high frequencies | Small gold nuggets and tiny targets, especially in mineralized ground |
This is one reason why FMF is so important to the DEUS II.
Instead of choosing between “deep large targets” and “small sensitive targets” using only one frequency, the detector can combine several frequencies and apply program-specific processing.
FMF and Mineralized Ground
Mineralized ground is one of the environments where multi-frequency processing becomes especially useful.
The DEUS II uses its frequency combinations not only for target detection, but also for managing ground response. Depending on the selected program, frequencies can be processed differently to reduce electrically conductive ground effects or improve sensitivity to certain target categories.
This is especially important in programs such as:
- Sensitive
- Gold Field
- Relic
- Diving
- Beach
- Beach Sens
Each program uses a different frequency strategy and different internal parameters according to its intended environment.
FMF Is Not Just “More Frequencies”
The key advantage of XP’s FMF system is not simply the number of frequencies being transmitted.
The DEUS II combines:
Frequency selection + signal processing + ground handling + discrimination + reactivity + audio behavior
into a complete search platform.
This is why two DEUS II programs using similar frequency ranges can still behave differently in the field.
The program itself determines how the detector processes the signals, manages the ground, and presents target information to the operator.
XP DEUS II Search Programs Explained
The XP DEUS II is designed around a series of factory search programs, each optimized for a specific type of target, ground condition, or search environment. Rather than using one universal setup for every situation, the detector changes its frequency combination, signal processing, reactivity, discrimination behavior, and ground response according to the selected program.
Below are the factory programs documented in the current official DEUS II manual.
1. General
The General program is designed as a versatile starting point for both beginners and experienced users.
It uses a combination of low and high frequencies and is intended to provide a strong balance between target detection and false-signal control.
One of its main advantages is that it reduces the influence of damp or wet soil, which can sometimes produce false responses or “halo” effects around holes and disturbed ground.
This makes General a practical choice for:
- Everyday detecting
- Mixed targets
- General-purpose land searching
- Beginners learning the DEUS II
- Sites where wet soil creates unwanted responses
The official manual specifically describes General as suitable for both beginners and experienced users.
2. Sensitive
The Sensitive program uses low and high frequencies with a maximum frequency of approximately 40 kHz with standard FMF coils.
It is especially effective for:
- Small targets
- Low-conductivity targets
- Mineralized ground
- Polluted ground
- Areas containing many closely spaced objects
The manual notes that Sensitive is highly effective on small targets and performs particularly well in mineralized and contaminated ground.
3. Sensitive Full Tones
Sensitive Full Tones is based on the same core platform as the Sensitive program, but it uses Full Tones audio and a higher default Reactivity setting.
Instead of grouping targets into only a few tone categories, Full Tones produces a different audio response according to the conductivity of the detected target.
This gives experienced users more information through sound and can be very useful in heavily polluted or mineralized areas.
The trade-off is that the audio environment becomes more complex, so this mode generally requires more experience to interpret confidently.
4. Fast
The Fast program is built for speed and target separation.
It uses the same general platform as Sensitive but combines:
- Higher Reactivity
- Pitch audio
- Square audio processing
This combination makes the detector respond quickly when several targets are close together.
Fast is especially useful in:
- Iron-contaminated ground
- Old sites
- Areas with many closely spaced metallic objects
- Mineralized ground
- Locations where target separation is more important than maximum raw depth
The manual describes this program as particularly effective in ferrous-polluted and mineralized ground.
5. Park
The Park program is optimized for recreational areas and locations that are normally heavily polluted with modern metal trash.
Typical applications include:
- Parks
- Dry-sand beaches
- Picnic areas
- Public recreational zones
- Urban detecting sites
The factory configuration includes a notch range intended to reject common aluminum foil and also uses the B.Caps setting to help reject rusty bottle caps.
6. Deep High Conductor
The Deep High Conductor program is designed for deeper, higher-conductivity targets.
It combines lower and medium frequencies, with the standard program using frequencies up to approximately 14 kHz.
This program is particularly suitable for:
- High-conductivity coins
- Groups of coins
- Larger conductive targets
- Deep target searching in relatively clean ground
The official manual specifically states that it is designed to better locate good-conductivity targets while maintaining strong sensitivity to isolated coins.
7. DEUS MONO
DEUS MONO operates differently from the FMF programs because it uses a single frequency rather than simultaneous multi-frequency processing.
With standard FMF coils, the operator can work across seven main frequencies from approximately 4 to 45.4 kHz, with additional frequency shifts around each one.
DEUS MONO can be useful when:
- Electromagnetic interference affects FMF operation
- The user wants to concentrate on a particular target type
- A specific single frequency performs better at a given site
- The operator prefers traditional mono-frequency behavior
The manual also notes that DEUS MONO benefits from the DEUS II platform, including improved performance, audio quality, and EMI rejection.
8. Gold Field
The Gold Field program is one of the most important DEUS II modes for natural gold prospecting.
It is specifically intended for highly mineralized gold-bearing ground, where gold nuggets can sometimes produce responses similar to the surrounding soil or ferrous objects.
Gold Field operates in an all-metal configuration and mainly rejects the local ground after proper ground balancing.
This makes it especially suitable for:
- Native gold
- Gold nuggets
- Highly mineralized soil
- Gold-bearing ground
- Areas where small natural gold may be difficult to separate from the ground response
The manual recommends regularly adjusting the ground using the Grab function and reducing sensitivity if the detector becomes unstable in highly mineralized terrain.
9. Relic
The Relic program uses a similar processing approach to Gold Field but operates with lower frequencies and is designed for larger, deeper targets.
It is particularly suited to:
- Relics
- Large metallic masses
- Deep targets
- Historical sites
- Large buried objects
The detector is configured in an all-metal style with low Reactivity.
For deep large targets, XP recommends sweeping the coil higher above the ground, around 15 to 20 cm, to reduce interference from shallow iron and ground effects.
The manual also explains that reducing Reactivity toward 0 can provide an important advantage when searching for very deep large targets.
10. Diving
The Diving program is designed specifically for submerged saltwater detecting.
It uses lower and medium frequencies combined with conductive-soil subtraction to maintain better stability underwater and in wet salt conditions.
It is particularly suitable for:
- Saltwater diving
- Underwater coin hunting
- Rings and jewelry
- Wet salt environments
- Difficult submerged conditions
Compared with the Beach and Beach Sens programs, Diving is designed to provide greater stability and reduced response to very small low-conductivity targets such as aluminum foil.
11. Beach
The Beach program uses higher frequencies than Diving, reaching up to approximately 24 kHz with standard FMF coils.
Because of this, it provides greater sensitivity to smaller targets.
It is intended for:
- Wet beach sand
- Surf zones
- Small jewelry
- Coins
- Saltwater environments
If the detector becomes unstable, the user can reduce Salt Sens or increase Reactivity to improve stability.
12. Beach Sens
Beach Sens is the most sensitive of the three dedicated saltwater programs.
It uses frequencies up to approximately 40 kHz with standard FMF coils and is designed to provide excellent response to very small targets while still retaining strong performance on larger objects.
XP describes Beach Sens as the deepest beach program for wet conditions, while also noting that it is the most reactive and may require careful adjustment in unstable conditions.
Which XP DEUS II Program Should You Use?
| Search Situation | Recommended Program |
|---|---|
| General land detecting | General |
| Small targets | Sensitive |
| Experienced audio-based target analysis | Sensitive Full Tones |
| Iron-contaminated ground | Fast |
| Parks and trashy recreational areas | Park |
| Deep high-conductivity targets | Deep High Conductor |
| Single-frequency searching | DEUS MONO |
| Natural gold and nuggets | Gold Field |
| Deep relics and large targets | Relic |
| Saltwater diving | Diving |
| Wet beach and surf | Beach |
| Maximum small-target sensitivity on wet beach | Beach Sens |
The best DEUS II program depends on the target, ground conditions, contamination level, and whether the search is taking place on land, at the beach, or underwater.
XP DEUS II Gold Detection: Gold Field, Frequencies & Small Gold Performance
The XP DEUS II includes a dedicated Gold Field program specifically designed for natural gold prospecting in highly mineralized gold-bearing ground.
Gold Field is important because small gold nuggets can be difficult to detect in mineralized soil. Their signal can sometimes resemble the response of the surrounding ground or even ferrous material. To address this, XP configures Gold Field in an all-metal style, rejecting mainly the local ground after proper ground adjustment rather than relying on conventional discrimination.
Why Gold Field Is Different
Unlike general coin-hunting programs, Gold Field is designed to prioritize sensitivity to native gold and small low-conductivity targets in difficult soil.
The manual specifically recommends:
- Regularly adjusting the ground using Grab
- Lowering sensitivity if the detector becomes unstable
- Increasing Reactivity in strongly mineralized ground
- Using IAR discrimination carefully to control shallow iron without masking desirable targets
This makes Gold Field particularly suitable for:
- Gold nuggets
- Native gold
- Small low-conductivity targets
- Highly mineralized gold-bearing soil
- Prospecting areas with difficult ground response
Frequency and Gold Sensitivity
Frequency has a major influence on small-target sensitivity.
The DEUS II manual explains that higher frequencies are generally more sensitive to small targets than lower frequencies, especially in mineralized ground. With the standard FMF coils, the detector can operate with frequency limits up to approximately 40 kHz, while the HF2 coil extends the working range much higher.
For small gold, this matters because very small nuggets and fine low-conductivity targets often respond better to higher-frequency operation.
The manual also specifically associates the upper frequency ranges with small coins, fine jewelry, and gold nuggets in highly mineralized ground.
Standard FMF Coil vs HF2 Coil for Gold
With the standard FMF coils, the DEUS II already provides a strong frequency range for gold prospecting.
However, the HF2 coil extends the detector’s frequency capability significantly and is particularly well suited to very small targets in mineralized ground.
According to the official manual, the HF2 coil can reach:
- Up to approximately 89 kHz in FMF programs
- Up to approximately 120 kHz in DEUS MONO
The manual specifically notes that HF2 is particularly suitable for searching for small targets in mineralized environments because of these higher operating frequencies.
Ground Balance Is Critical for Gold Prospecting
Ground balancing is one of the most important settings when using Gold Field.
Highly mineralized gold-bearing soil can dramatically affect detector performance if the ground response is not correctly handled.
XP recommends using the Grab ground-setting method to capture the local ground value accurately.
The detector provides:
- Grab
- Tracking
- Manual Ground Balance in DEUS MONO
Grab is recommended by XP as the fastest and most accurate general method.
In Gold Field, ground compensation becomes especially important because very deep or very small gold targets may produce signals close to the surrounding ground response.
IAR Discrimination in Gold Field
Gold Field uses a special discrimination system called IAR — Iron Amplitude Rejection.
Unlike normal conductivity-based discrimination, IAR helps reject ferrous targets according to the strength and distance of their signal.
This is important because deeply buried gold or relic targets in mineralized soil can sometimes behave similarly to iron.
For that reason, excessive IAR rejection may reduce the chance of detecting difficult deep targets.
The official manual specifically advises reducing IAR if gold nuggets or deep relics begin producing iron-like responses.
Best Starting Strategy for Gold Field
A practical starting approach for natural gold prospecting is:
- Select Gold Field.
- Perform a proper Grab ground balance.
- Begin with stable sensitivity rather than maximum sensitivity.
- Increase Reactivity if the ground is strongly mineralized.
- Keep IAR discrimination conservative.
- Sweep slowly and consistently.
- Re-ground balance when soil conditions change.
- Investigate repeatable weak signals carefully.
Can XP DEUS II Detect Small Gold Nuggets?
Yes. The DEUS II is specifically designed to detect small low-conductivity targets, and the Gold Field program is intended for native gold prospecting in mineralized ground.
Performance improves further when using higher frequencies, particularly with the HF2 coil for very small targets.
However, gold-detection performance still depends on:
- Nugget size
- Ground mineralization
- Coil type
- Operating frequency
- Ground balance
- Sensitivity
- Reactivity
- Search technique
For this reason, no fixed depth should be assumed for all gold nuggets.
XP DEUS II Depth & Deep Target Performance
When discussing XP DEUS II depth, it is important to avoid reducing the detector to one fixed maximum-depth number. XP does not publish a single universal depth figure for every target because real detection depth depends on the target, ground conditions, selected program, coil, reactivity, frequency range, and search technique.
Instead, the DEUS II is designed to let the operator optimize the detector for different types of deep targets.
What Affects XP DEUS II Detection Depth?
The main factors include:
- Target size
- Target conductivity
- Target orientation
- Ground mineralization
- Selected search program
- Reactivity setting
- Frequency range
- Coil type
- Ground balance
- Search speed
- Nearby ferrous contamination
A large, high-conductivity target in clean ground can behave very differently from a tiny low-conductivity target in mineralized soil.
Reactivity and Depth
Reactivity is one of the most important DEUS II settings affecting deep-target performance.
A lower Reactivity setting allows the detector to analyze the target signal for a longer period. In cleaner ground, this can improve response to deeper targets.
XP specifically explains that in clean ground, lowering Reactivity can make the detector more sensitive to deep targets.
As a general guide:
| Reactivity | Typical Use |
|---|---|
| 0–1 | Deep targets, large masses, clean ground |
| 2–2.5 | General detecting |
| 3–5 | Iron-contaminated or highly mineralized ground |
However, lower Reactivity is not always better.
In heavily mineralized or iron-contaminated soil, increasing Reactivity can improve target separation and stability, allowing the detector to identify desirable targets that might otherwise be masked by iron or ground noise.
Deep High Conductor Program
The Deep High Conductor program is one of the primary DEUS II programs for deep, high-conductivity targets.
It uses lower and medium frequencies and is designed for targets such as:
- Deep coins
- High-conductivity coins
- Coin clusters
- Larger conductive targets
The factory configuration uses frequencies up to approximately 14 kHz, which favors higher-conductivity targets compared with programs focused on extremely small low-conductivity objects.
For cleaner ground, XP also suggests that lower Reactivity settings can improve deep-target performance.
Relic Program for Large Deep Targets
For large targets at depth, the Relic program is especially important.
Relic is configured with:
- Lower frequencies
- Low Reactivity
- All-metal style operation
- Conductive soil subtraction
- Ground adjustment using Grab
XP specifically recommends this program for large masses at depth.
For this type of search, the manual recommends raising the search coil approximately 15–20 cm above the ground.
This may sound unusual, but the purpose is to reduce interference from:
- Shallow iron
- Small surface targets
- Ground effects
This allows the operator to concentrate more clearly on the longer, broader signal responses produced by larger deep targets.
Gold Field and Deep Targets in Mineralized Ground
Deep targets can become especially difficult to detect in mineralized soil because their signals may begin to resemble the surrounding ground response.
XP explains that Gold Field and Relic are designed to help in these situations because they mainly reject the local ground after precise adjustment instead of aggressively rejecting surrounding signals.
This can help when searching for:
- Deep native gold
- Larger buried masses
- Difficult targets in mineralized ground
The manual specifically notes that deeply buried targets may take on values close to the surrounding soil, making accurate ground compensation particularly important.
Frequency and Deep Targets
Lower frequencies are generally more suitable for larger targets and high-conductivity objects, while higher frequencies improve sensitivity to smaller targets.
This is why the DEUS II allows the operator to change the maximum frequency used by FMF programs.
For deep high-conductivity searching, reducing the maximum frequency to around 14 kHz can help concentrate the detector more toward larger and higher-conductivity targets.
By contrast, higher-frequency operation is more useful when searching for small targets and low-conductivity objects.
Search Speed Also Matters
XP recommends slower searching when investigating deeper targets.
A fast sweep can provide a quick overview of an area, but it may leave portions of ground insufficiently examined.
For more thorough searching, each coil sweep should slightly overlap the previous sweep.
Slowing down also gives the operator more time to recognize weak, deep responses.
Coil Position for Normal Deep Searching
For normal land detecting, XP recommends keeping the search coil:
- Parallel to the ground
- As close to the surface as practical
- Without repeatedly striking the ground
Keeping the coil close to the ground improves the chance of detecting deeper targets and also improves sensitivity to smaller objects.
The exception is specialized large-target searching with the Relic program, where XP recommends lifting the coil approximately 15–20 cm above the ground.
Does XP DEUS II Have a Fixed Maximum Depth?
No single fixed maximum depth is specified by XP for all targets.
This is the most accurate way to understand DEUS II depth:
XP DEUS II detection depth varies according to target size, conductivity, ground conditions, search program, frequency, coil, Reactivity, and operator technique.
A small coin, a gold nugget, and a large buried metallic object should not be expected to produce the same detection depth.
For deep-search performance, the operator should select the appropriate program and settings rather than relying on one advertised depth number.
XP DEUS II Beach & Underwater Detection
The XP DEUS II is designed for both land and underwater use, making it especially versatile for beach hunters and divers. XP rates the remote control and compatible search coils IP68 waterproof to 20 meters, while the detector also includes dedicated programs for saltwater conditions.
Dedicated Saltwater Programs
The DEUS II includes three factory programs specifically intended for beach and underwater detecting:
- Diving
- Beach
- Beach Sens
Each one uses a different combination of frequencies and signal processing to handle saltwater, wet sand, and changing mineralization.
Diving Program
The Diving program is designed for submerged saltwater searching and difficult underwater conditions.
It uses lower and medium frequencies with conductive-soil subtraction to improve stability in saltwater.
XP positions Diving as the most stable of the three saltwater programs, making it especially suitable for:
- Saltwater diving
- Underwater coin hunting
- Rings and jewelry
- Wet salt environments
- Challenging submerged conditions
The program is also naturally less responsive to very low-conductivity targets such as small aluminum foil compared with the more sensitive Beach and Beach Sens programs.
Beach Program
The Beach program uses higher frequencies, reaching up to approximately 24 kHz with standard FMF coils.
This gives it greater sensitivity to smaller targets than the Diving program.
Beach is especially suitable for:
- Wet beach sand
- Surf zones
- Coins
- Jewelry
- Small non-ferrous targets
If instability appears, XP recommends reducing Salt Sens or increasing Reactivity.
Beach Sens Program
The Beach Sens program is the most sensitive of the dedicated saltwater modes.
With standard FMF coils, it uses frequencies up to approximately 40 kHz and is designed to improve sensitivity to very small targets while maintaining strong performance on larger ones.
XP describes Beach Sens as the deepest beach program for wet conditions, but also the most reactive.
Because of this increased sensitivity, Beach Sens may require more careful adjustment in difficult saltwater conditions.
Salt Sensitivity
The DEUS II includes a dedicated Salt Sens setting for the Diving, Beach, and Beach Sens programs.
Salt Sens is designed specifically to reduce false signals caused by seawater and wet salt environments.
The setting can be adjusted from 1 to 9.
XP recommends using Salt Sens as the primary adjustment when instability is caused by saltwater, while general Sensitivity should be reduced mainly when the problem comes from electromagnetic interference.
Magnetic Black Sand
Some beaches contain strongly magnetic black sand, which can mask weak or deep targets.
The DEUS II includes a Magnetic Ground setting for the beach programs.
Two options are available:
Reject
Rejects black sand, ferrite, and meteorites for greater stability.
Accept
Allows these ground responses to be heard and may also allow deeper targets that would otherwise be masked by similar ground values.
XP notes that Accept can help reveal distant targets hidden by magnetic ground, but it also makes the detector less stable.
Waterproofing and Diving Depth
The DEUS II remote control and search coil are rated:
- IP68
- Waterproof to 20 meters
For deeper dives, XP also provides a dedicated Diving Mode that locks the remote-control keypad once water pressure becomes significant.
According to the manual, this mode is intended to prevent pressure at approximately 8 to 10 meters from accidentally activating remote-control buttons.
Underwater Antenna
Because radio waves do not travel effectively through water, the DEUS II uses a dedicated aerial antenna for underwater communication between the coil and remote control.
The standard box contents listed in the manual include the underwater aerial antenna and clip.
This component should be correctly installed before underwater use.
BH-01 Bone Conduction Headphones
For underwater detection, XP offers the BH-01 bone conduction headphones.
Instead of sitting over the ears, BH-01 rests against the cheekbones and transmits sound through vibration.
The headphones are:
- Designed specifically for metal detecting
- Made in France by XP
- IP68 waterproof to 20 meters
- Suitable for both underwater and land use
This design allows the ears to remain open while target audio is transmitted through bone conduction.
Which Beach Program Should You Choose?
| Search Environment | Recommended Program |
|---|---|
| Saltwater diving | Diving |
| Wet sand and surf | Beach |
| Small targets in wet sand | Beach Sens |
| Strong black sand | Beach program + Magnetic Ground adjustment |
| Unstable saltwater conditions | Reduce Salt Sens |
| Freshwater diving | XP recommends an inland program rather than Diving |
The three saltwater programs give the XP DEUS II a significant advantage for users who regularly move between dry land, wet beaches, surf zones, and underwater search locations.
XP DEUS II Target ID, Discrimination & Audio Identification
The XP DEUS II combines visual target identification with advanced audio discrimination, giving the operator several ways to evaluate a target before digging.
Instead of relying only on a single Target ID number, the DEUS II allows the user to combine:
- Digital Target ID
- Ferrous / Non-Ferrous visual display
- Discrimination
- Notch and Multi-Notch
- B.Caps
- Iron Volume
- Multiple tone modes
- Full Tones
- Pitch audio
This combination is one of the detector’s strongest features for experienced users who want more information from each target response.
Target ID Scale
The DEUS II uses a digital conductivity scale from 0 to 99 for most target identification, with the negative range down to -6.4 representing the ground zone and very small ferrous responses.
The conductivity scale helps the user estimate the electrical characteristics of the detected target. In general, lower numbers represent lower-conductivity targets, while higher numbers represent higher-conductivity targets.
The official manual also shows examples ranging from foil and poor alloys through bronze coins and larger silver or copper coins.
Discrimination
The Discrimination setting allows the operator to reject targets below a selected conductivity threshold.
For example:
- A setting of 10 rejects targets with a Target ID below 10.
- A higher setting can reject more low-conductivity targets.
- XP gives 40 as an example of a level that can reject much small aluminum foil.
However, higher discrimination can also cause desirable targets to be lost.
For that reason, XP recommends using visual and audio target information rather than relying only on aggressive discrimination.
Ferrous / Non-Ferrous Display
The standard DEUS II search screen includes a visual F/NF display for ferrous and non-ferrous target responses.
The screen also shows target strength, which can help the user assess the response of a target and estimate whether it is likely shallow, deep, weak, or strong.
The DEUS II also offers a full-screen Target ID display and an advanced X-Y target signature screen for additional visual analysis.
Notch
The Notch function allows the user to reject a specific conductivity value or target window without rejecting everything below that value.
For example, if an unwanted target repeatedly identifies around TID 37, the user can create a notch around that value while continuing to accept targets with conductivity above and below it.
This is especially useful in areas where one specific type of trash appears repeatedly.
Multi-Notch
The DEUS II also provides Multi-Notch, allowing several separate conductivity ranges to be rejected.
This gives the operator significantly more control than a simple discrimination threshold.
XP explains that the rejected zones appear grayed out on the target conductivity bar.
B.Caps – Bottle Cap Rejection
The B.Caps function is specifically designed to improve rejection of rusty bottle caps and certain difficult ferrous targets.
It can be adjusted from 0 to 5.
XP recommends using it particularly in:
- Parks
- Beaches
- Polluted sites
- Areas containing large numbers of rusty bottle caps
The system can also assist with some difficult ferrous objects such as ferrous cartridges, rings, and irregular iron targets.
Iron Volume
Iron Volume controls the loudness of the low tone associated with ferrous targets below the discrimination setting.
The range is:
- 0 = iron tone muted
- 10 = maximum iron volume
Some experienced detectorists prefer keeping iron audible at a low volume rather than completely silent because hearing the surrounding iron can provide useful information about a difficult site.
2, 3, 4 and 5 Tone Modes
The DEUS II allows the conductivity scale to be divided into different audio regions.
The operator can choose:
- 2 Tones
- 3 Tones
- 4 Tones
- 5 Tones
Each conductivity range can be assigned a different tone frequency and volume.
This allows targets to be classified audibly without constantly looking at the remote control display.
Full Tones
Full Tones provides a more detailed audio representation of target conductivity.
Instead of dividing targets into only a few fixed tone groups, each Target ID produces an audio pitch proportional to its conductivity.
Higher-conductivity targets therefore generate higher-pitched responses.
XP gives an example where aluminum foil with a TID around 30 produces a much lower tone than a large silver coin with a TID around 95.
Full Tones can provide a very rich amount of information, but it generally requires more experience because the user must learn to interpret a wide range of subtle sounds.
Pitch and Pitch 2
In Pitch mode, the target conductivity does not directly determine the sound.
Instead, the signal strength influences the audio pitch and volume.
A smaller or more distant target tends to produce a weaker, lower-pitched response, while a closer or stronger target produces a stronger, higher-pitched sound.
XP also provides Pitch 2, which is designed to make deep and small targets more noticeable while reducing ground noise.
Silencer
The Silencer helps reduce residual false spikes from large iron objects and irregular ferrous targets.
Increasing Silencer can improve iron rejection, but excessive filtering may also mask good non-ferrous targets located close to iron.
This setting should therefore be adjusted carefully in heavily contaminated sites.
Best Way to Identify a Target
For the most reliable target analysis, it is better to combine several types of information rather than relying on one value.
A practical DEUS II workflow is:
- Listen to the audio response.
- Observe the Target ID.
- Check the ferrous / non-ferrous display.
- Sweep the target from another direction.
- Compare the signal consistency.
- Use audio tone behavior to evaluate conductivity.
- Use Pinpoint if necessary before digging.
A stable Target ID combined with a repeatable non-ferrous audio response is generally much more informative than a single isolated reading.
Pinpoint: How to Locate a Target
Once the DEUS II detects a target, the Pinpoint mode can help locate its exact position before digging.
- Move the coil slightly to the side of the target.
- Activate Pinpoint mode.
- Move the coil slowly across the suspected target area.
- Listen for the strongest and highest-pitched response.
- The point with the strongest signal generally indicates the center of the target beneath the coil.
- If necessary, move around the target and sweep again from a 90-degree angle to confirm the position.
- For a more precise location, re-tune the Pinpoint threshold near the target and repeat the sweep.
For normal motion searching, another useful technique is to sweep across the target from two different directions. The intersection of the strongest responses can help identify the exact digging point.
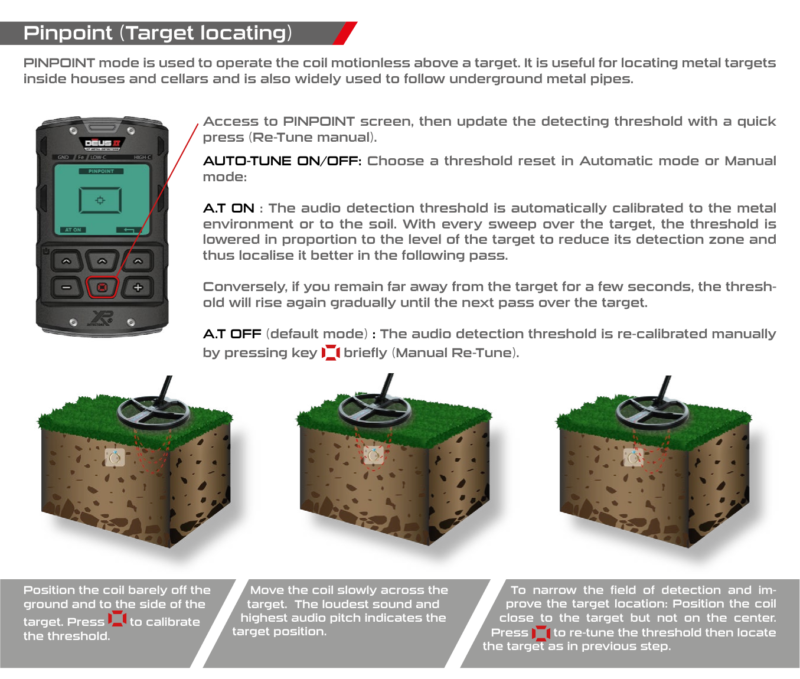
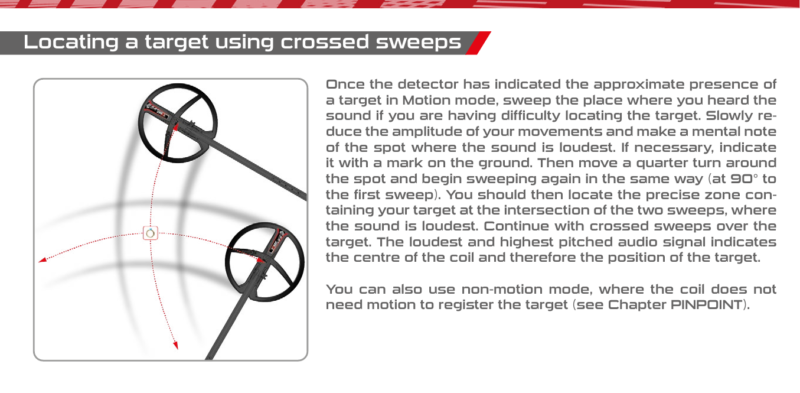
XP DEUS II Ground Balance, Mineralization & Ground Settings
Ground balance is one of the most important parts of getting stable and accurate performance from the XP DEUS II, especially in mineralized soil, black sand, old sites, and areas with changing ground conditions.
The DEUS II continuously displays information about the ground, including the measured ground phase and the level of mineralization, helping the operator understand how difficult the soil is before making adjustments.
Why Ground Balance Matters
Natural soil can contain iron oxides, ferrite, mineral salts, and other conductive or magnetic materials.
These ground conditions can:
- Reduce detection depth
- Create false signals
- Mask weak targets
- Make Target ID less stable
- Interfere with small gold or deep target detection
The DEUS II provides several ground-adjustment methods to help compensate for these effects.
Ground Balance Modes
The official manual lists three main ground-setting methods:
- Grab
- Tracking
- Manual
However, Manual ground adjustment is only available in the DEUS MONO program.
Grab Ground Balance
Grab is the method XP recommends most often because it is quick and accurate.
To perform Grab:
- Enter the Ground menu.
- Pump the search coil up and down over clean ground.
- Hold the ground-balance control.
- Continue until the ground sound is reduced and the displayed value stabilizes.
The manual recommends moving the coil vertically over the soil while capturing the local ground value.
Grab is especially useful when:
- Entering a new search area
- Moving into noticeably different soil
- Searching for gold in mineralized ground
- Using Gold Field or Relic
- The detector begins producing ground-related instability
Tracking Ground Balance
Tracking automatically monitors the ground and continuously adjusts the ground correction value.
This can be useful when mineralization changes gradually and consistently across a search area.
However, XP warns that Tracking is less suitable in locations where ground conditions change rapidly, such as old human settlements where mineralization may vary significantly within a short distance.
In those environments, XP recommends using Grab instead.
Manual Ground Balance
Manual ground balance is available in the DEUS MONO program.
The user first observes the ground mineralization value while pumping the coil over the soil, then manually adjusts the ground setting to match the measured value.
XP explains that manual adjustment is not offered in the multi-frequency programs because each frequency would otherwise need to be adjusted separately. Grab can capture the ground response of the frequencies simultaneously.
Ground Stabilizer
The DEUS II also provides a Ground Stabilizer setting for inland programs.
It controls how much ground feedback the operator is willing to hear.
The range is:
- Level 1 – Least stable / maximum ground acceptance
- Level 2 – Balanced
- Level 3 – Most stable
XP describes Level 1 as an expert setting because it allows more ground response to remain audible, which can help reveal very deep signals that might otherwise be masked by mineralization.
Level 3 provides more stability but rejects more ground response.
Which Ground Stabilizer Level Should You Use?
| Ground Condition | Suggested Starting Point |
|---|---|
| Clean, mild soil | Level 2 |
| Difficult mineralized soil | Level 2 or 3 |
| Maximum stability required | Level 3 |
| Expert deep searching | Level 1 |
The best value depends on the search environment and the operator’s experience.
Ground Mineralization Indicator
The DEUS II displays both:
- Ground phase
- Mineralization strength
The stronger the mineralization level, the more the soil can affect detector performance.
Pumping the coil several times over clean ground helps produce a more accurate mineralization reading.
Magnetic Ground and Black Sand
In the Diving, Beach, and Beach Sens programs, the DEUS II includes a dedicated Magnetic Ground setting.
This is especially useful on beaches containing magnetic black sand.
Two options are available:
Reject
Provides greater stability by rejecting black sand, ferrite, and meteorite-like responses.
Accept
Allows these ground responses to sound and can help reveal deeper targets that might otherwise be masked by similar ground values.
Ground Balance for Gold Field and Relic
Ground balance becomes especially important in Gold Field and Relic.
XP explains that deeply buried targets can sometimes produce values very close to the surrounding ground.
These programs are designed to reject mainly the local ground after precise adjustment, helping retain responses from difficult deep targets in mineralized soil.
For this reason, users searching for native gold or large deep relics should regularly update the ground balance as soil conditions change.
Practical Ground Balance Routine
A good field routine is:
- Find a clean patch of ground.
- Check the mineralization reading.
- Perform Grab.
- Select the correct search program.
- Begin searching.
- Recheck the ground balance whenever the soil changes.
- If instability remains, adjust Reactivity or Sensitivity.
- On beaches, use Salt Sens and Magnetic Ground settings where necessary.
Correct ground balance does not simply make the detector quieter. It helps the DEUS II separate actual target responses from the natural response of the soil.
XP DEUS II Reactivity, Sensitivity & Advanced Search Settings
The XP DEUS II gives the operator extensive control over how the detector responds to targets, ground conditions, and nearby interference. Among the most important settings are Reactivity, Sensitivity, Audio Response, Iron Volume, Threshold, and Frequency control.
Understanding how these settings interact is essential for getting the best performance from the detector.
Reactivity
Reactivity controls how quickly the DEUS II analyzes and separates nearby target signals. It is essentially the detector’s recovery speed.
A higher Reactivity setting allows the detector to respond more quickly when several targets are close together, which is especially useful in:
- Iron-contaminated ground
- Mineralized soil
- Trashy sites
- Areas with closely spaced targets
A lower Reactivity setting allows the detector to spend more time analyzing each signal and can improve deep-target response in cleaner ground.
Recommended Reactivity Ranges
The official manual provides the following general guidance:
| Reactivity | Recommended Use |
|---|---|
| 0–1 | Large masses and coins in relatively clean ground |
| 2–2.5 | General-purpose detecting |
| 3–5 | Iron-contaminated and/or mineralized ground |
XP also explains that the greatest raw detection range is usually obtained with low Reactivity, but medium or high Reactivity can actually help locate more targets in mineralized soil because it improves target separation and signal clarity.
Sensitivity
The DEUS II Sensitivity setting ranges from 0 to 99.
XP states that the most commonly used values are generally between 70 and 90.
Sensitivity should be reduced when searching near:
- Power lines
- Electric fences
- Radio transmitters
- Strong electromagnetic interference
- Highly contaminated areas
The manual also warns against testing the detector indoors because buildings often contain significant electromagnetic and metallic interference.
Higher Sensitivity Is Not Always Better
Increasing sensitivity can improve response to weak or small targets, but excessive sensitivity may make the detector unstable.
A practical approach is:
- Start with a high but stable value.
- Sweep the detector over the ground.
- If excessive false signals appear, lower Sensitivity gradually.
- Stop once the detector becomes stable while still maintaining good target response.
The ideal Sensitivity setting is therefore the highest stable level for the current environment, not simply 99.
Frequency Scan
The DEUS II includes an automatic Frequency Scan function.
This scans the available operating frequencies and selects a channel with lower electromagnetic interference.
It can be especially useful:
- Near power lines
- Around other detectors
- In urban environments
- When unexplained instability appears
XP recommends using Frequency Scan before reducing other performance settings if electromagnetic interference is suspected.
Audio Response
Audio Response changes how loudly weak and deep targets are heard.
The range is:
- 0 = weak audio response
- 7 = maximum audio response
Increasing Audio Response can make weak targets sound louder, but it does not add actual detection depth.
XP specifically explains that this setting changes the audio dynamic range rather than increasing the detector’s physical detection capability.
Why Too Much Audio Response Can Be a Problem
If Audio Response is set too high:
- Small false signals are amplified
- Weak ground noise can become more noticeable
- Strong and weak targets may sound more similar
- Estimating target depth by sound becomes more difficult
For users who want to judge how deep a target may be from the strength of its sound, a moderate Audio Response is usually easier to interpret.
Threshold
Threshold is available when using Pitch mode.
It controls the level of the continuous background sound.
The setting ranges from 0 to 20.
The pitch of the threshold and very weak target responses can also be adjusted between approximately 150 and 603 Hz through the Expert menu.
Threshold can be useful when searching for very weak responses because subtle changes in the background tone may help reveal small or deep targets.
Salt Sens
In the three saltwater programs — Diving, Beach, and Beach Sens — the detector provides a separate Salt Sens adjustment.
Salt Sens ranges from 1 to 9 and is specifically intended to manage false signals caused by seawater and wet salt conditions.
XP recommends adjusting Salt Sens before reducing general Sensitivity when the instability comes from saltwater rather than electromagnetic interference.
Multi-Process
On compatible ST headphones, the DEUS II also offers Multi-Process, which combines two separate audio-processing channels.
This allows the detector to mix different reactivity levels, audio types, and target responses at the same time.
XP describes two key uses:
- Combining low Reactivity for deeper searching with high Reactivity for better separation near iron
- Creating audio morphing effects to provide more information about target character and distance
The system can therefore provide two different perspectives on the same target response simultaneously.
Practical Setting Strategy
A useful way to approach the advanced settings is:
Clean Ground
- Lower Reactivity
- Higher stable Sensitivity
- Moderate Audio Response
Iron-Contaminated Ground
- Higher Reactivity
- Moderate Sensitivity
- Use Iron Volume and B.Caps carefully
Highly Mineralized Ground
- Increase Reactivity
- Reduce Sensitivity if unstable
- Perform proper Ground Balance
Deep Target Searching
- Lower Reactivity where ground allows
- Use Deep High Conductor or Relic depending on target type
- Keep Audio Response moderate enough to preserve depth perception
Saltwater
- Use Diving, Beach, or Beach Sens
- Adjust Salt Sens first
- Increase Reactivity if necessary for stability
The DEUS II is most effective when these settings are adjusted together rather than changing one parameter in isolation.
XP DEUS II Audio System & Wireless Headphones
The XP DEUS II has one of the most advanced audio systems in the XP range. The user can choose between different audio types, tone configurations, equalizer settings, and wireless headphone options.
Available audio styles include:
- PWM
- Square
- High Square
- Low Square
- Pitch
- Full Tones
The detector also includes a four-band equalizer, allowing the user to adjust low, mid-low, mid-high, and high frequencies according to personal hearing preferences.
The DEUS II supports several XP wireless headphone options, including:
- WS6ST
- WSAST
- WSAXL ST
- BH-01 bone conduction headphones
The WS6ST module can even operate as the main controller without the remote control, creating an extremely lightweight setup while still providing access to detector settings and target information.
XP DEUS II Battery Life, Weight & Portability
One of the strongest practical advantages of the DEUS II is its lightweight wireless design.
Depending on the configuration, the detector can weigh from approximately 750 g, making it comfortable for long search sessions.
The system uses rechargeable lithium-polymer batteries in the coil, remote control, and wireless headphones.
Battery life varies by component and operating mode, and can also be affected by the audio output used. The manual notes, for example, that the remote control can provide significantly longer runtime when using wireless headphones compared with the built-in speaker or BH-01 output.
XP DEUS II Accessories & Compatibility
The DEUS II ecosystem supports a wide range of XP accessories and configurations.
Key compatible accessories include:
- Multiple FMF search coils
- HF2 coil
- WS6ST headphones
- WSAST headphones
- WSAXL ST headphones
- BH-01 bone conduction headphones
- XP MI-6 wireless pinpointer
- Underwater antenna
- S-Telescopic stem
- Charging accessories
The standard box contents depend on the version purchased, but the official manual lists items such as the remote control, wireless headphones, search coil, coil fitting kit, underwater antenna, waterproof caps, telescopic stem, charging cable, and coil connection clamp.
XP MI-6 Pinpointer Integration
The XP MI-6 pinpointer can connect wirelessly to the DEUS II.
Once paired, its audio can be transmitted directly through the DEUS II system, and additional MI-6 settings become available from the detector interface.
The remote control can also adjust MI-6 sensitivity, volume, tone, and other functions.
XP GO TERRAIN App
The DEUS II can communicate with the XP GO TERRAIN smartphone application.
The app can receive target information from the detector and use the smartphone GPS to map the search area, record detected targets, and track search routes.
This gives users an additional way to document and review their field activity.
XP DEUS II Main Advantages
The strongest advantages of the XP DEUS II include:
- FMF® simultaneous multi-frequency technology
- Excellent target separation
- Dedicated Gold Field program
- Dedicated Relic program
- Three saltwater programs
- IP68 waterproofing to 20 meters
- Fully wireless design
- Very low weight
- Advanced Target ID and discrimination
- Adjustable Reactivity
- Advanced ground balance
- Multiple audio systems
- Wireless headphones
- MI-6 integration
- Software updates
- GO TERRAIN support
- Extensive user customization
Things to Consider Before Buying
The DEUS II is a highly advanced detector, but its large number of settings means that beginners may need time to understand features such as:
- Reactivity
- Ground balance
- Frequency Max
- Salt Sens
- IAR
- Notch
- Audio Response
- Tone modes
The good news is that the factory programs allow beginners to start detecting without immediately adjusting every advanced setting.
Another important point is that XP does not specify one fixed detection depth for all targets. Depth varies according to target size, conductivity, ground conditions, coil, program, and settings.
Who Is the XP DEUS II Best For?
The XP DEUS II is a strong option for:
- Coin hunters
- Relic hunters
- Gold prospectors
- Beach detectorists
- Underwater detectorists
- Users searching mineralized ground
- Professional detectorists
- Advanced users who want extensive customization
- Beginners who want a detector they can grow into over time
Its wide range of programs makes it suitable for users who search in several different environments rather than specializing in only one type of detecting.
XP DEUS II 5-Year Warranty in Dubai
Customers purchasing the XP DEUS II from Detectors Shop in Dubai receive a 5-year warranty.
Detectors Shop also provides product guidance and after-sales support for customers using the DEUS II and other XP metal detectors.
Is the XP DEUS II multi-frequency?
Yes. The DEUS II uses FMF® Fast Multi Frequency technology, allowing simultaneous multi-frequency operation across its FMF programs.
Can XP DEUS II detect gold?
Yes. It includes the dedicated Gold Field program for native gold and gold nuggets, especially in mineralized ground.
Is XP DEUS II waterproof?
Yes. The compatible remote control and search coil are rated IP68 waterproof to 20 meters.
Can XP DEUS II be used on the beach?
Yes. It includes three dedicated saltwater programs: Diving, Beach, and Beach Sens.
Does XP DEUS II work underwater?
Yes. It is designed for underwater detecting to depths of up to 20 meters when correctly configured.
What frequencies does XP DEUS II use?
The FMF programs use different combinations of simultaneous frequencies. In DEUS MONO with standard FMF coils, the detector provides main frequencies from approximately 4 to 45.4 kHz.
Can DEUS II detect small gold nuggets?
Yes. Higher-frequency operation and the Gold Field program make the detector suitable for small gold targets, particularly in mineralized ground.
Does XP DEUS II have ground balance?
Yes. It includes Grab, Tracking, and Manual ground adjustment, with Manual available in DEUS MONO.
Does XP DEUS II have a pinpoint mode?
Yes. The detector includes a dedicated non-motion Pinpoint mode for precise target location.
Can the XP MI-6 connect to DEUS II?
Yes. The MI-6 can connect wirelessly and integrate directly with the DEUS II interface and audio system.
Is XP DEUS II suitable for beginners?
Yes. Beginners can start with the factory programs, while advanced settings remain available as their experience increases.
What warranty does Detectors Shop provide?
Detectors Shop provides a 5-year warranty on the XP DEUS II.
XP DEUS II Review: Final Verdict
The XP DEUS II is one of the most versatile metal detectors in the XP range because it combines FMF simultaneous multi-frequency technology, wireless operation, advanced discrimination, lightweight construction, gold prospecting capability, beach detection, and underwater use in one system.
Its greatest strength is flexibility. The same detector can be configured for coins, relics, gold nuggets, mineralized soil, wet beaches, saltwater diving, and deep high-conductivity targets.
The DEUS II is also highly customizable, offering extensive control over Reactivity, frequency, discrimination, ground balance, audio response, tones, Target ID, and many other parameters.
For beginners, the factory programs provide a simple starting point. For experienced detectorists, the advanced settings provide enough control to fine-tune the detector for demanding search conditions.
For users looking for a lightweight, wireless, waterproof, and highly configurable detector, the XP DEUS II remains one of the strongest all-around options available from XP Metal Detectors.
Customers purchasing through Detectors Shop in Dubai receive a 5-year warranty and professional support.
Sources & References
This XP DEUS II review was prepared using official and first-party technical sources to ensure accuracy and reliability.
The main references used for this guide include:
- XP Metal Detectors – Official DEUS II Product Page
- XP DEUS II Official User Manual
- Detectors Shop – XP DEUS II Product Page
- Detectors Shop technical experience and customer support information
- Detectors Shop 5-year warranty policy for XP DEUS II
Where specifications or operating recommendations are mentioned, priority was given to the official XP Metal Detectors documentation and the current XP DEUS II review. Product availability, warranty, and local support information are based on Detectors Shop’s current offering in Dubai.
