












Introduction
Keeping your XP metal detector updated is one of the easiest ways to ensure that you are using the latest improvements, compatibility updates, bug fixes, and performance enhancements released by XP Metal Detectors.
Depending on the model, XP firmware updates can apply to the detector’s remote control, wireless headphones, coils, and other compatible accessories. In some cases, different components must also be updated to compatible firmware versions to continue working together correctly.
In this complete guide, we will explain how to update XP metal detectors step by step, including the update process for XP DEUS II, XP ICON, XP DEUS, WS6, WSA II, and other compatible XP accessories.
You will also learn how to update XP metal detectors what you need before starting, how to access the official XP updater, how to avoid common update mistakes, and how to solve the most frequent firmware update problems.

Table of Contents
What You Need Before Updating Your XP Metal Detector
how to update XP metal detectors Before starting the update process, prepare everything you need in advance to avoid interruptions or connection problems.
You will need:
- A compatible XP metal detector or accessory
- A Windows PC or compatible computer
- A stable internet connection
- The correct USB data cable
- A sufficiently charged remote control or wireless headphones
- Access to the official XP update page
- A supported web browser when using the XP online updater
It is also a good idea to write down any custom programs or personal settings before updating, especially if you use modified search programs that you may want to restore later.
Important: Use the correct XP USB/data cable for the component you are updating. A charging-only cable may not allow the updater to detect the device.
How to Access the Official XP Updater
how to update XP metal detectors ??
XP provides official update tools for supported detectors and accessories. For the safest update process, always use the official XP website rather than third-party download pages.
Step 1 – Open the XP Updates Page
Go to the official XP Metal Detectors website and open the Updates section.
Step 2 – Choose Your Detector
Select the product you want to update XP metal detectors , such as:
Step 3 – Open the Correct Updater
Each detector family uses its own update process. Make sure you select the updater that matches your detector and accessory.
For DEUS II, the updater may include separate options for components such as:
- Remote Control
- WS6
- WSA II / WSA II XL
- Compatible stereo headphones
Step 4 – Follow the On-Screen Instructions
Once the updater opens, follow the instructions shown on the screen carefully. Do not connect or disconnect the device until the updater asks you to do so.
Important: Always choose the correct detector and accessory before starting. Using the wrong updater or interrupting the process may cause the update to fail.
How to Update XP DEUS II Remote Control – Step by Step
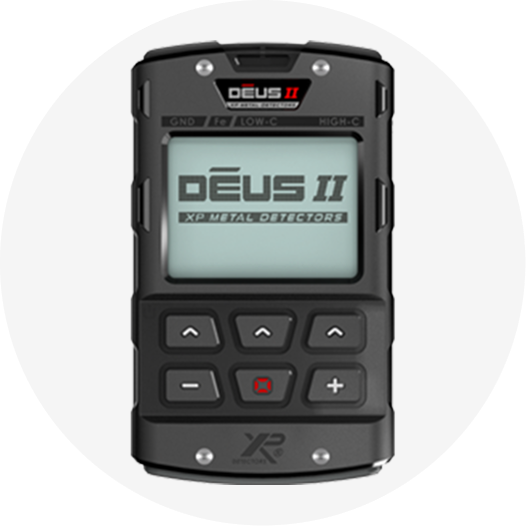
Updating the DEUS II Remote Control is straightforward when you follow the correct sequence. XP recommends using its official updater and the correct USB data cable supplied with the detector.
Step 1 – Charge the Remote Control
Before starting, make sure the DEUS II Remote Control has enough battery power.
Avoid beginning a firmware update when the battery is very low, as an unexpected shutdown during installation can interrupt the process.
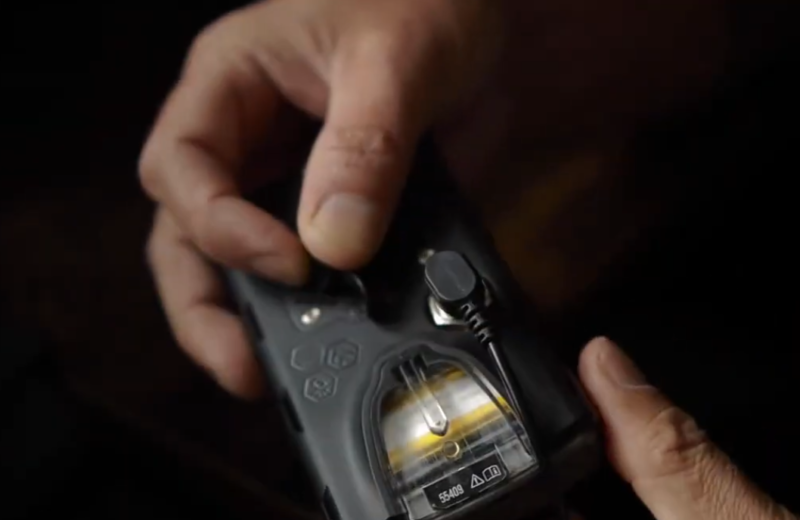
Step 2 – Open the Official XP Updater
Open the official XP update page on your computer and select the DEUS II update XP metal detectors.
For the online updater, XP recommends using a compatible browser such as Google Chrome or Microsoft Edge. how to update XP metal detectors
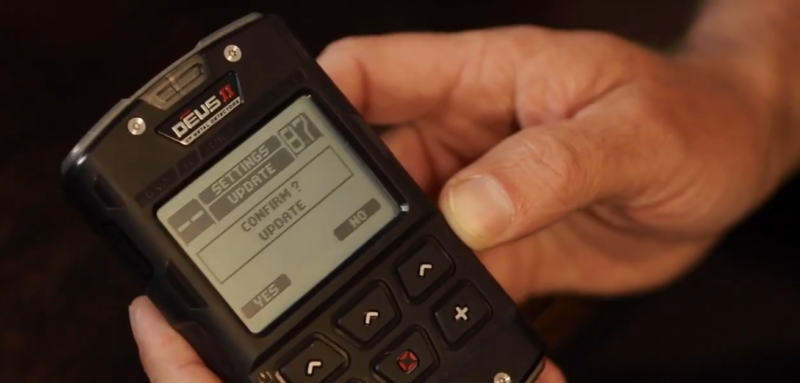
Step 3 – Put the DEUS II Remote Control in Update Mode
On the DEUS II Remote Control, navigate to:
OPTION → CONFIG → UPDATE → CONFIRM
Once confirmed, the remote control will be ready to communicate with the updater.
Step 4 – Connect the Remote Control to the Computer
Use the correct XP USB cable supplied with the DEUS II and connect the Remote Control to a USB port on your computer.
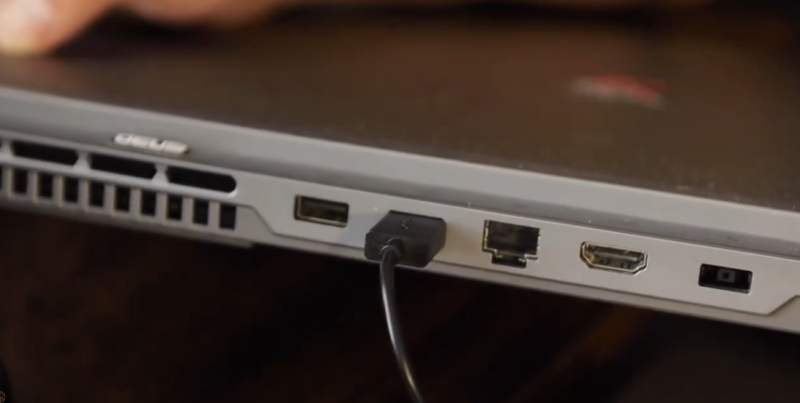
Make sure the cable is properly connected and avoid using a charging-only USB cable.
Step 5 – Select the Firmware Version
Inside the update XP metal detectors, select the firmware version you want to install.
In most cases, users should choose the latest stable version available unless XP specifically recommends another version for compatibility reasons.
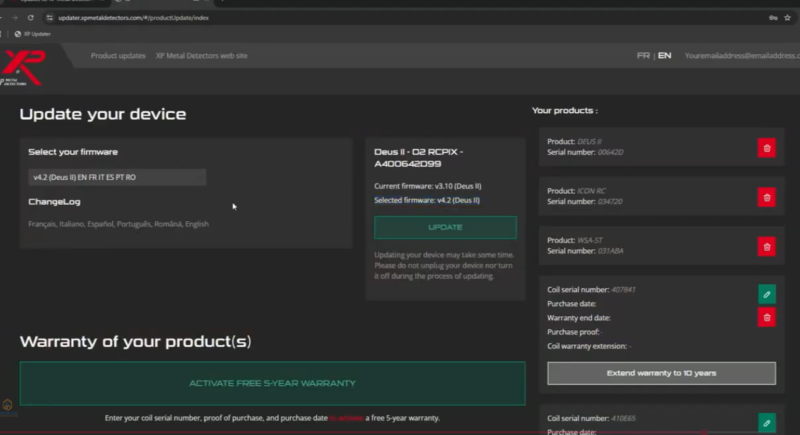
Step 6 – Start the Firmware Update
Follow the instructions displayed by the update XP metal detectors and begin the installation.
The updater will transfer the firmware to the DEUS II Remote Control and install it automatically.
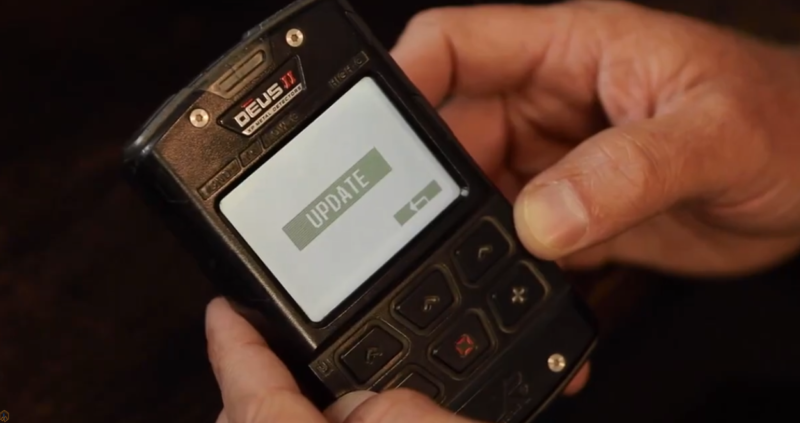
Step 7 – Do Not Disconnect the Device
While the update is running:
- Do not unplug the USB cable.
- Do not turn off the computer.
- Do not switch off the Remote Control.
- Do not close the updater page.
Wait until the updater confirms that the firmware installation has finished successfully.
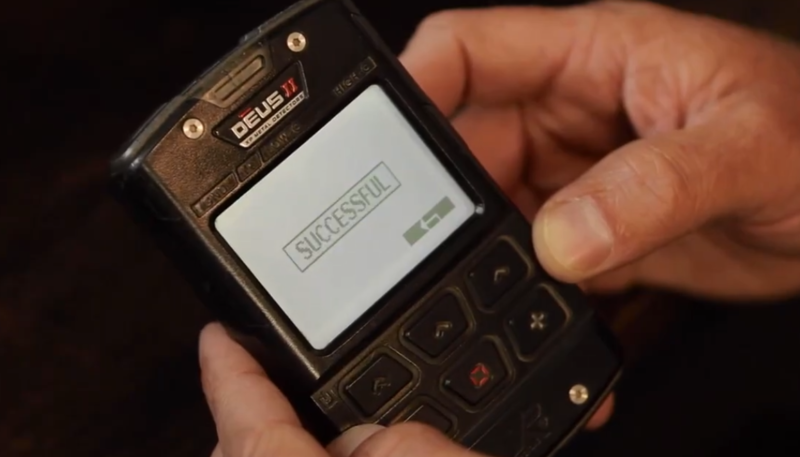
Step 8 – Restart the DEUS II Remote Control
After the update XP metal detectors confirms that the process is complete, disconnect the cable only when instructed and restart the Remote Control.
Step 9 – Check the Firmware Version
After restarting the detector, open the system information menu and verify that the new firmware version has been installed correctly.
Important: If you use wireless headphones such as WS6, WSA II, WSA II XL, or compatible stereo XP headphones, update them to the firmware version required by the Remote Control. XP warns that incompatible firmware versions between components can prevent them from working together correctly.
XP’s official instructions confirm the DEUS II update path through OPTION → CONFIG → UPDATE → CONFIRM, and they also stress that the remote and compatible wireless headphones should be kept on matching firmware versions where required.
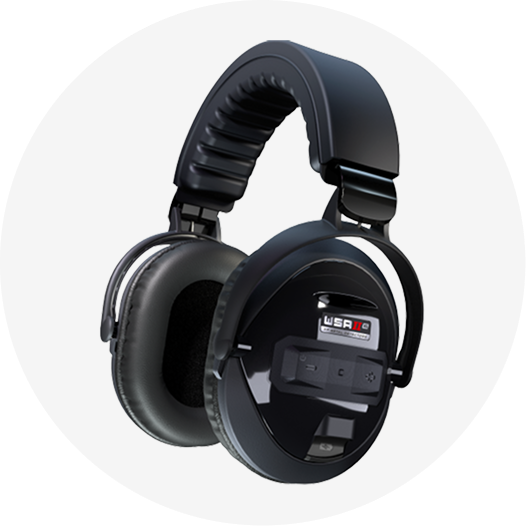
How to Update XP WS6 Headphones – Step by Step
If you use the XP WS6 wireless headphones with your DEUS II, they should be updated whenever XP requires the headphones and Remote Control to use compatible firmware versions.
Step 1 – Open the WS6 Settings
Turn on the WS6 module and press the menu button to access the options.
Navigate to the configuration menu.
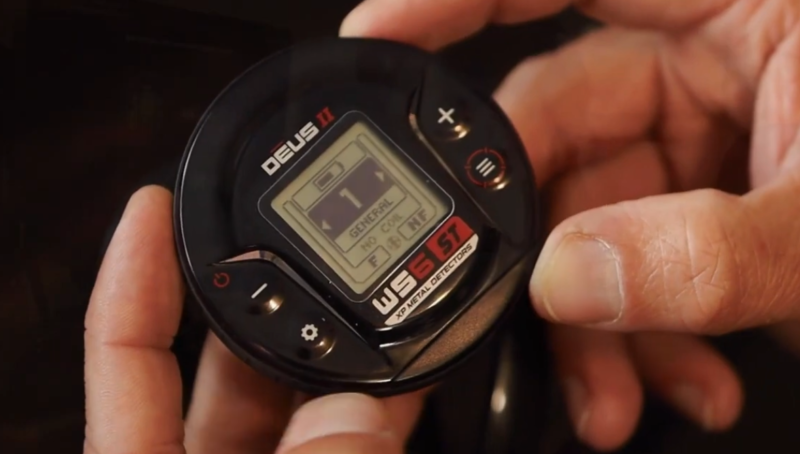
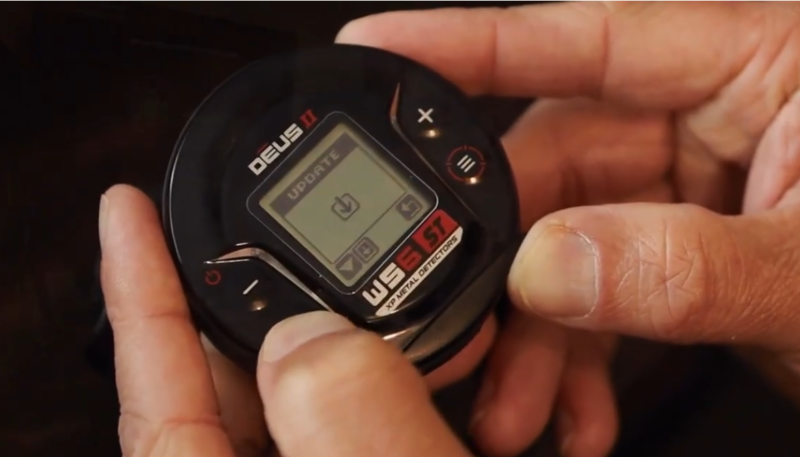
Step 2 – Enter Update Mode
From the WS6 menu, select:
CONFIG → UPDATE
Press and hold the required button to confirm update mode.
The WS6 will now be ready to connect to the XP updater.
Step 3 – Open the XP Updater
On your computer, open the official XP updater and select the WS6 option.
Make sure you are using the updater intended for the WS6 and not another XP accessory.
Step 4 – Connect the WS6 to the Computer
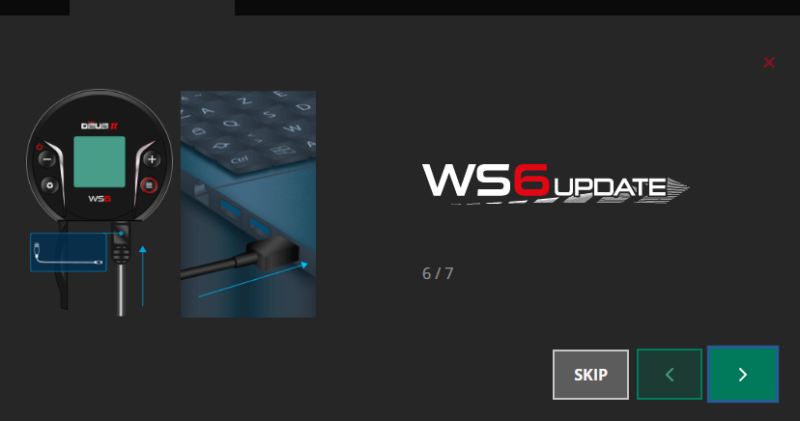
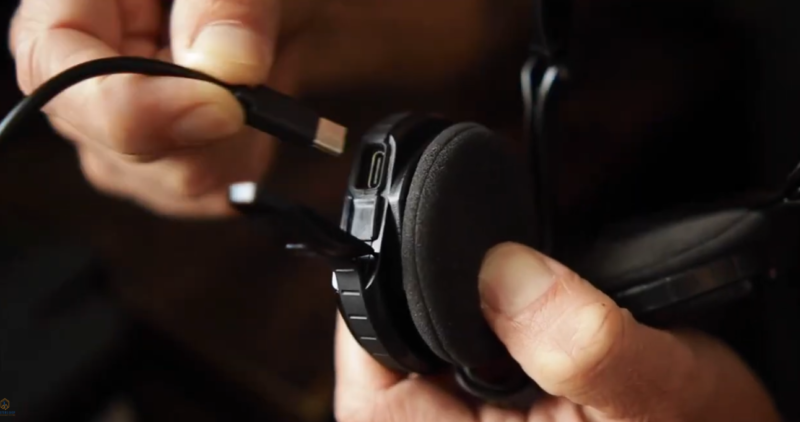
Use the correct single USB data cable supplied for the WS6.
Connect the WS6 directly to your computer when the updater asks you to do so.
Step 5 – Select the Firmware Version
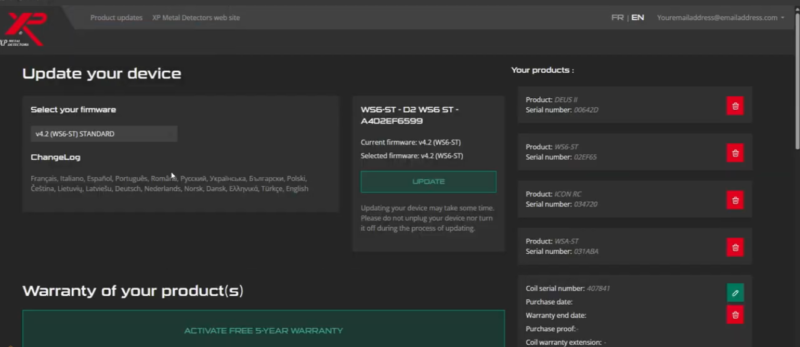
Choose the firmware version required for your DEUS II system.
For proper compatibility, the WS6 should use the version specified by XP for the Remote Control firmware you have installed.
Step 6 – Start the Update
Follow the instructions displayed on the XP updater and begin the firmware installation.
Do not disconnect the WS6 while the update is in progress.
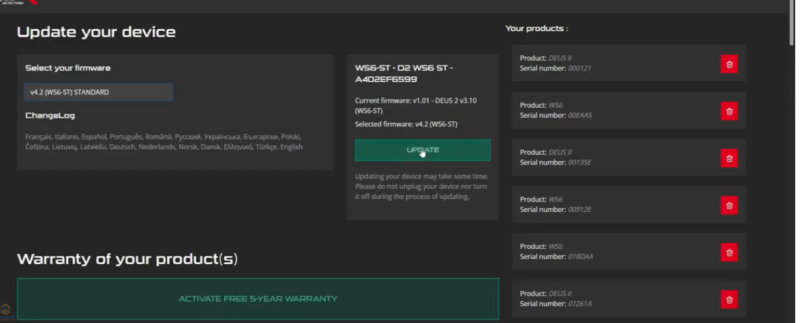
Step 7 – Wait for the Update to Finish
Keep the WS6 connected until the updater confirms that the installation has completed successfully.
Do not close the updater, unplug the cable, or switch off the computer during this process.
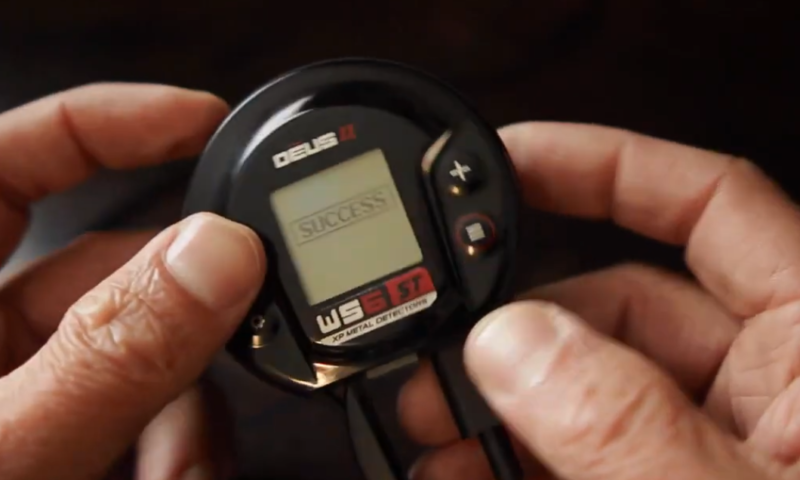
Step 8 – Restart the WS6
Once the update XP metal detectors is complete, disconnect the cable only when instructed and restart the WS6.
Step 9 – Reconnect the WS6 to DEUS II
Turn on the DEUS II Remote Control and verify that the WS6 connects normally.
If the headphones do not reconnect after the update, check that the Remote Control and WS6 are using compatible firmware versions.
Important: XP specifically recommends updating the WS6 and DEUS II Remote Control to the same required firmware version to ensure correct wireless communication.
How to Update XP WSA II and WSA II XL Headphones – Step by Step
The XP WSA II and WSA II XL wireless headphones can also receive firmware updates through the official XP updater. XP recommends keeping them on the same firmware version as the DEUS II Remote Control to ensure proper communication.
Step 1 – Charge the Headphones
Before starting, make sure your WSA II or WSA II XL headphones are sufficiently charged.
XP recommends having at least 50% battery level before beginning a firmware update.
Step 2 – Open the Official XP Updater
On your computer, open the official XP updater.
Select the:
WS6 or WSAII
tab at the top of the updater page.
The WSA II and WSA II XL use the same updater option.
Step 3 – Put the Headphones in Update Mode
To place the WSA II or WSA II XL headphones into update mode:
- Press the – button.
- Then press the + button.
- Hold both buttons together for approximately 12 seconds.
The headphones will then be ready for the firmware update.
Step 4 – Connect the Correct USB Cable
Connect the headphones to your computer using the single USB DATA cable supplied with the headphones.
Important: Do not use the three-output DEUS II charging cable for this step. XP specifically requires the single USB data cable for updating the WSA II and WSA II XL.
Step 5 – Select the Firmware Version
Follow the instructions displayed by the XP updater and select the firmware version that matches your DEUS II system.
Step 6 – Start the Firmware Update
Begin the update and keep the headphones connected while the firmware is being transferred and installed.
Do not unplug the USB cable or close the updater during the process.
Step 7 – Wait for Confirmation
Wait until the updater confirms that the firmware installation has completed successfully.
Only disconnect the headphones when the updater indicates that it is safe to do so.
Step 8 – Restart and Test the Headphones
Restart the WSA II or WSA II XL headphones and turn on your DEUS II Remote Control.
Confirm that the headphones reconnect and operate normally.
Compatibility Warning: XP states that the DEUS II Remote Control and WSA II / WSA II XL headphones must use the same required firmware version. If the versions do not match, the headphones may not communicate with the Remote Control correctly.
XP’s official instructions specifically state that WSA II and WSA II XL use the same updater tab, enter update mode by holding – and + for about 12 seconds, and must use the single USB DATA cable rather than the three-output cable.
How to Update XP ICON / ICON X – Step by Step
XP provides a dedicated updater for the XP ICON and ICON X detectors. The update process is designed to keep the detector’s remote control and compatible wireless headphones up to date with the latest functions and improvements.
Step 1 – Charge the ICON or ICON X Components
Before starting, make sure the Remote Control and any wireless headphones you plan to update have sufficient battery power.
Avoid starting a firmware update with a nearly empty battery.
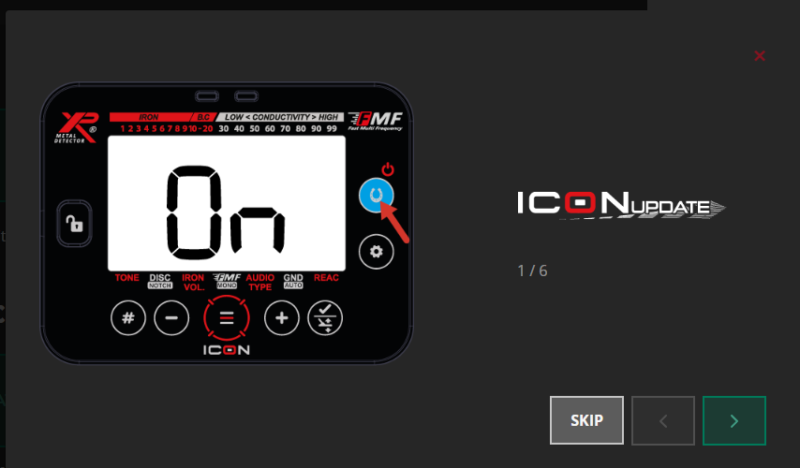
Step 2 – Open the Official XP Updates Page
Go to the official XP Metal Detectors website and open the Updates section.
Select:
ICON / ICON X
Then open the official ICON Updater.
Step 3 – Select the Component You Want to Update
The ICON update XP metal detectors can be used to update supported components of the detector system, including the Remote Control and compatible wireless headphones.
Choose the correct component before continuing.
Step 4 – Connect the Remote Control
Use the correct USB data cable and connect the ICON or ICON X Remote Control to your computer when the updater asks you to do so.
Make sure the USB connection is stable throughout the process.
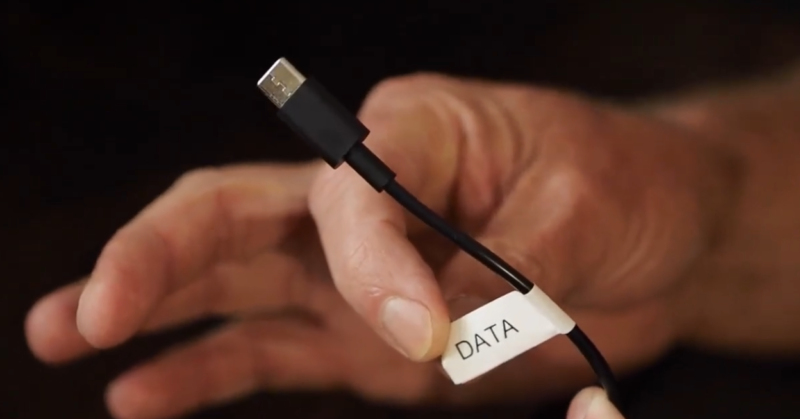
Step 5 – Follow the Updater Instructions
The official XP updater will guide you through the required steps.
Follow every instruction shown on the screen carefully and do not disconnect the Remote Control while firmware is being transferred or installed.
Step 6 – Install the Available Firmware
Choose the firmware version offered by the official updater and start the installation.
Wait until the update process reaches completion.
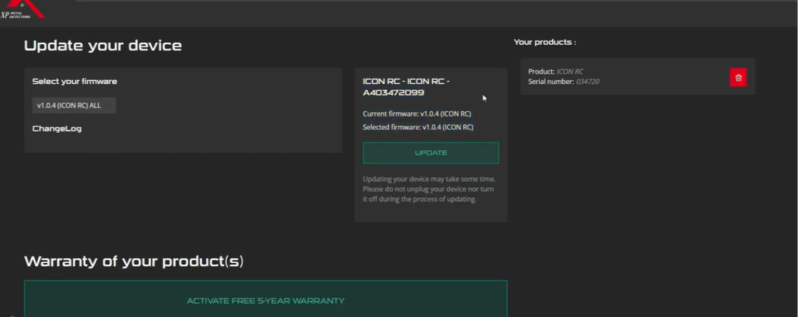
Step 7 – Wait for Confirmation
Do not disconnect the USB cable until the updater confirms that the update has finished successfully.
Closing the browser or disconnecting the device during installation may interrupt the update.
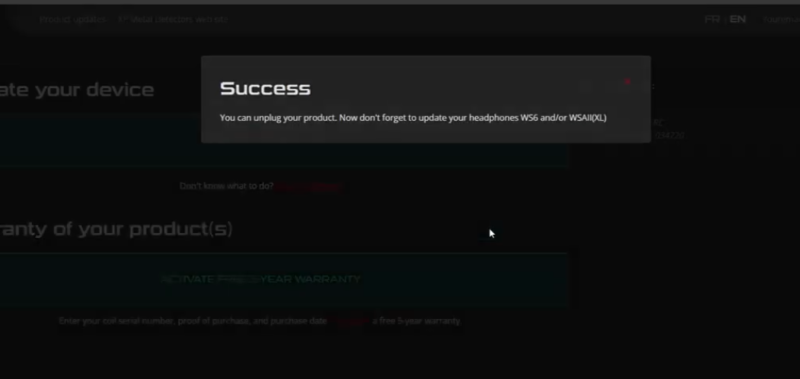
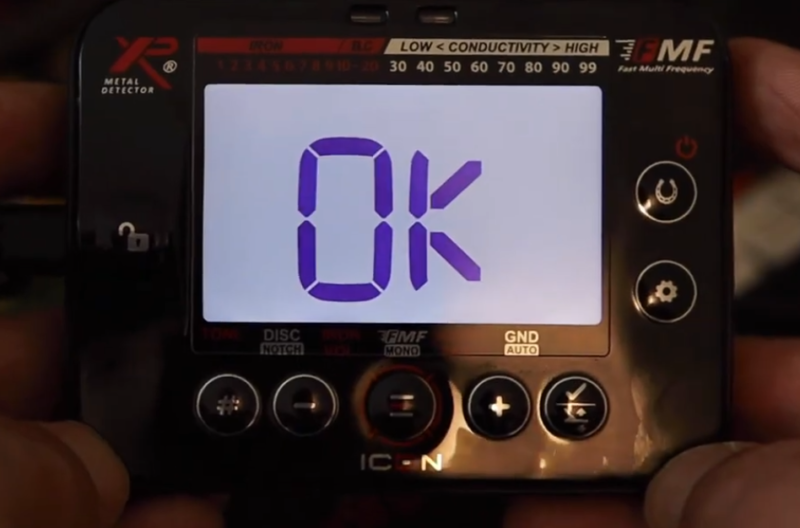
Step 8 – Restart the Remote Control
Once the updater confirms completion, disconnect the device when instructed and restart the ICON or ICON X Remote Control.
Step 9 – Update Compatible Wireless Headphones
If your detector is paired with compatible XP wireless headphones, return to the ICON updater and update the headphones when required.
Follow the specific on-screen instructions for the headphone model you are using.
Step 10 – Test the Detector
After completing the updates:
- Turn on the detector.
- Confirm that the Remote Control starts normally.
- Check the wireless headphone connection.
- Confirm communication with the search coil.
- Perform a short detection test.
If all components connect normally, the update has been completed successfully.
Important: Always use the official XP ICON updater and follow the instructions displayed on screen. The exact update procedure may change as XP releases new firmware versions.
How to Update the Original XP DEUS – Step by Step
The original XP DEUS can also receive firmware updates through the official XP updater. Depending on the update, the process may involve the Remote Control, wireless headphones, and coil software.
For proper operation, XP recommends keeping all DEUS components on the same compatible firmware version.
Step 1 – Fully Charge All DEUS Components
Before starting the update, make sure the following components are fully charged:
- DEUS Remote Control
- Wireless headphones
- Search coils
A firmware update should not be started with a low battery level.
Step 2 – Open the Official DEUS Updater
Go to the official XP Metal Detectors Updates page and select:
DEUS UPDATER
Use the English version of the updater and follow the instructions displayed on the screen.
Step 3 – Prepare the DEUS Remote Control
Turn on the Remote Control and follow the updater instructions to place it in the required update mode.
Do not connect the USB cable before the updater asks you to do so.
Step 4 – Connect the Remote Control
Use the single USB data cable recommended by XP.
Connect the DEUS Remote Control directly to the computer when prompted by the updater.
Important: Do not use the three-output charging cable for the firmware update.
Step 5 – Select the Firmware Version
Choose the firmware version available through the official DEUS updater.
Unless you have a specific compatibility reason to use another version, install the latest stable firmware offered by XP.
Step 6 – Update the Remote Control
Start the firmware installation and keep the Remote Control connected until the updater confirms that the process has finished successfully.
Do not unplug the USB cable during installation.
Step 7 – Update the Wireless Headphones
After updating the Remote Control, follow the updater instructions to update the compatible DEUS wireless headphones.
The headphones should use the same compatible firmware version as the Remote Control.
Step 8 – Update the Search Coils When Required
Some DEUS firmware updates may also include coil software.
Follow the official updater instructions carefully and make sure all coils used with the detector are updated when required.
Step 9 – Restart the DEUS System
After all required components have been updated:
- Restart the Remote Control.
- Restart the headphones.
- Select the correct coil.
- Confirm that all components communicate normally.
Step 10 – Test the Detector
Perform a quick functional test after the update.
Check:
- Coil connection
- Wireless headphone connection
- Audio response
- Target detection
- Saved programs and settings
Important Compatibility Rule: XP states that the DEUS Remote Control, headphones, and coils should use the same compatible firmware version. For example, components running different major firmware versions may not communicate correctly.
XP’s official DEUS V6 instructions specifically say that the Remote Control, headphones, and coils should all be updated to the same version, and its current update page still provides a dedicated DEUS updater for these components.
What to Do After Updating Your XP Metal Detector
Once the firmware update is complete, do not start detecting immediately. Take a few minutes to confirm that all components are working correctly and that the update was installed successfully.
1. Check the Installed Firmware Version
Open the detector’s system information menu and confirm that the expected firmware version is displayed.
If the version number has not changed, repeat the update process and make sure the installation completed successfully.
2. Reconnect Wireless Headphones
Turn on your XP wireless headphones and check that they connect normally to the Remote Control.
If they do not connect, confirm that both components are running compatible firmware versions.
3. Check Coil Connection
Verify that the search coil is recognized by the detector and responds correctly.
If the coil is not detected, check the pairing settings and confirm whether the firmware update also required a coil update.
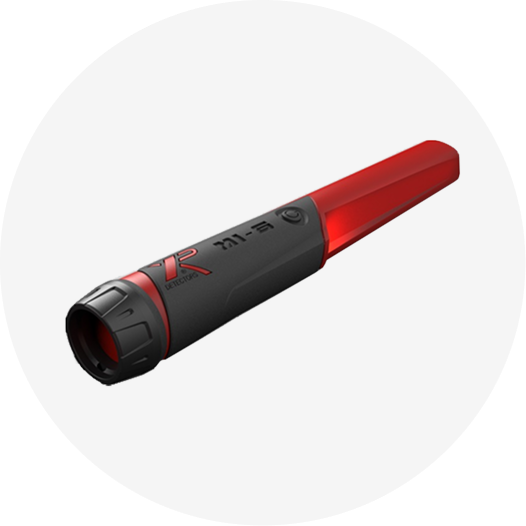
4. Reconnect the MI-6 Pinpointer
If you use an XP MI-6 pinpointer, check that it is still paired correctly after the update.
Reconnect or re-pair it if necessary.
5. Restore Custom Programs
Some firmware update XP metal detectors may reset or modify custom settings.
If you saved your preferred programs before updating, re-enter them and confirm that all important parameters are correct.
6. Test the Audio
Check the headphones and detector audio before going into the field.
Test:
- Volume
- Audio type
- Target tones
- Wireless connection
- MI-6 audio, if connected
7. Perform a Quick Detection Test
Pass a few known metal targets under the coil and confirm that the detector responds normally.
This simple test can help identify connection or configuration issues before you begin a full detecting session.
8. Restart the Complete System
Finally, switch off the Remote Control, headphones, and accessories, then restart the entire system once.
If all components connect normally and the detector responds correctly, the firmware update is complete.
Tip: After every major firmware update, spend a few minutes reviewing the detector settings. New firmware versions may introduce additional options, audio features, compatibility changes, or improvements that are worth testing.
XP Firmware Update Problems and Solutions
Even when the update process is simple, connection issues, incorrect cables, incompatible firmware versions, or interrupted installations can sometimes cause problems. The solutions below cover the most common XP firmware update issues.
XP Updater Does Not Detect the Detector
If the updater cannot detect your XP device:
- Disconnect and reconnect the USB cable.
- Try another USB port on the computer.
- Make sure you are using a USB data cable, not a charging-only cable.
- Close and reopen the updater.
- Restart the detector and enter update mode again.
- If using an online updater, try Google Chrome or Microsoft Edge.
USB Device Not Recognized
If Windows does not recognize the detector or headphones, first verify the cable and USB port.
Avoid USB hubs whenever possible and connect the XP device directly to the computer.
If the problem continues, restart the computer and repeat the process.
Firmware Update Stops or Freezes
If the update appears to stop:
- Do not immediately disconnect the device.
- Wait for the updater to respond.
- Check that the internet connection is still active.
- Avoid closing the browser or update software during installation.
If the updater reports an error, restart the process from the beginning using the official XP updater.
DEUS II Remote Control Will Not Enter Update Mode
Confirm that you are following the correct menu path:
OPTION → CONFIG → UPDATE → CONFIRM
If the update option is unavailable, check the firmware-specific instructions provided by XP, as older versions may use slightly different procedures.
WS6 Does Not Connect After the Update
One of the most common causes is a firmware mismatch between the WS6 and DEUS II Remote Control.
Check the installed firmware version on both devices and update the WS6 again if necessary.
WSA II or WSA II XL Does Not Work After Updating
Verify that:
- The headphones were updated using the correct updater option.
- The correct single USB data cable was used.
- The firmware version is compatible with the DEUS II Remote Control.
Restart both devices after confirming the firmware versions.
The Search Coil Does Not Connect
If the coil no longer communicates with the detector:
- Restart the detector.
- Check that the correct coil is selected.
- Re-pair the coil if necessary.
- Verify whether the firmware update required a coil update.
For the original XP DEUS, coil firmware compatibility can be especially important.
The Update Fails Before Completion
Common causes include:
- Unstable USB connection
- Incorrect USB cable
- Low battery
- Browser interruption
- Computer sleep mode
- Internet connection failure
Repeat the update only after correcting the likely cause.
The Detector Restarts After an Update
A restart after firmware installation can be normal.
Allow the detector to complete the startup process and then check the installed firmware version.
If the detector repeatedly restarts or fails to load normally, reconnect it to the official updater and follow XP’s recovery or update instructions.
Custom Programs Have Disappeared
Some updates may reset or modify saved user settings.
This is why it is recommended to record important custom programs before installing new firmware.
Re-enter your preferred settings after confirming that the update was completed successfully.
The Remote and Headphones Show Different Firmware Versions
Do not ignore a firmware mismatch.
XP requires compatible firmware versions between the Remote Control and supported wireless headphones for proper communication.
Update the component that is still running the older or incompatible version.
Important: If an update repeatedly fails, avoid experimenting with unofficial firmware files or third-party update tools. Return to the official XP updater and follow the instructions for your exact detector and accessory.
XP Firmware Update Safety Tips and Important Warnings
Firmware updates are generally safe when the official XP procedure is followed correctly. However, interrupting the process or using the wrong connection method can cause update failures.
Use Only the Official XP Updater
Always download or access firmware updates through the official XP Metal Detectors website.
Avoid unofficial firmware files, modified software, or third-party download pages.
Use the Correct USB Data Cable
Not every USB cable can transfer data.
A charging-only cable may power the device without allowing the updater to recognize it.
Always use the cable recommended by XP for the specific Remote Control, headphones, or accessory you are updating.
Do Not Disconnect the Device During Installation
Never unplug the USB cable while firmware is being transferred or installed.
Wait until the updater confirms that the process has finished.
Keep the Battery Sufficiently Charged
Make sure the component being updated has enough battery power before starting.
This reduces the risk of the device shutting down during installation.
Prevent the Computer from Entering Sleep Mode
During the update, keep the computer active.
Avoid:
- Sleep mode
- Automatic shutdown
- Restarting the computer
- Closing the updater
- Disconnecting from the internet
Update Compatible Components When Required
An XP detector may contain several wireless components that communicate with each other.
Depending on the detector and firmware version, this may include:
- Remote Control
- Wireless headphones
- Search coils
- Compatible accessories
If XP requires multiple components to use matching or compatible firmware versions, update all of them before returning to normal use.
Save Important Settings Before Updating
Write down any important custom programs, audio settings, discrimination settings, or other personal configurations before installing a major firmware update.
This makes it easier to restore your preferred setup if settings are reset.
Do Not Force an Update After an Error
If the updater reports a failure, first identify the likely cause.
Check:
- USB cable
- USB port
- Battery level
- Internet connection
- Correct updater
- Correct update mode
Then restart the update process using the official instructions.
Verify the Detector After Every Update
Once the firmware installation is complete, check that the detector, headphones, coil, and accessories communicate correctly before using the detector in the field.
Best Practice: Treat every major XP firmware update as a complete system update. Check all components, verify their compatibility, and perform a short functional test before your next detecting session.
Frequently Asked Questions About XP Firmware Updates
What is the latest XP DEUS II firmware version?
The latest available firmware version can change whenever XP releases a new update. Always check the official XP Metal Detectors update page before starting the process to confirm the current version.
How do I update my XP DEUS II?
Open the official XP updater, put the DEUS II Remote Control into update mode, connect it using the correct USB data cable, select the firmware version, and follow the on-screen instructions until the update is complete.
Do I need to update my XP headphones too?
Yes, when XP requires matching or compatible firmware versions, the wireless headphones should be updated as well. This is especially important with components such as WS6, WSA II, and WSA II XL.
How do I update XP WS6 headphones?
Enter the WS6 update mode from the configuration menu, connect the WS6 to the computer using the correct USB data cable, select WS6 in the official XP updater, and follow the installation instructions.
How do I update WSA II or WSA II XL headphones?
Open the WSA II updater option, place the headphones into update mode by holding the required buttons, connect them using the correct single USB data cable, and follow the updater instructions.
Can I update an XP detector without a computer?
This depends on the detector and the update method currently provided by XP. For firmware procedures that require the official online updater or USB connection, a compatible computer is required.
Why does my WS6 not connect after an update?
The most common cause is incompatible firmware between the WS6 and the DEUS II Remote Control. Check both versions and update the component that is running an incompatible version.
Will an XP firmware update erase my custom programs?
Some updates may reset or change stored settings. It is a good idea to write down your custom programs and important settings before updating.
Can I install an older XP firmware version?
Older firmware availability depends on what XP currently provides through its official updater. If an older version appears in the firmware selection menu, it may be available for installation.
What should I do if the XP updater does not detect my detector?
Check the USB data cable, try another USB port, restart the updater, confirm that the device is in update mode, and make sure you are using the correct official updater.
Is XP firmware free?
Yes. Official XP firmware updates are provided by XP Metal Detectors for supported devices and accessories.
How long does an XP firmware update take?
The exact time depends on the device, firmware version, internet connection, and computer. The most important point is to leave the device connected until the updater confirms that the process is complete.
Should the Remote Control and headphones use the same firmware?
When XP specifies matching firmware versions, yes. Using incompatible versions can prevent the Remote Control and wireless headphones from communicating correctly.
Is it safe to interrupt an XP firmware update?
No. Do not disconnect the USB cable, shut down the computer, or close the updater while firmware is being installed. Wait until the updater confirms completion.
Official XP Update Resources
For firmware update XP metal detectors , always use the official XP Metal Detectors website and the update tool intended for your exact detector or accessory.
Recommended official resources include:
- XP Metal Detectors Updates Page
- XP DEUS II Updater
- XP ICON / ICON X Updater
- XP DEUS Updater
- Official XP User Manuals
- Official XP Firmware Release Notes
how to update XP metal detectors Before installing any firmware, check the official XP update page for the latest instructions, supported devices, compatibility notes, and available firmware versions.
Important: Avoid downloading firmware files from unofficial websites, forums, or file-sharing services. Using the official XP updater is the safest way to keep your detector and accessories compatible.
Conclusion
Updating your XP metal detector is an important part of keeping the system compatible with the latest firmware improvements, accessories, and performance updates released by XP Metal Detectors.
Whether you use XP DEUS II, XP ICON, ICON X, the original XP DEUS, WS6, WSA II, or other compatible XP accessories, the safest approach is always the same: use the official XP updater, follow the instructions carefully, use the correct USB data cable, and never interrupt the firmware installation.
After every update, check the firmware version, reconnect your wireless components, verify coil communication, restore any custom settings if necessary, and perform a short detection test before returning to normal use.
Because XP continues to release new firmware versions, this guide should be checked and update XP metal detectors whenever a new version becomes available.
xp gold price
XP Product
-
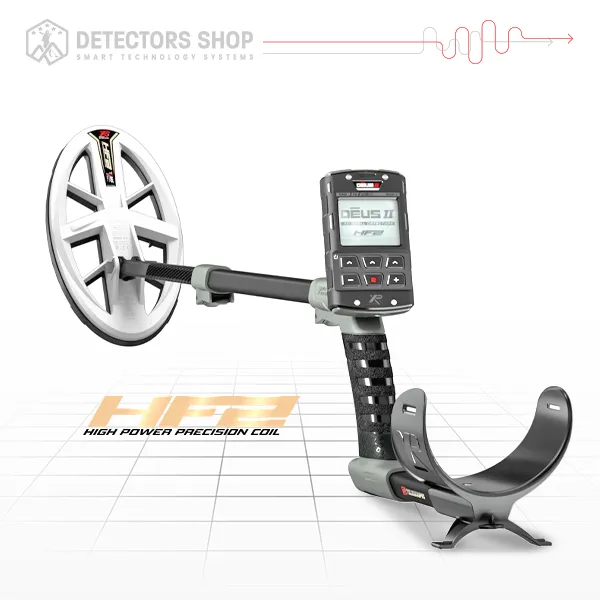
DEUS II HF2 GOLD
ر.س 6,743 -

DEUS II WS6
ر.س 8,000 -
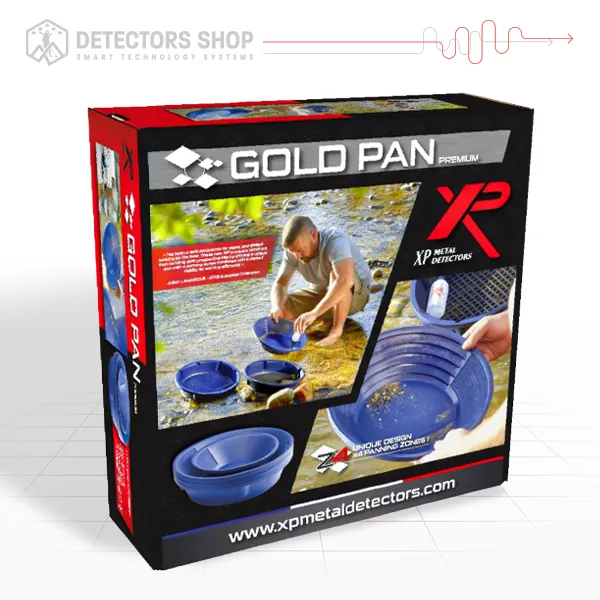
GOLD PAN PREMIUM
ر.س 618 -
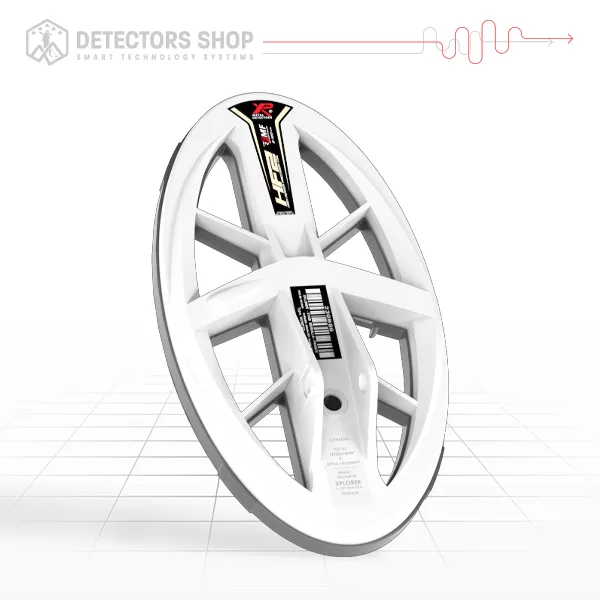
HF2 Search Coil
ر.س 1,498 -
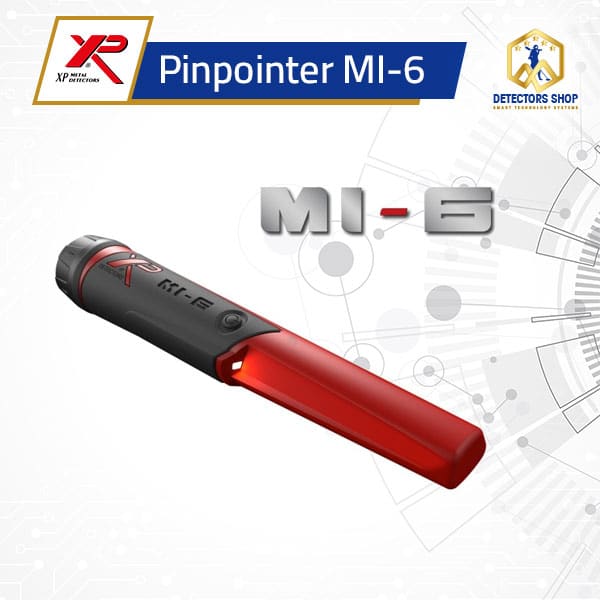
Pinpointer MI-6
ر.س 937 -
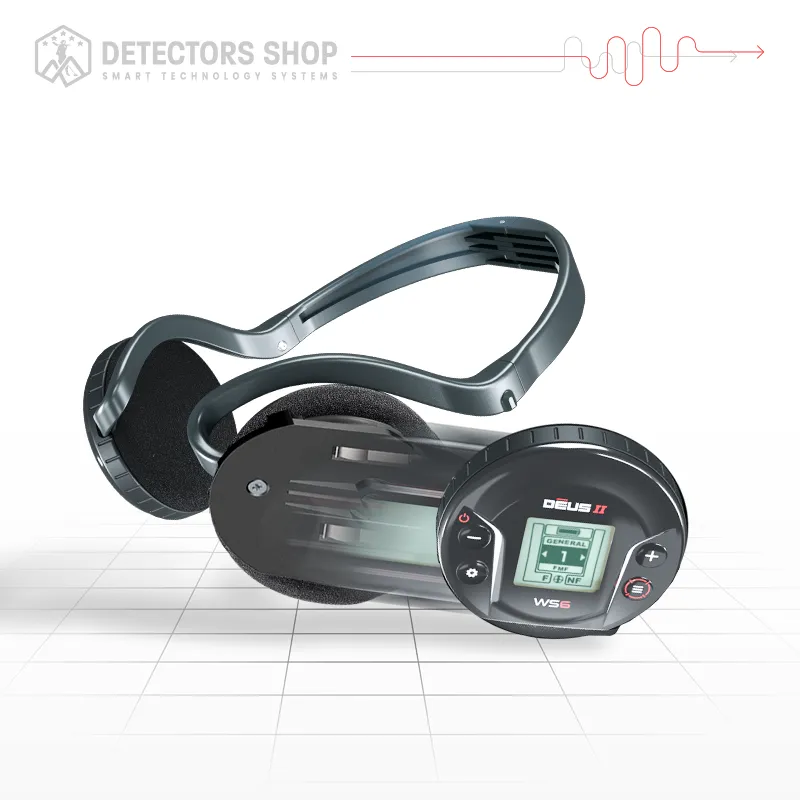
WS6 Headphones
ر.س 1,498
